Step by step how to guide for AWD conversion, Daihatsu Sirion M1xx
There is no guide for this conversion that I know of, maybe there is something hidden in the Japanese dark net but otherwise I haven’t found anything. All google searches will bring you to this or my build thread.
I hope this guide is informative and entertaining at the same time. My hopes are it will encourage others to also have a go.
FORWORD
This is a fairly straight forward conversion but at the same time it’s quite a lot of work and should only be attempted by people who are insane/mentally ill and have ample fabrication, welding and mechanical experience.
I would like to thank @Mr_Gormsby providing as much support as he has, answering a ridiculous amount of stupid questions and always being there to bounce ideas off of.
I would also like to thank @FrAsErTaG and @evilhighway for providing an epic platform to allow myself and others to document our builds, ask questions, find answers, and connect all of us dai-hard fans.
Also a big thankyou to the rest of the L2D community for providing support and contributing to the epic awesomeness that is Live 2 Dai.
I would like to dedicate this article and my build to my best friend Jacob “B-Town” Brown, he was an absolute legend who shared my interest in cars and bikes but tragically passed away in a motorcycle accident in August 2015, and to my father Ian “Wilko” Wilkinson who is fighting a losing battle to dementia, he was somewhat of a racing legend back in the day, sponsored by Jeep Australia and raced in events such as the Fink Desert Race, the Ettamogah Pub Rally, and the Great Endeavour Rally. He won many events and has a wall full of trophies, he is my hero.
CHAPTER ONE: SEARCHING THE GLOBE FOR THE LOST DRAGON BALLS
For this conversion you will need many parts from an AWD Sirion. Parts can be sourced from the following counties/continents; Japan, Europe, United Kingdom, and possibly America.
The best thing to do would be to find a complete car or a rear cut, then you will have almost everything you will need. An experienced fabricator could possibly make a lot of the parts that are needed.
The list of everything you will need is as follows;
-Gearbox with transfer box and right side half shaft (you could use a standard gearbox and just bolt up the transfer box but you will need to make sure you have the correct diff ratio and check to see if your diff centre has the key/dog teeth to drive the transfer)
-Shift linkages (could be fabricated)
-Tail shaft
-Handbrake cables (2WD cables could possibly be adapted to fit)
-Complete rear diff with trailing arms and panhard bar
-Fuel tank with filler neck
-Trailing arm mounts (could be fabricated)
-Panhard bar mount (could be fabricated)
-Rear springs
-Rear shocks
-Rear left fuel tank mount (could be fabricated)
-Rear ABS sensors (2WD sensors could possibly be adapted to fit)
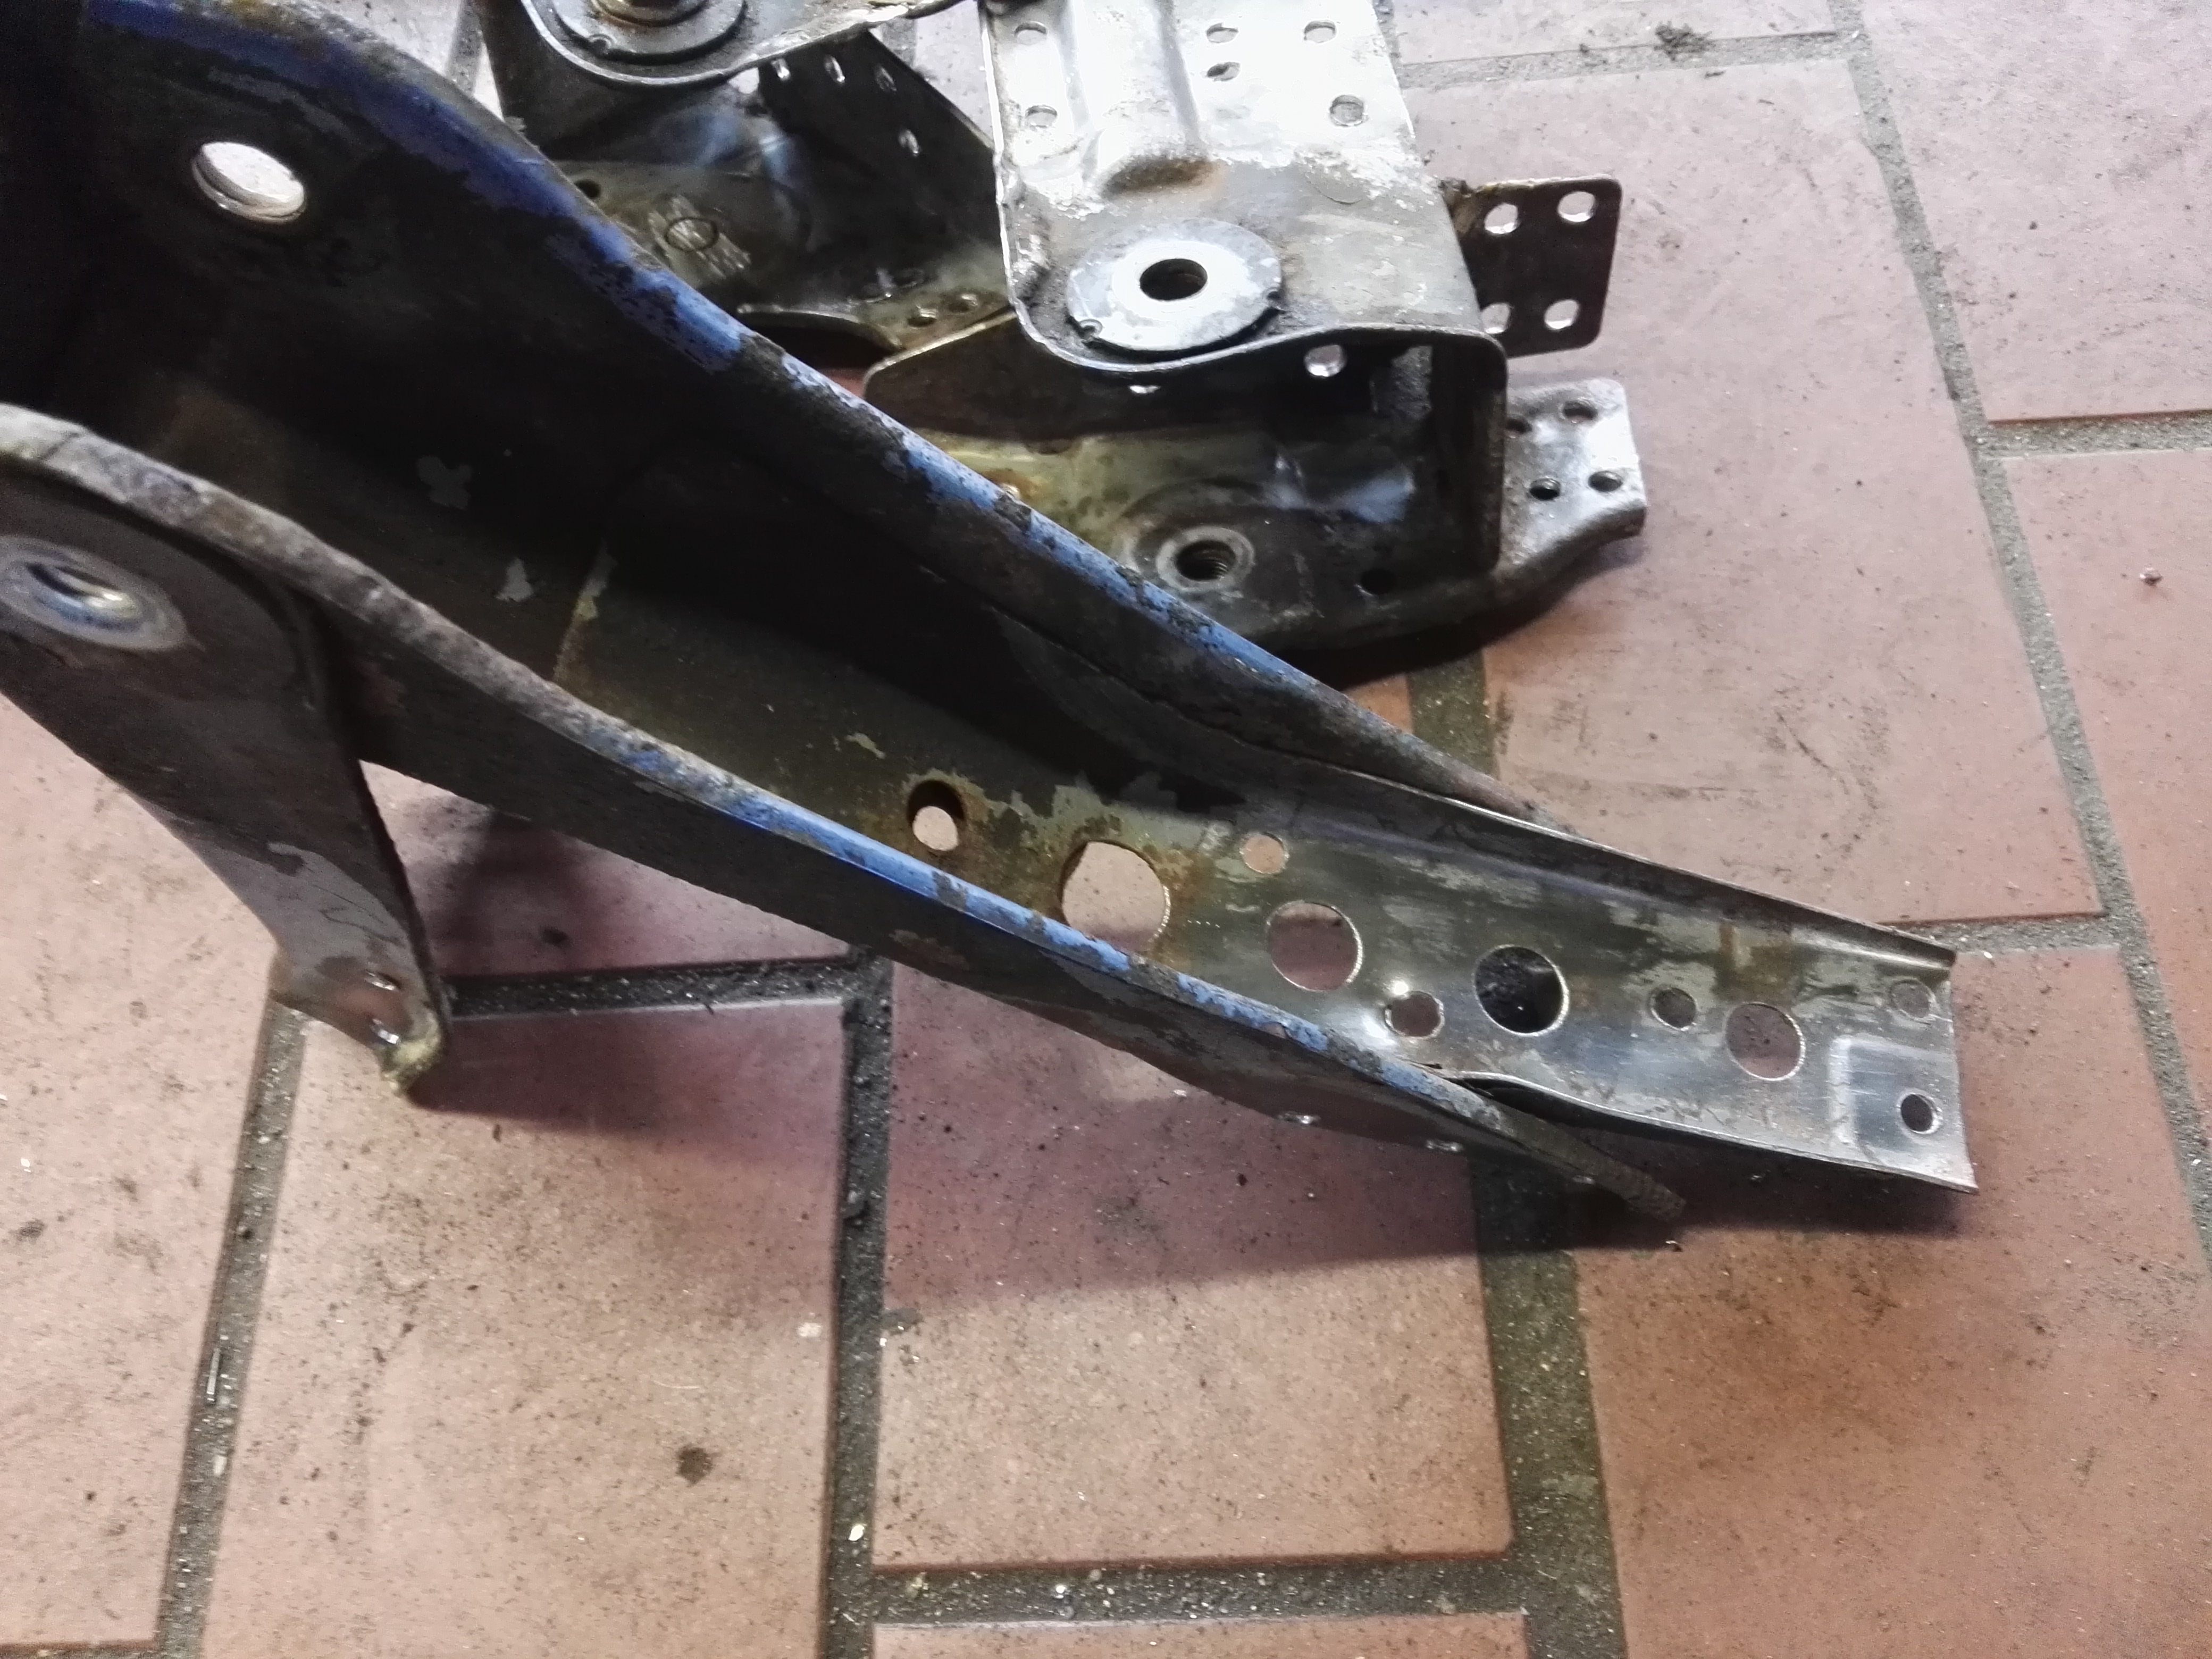
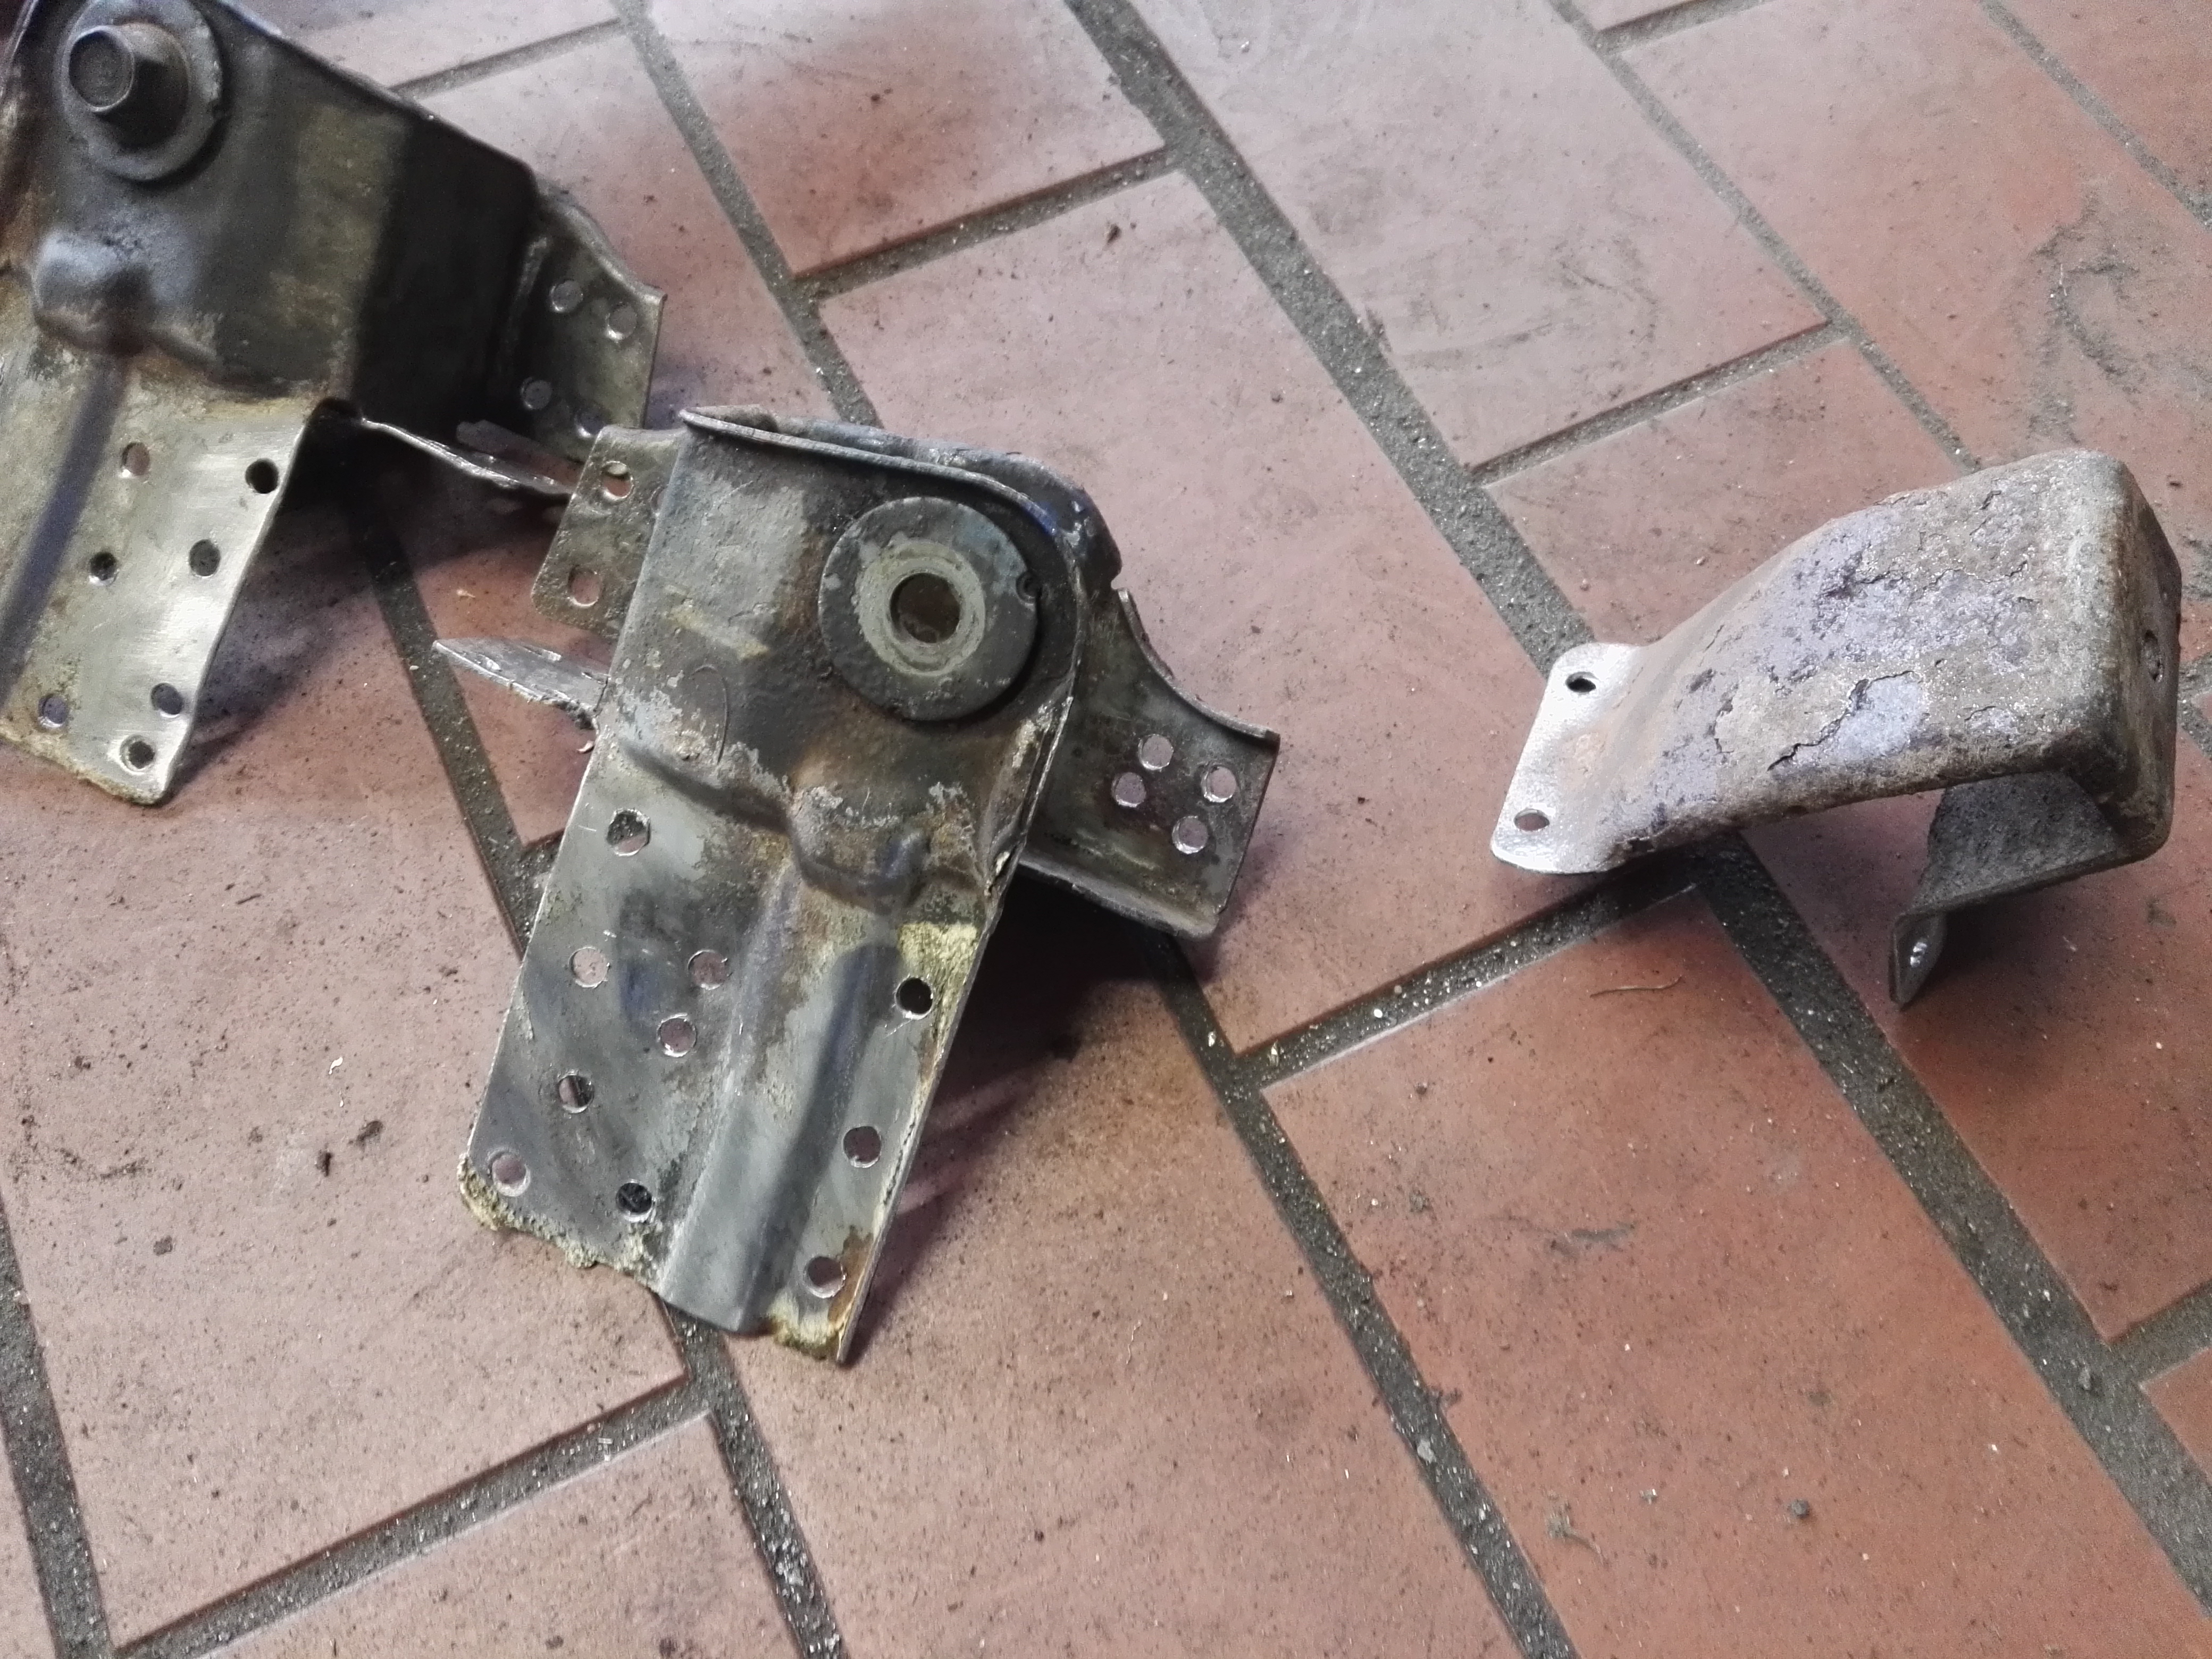
Here are a few photos of some of the parts


![Old and New Rear Shock Absorbers[1]](https://www.livetodai.com/uploads/default/original/2X/a/a0e19dac461e302ce0bd917da252bd62f6b3bb55.jpg)

CHAPTER TWO: HOW TO DISCECT YOU FROG
If you have a complete car or a rear cut you will need to remove all the needed parts and the mounts.
If you are expecting to read how to remove the parts then you are not ready to do this conversion.
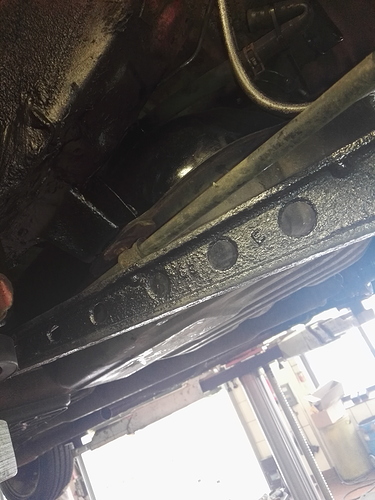
As for the mounts here are some photos showing where all the spot welds are that you will need to drill out. This will take a long time and it’s a bitch. I recommend you have a good drill and some good quality drill bits, I used a 7mm or 8mm drill bit (I think lol can’t remember). It’s a good idea to take some measurements beforehand, I will provide measurements in the next section but you should also take your own.


CHAPTER THREE: PREPARATION AND INSTALLATION
The 2WD Sirion will already have a lot of the holes ect. there for the AWD stuff, you will just have to weld in some nuts or install some rivnuts in various locations to be able to bolt everything up.
I will start at the front of the car and work back, it’s not the order I did everything in but it makes it easier in a how to guide I guess.
So first you will need to fit the gearbox/transfer/halfshafts. Sorry no photos or details here, if you can’t do it then you definitely should not be attempting this conversion.
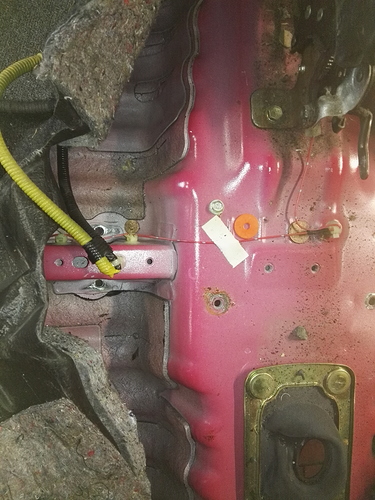
Next you will need to remove the front seats and lift the carpet. You will see a support brace running through the tunnel and you will see where there should be 2 holes on each side. It’s clearly marked from the factory. You need to drill here with an 8.5mm drill bit. These holes are for the centre bearing for the tailshaft. You can use nuts and bolts or you can weld some nuts or bolts in these holes. I welded in some M8x35 bolts with 10.9 rating.
Next you will need to remove everything from the rear end. Axle, fuel tank, exhaust ect.
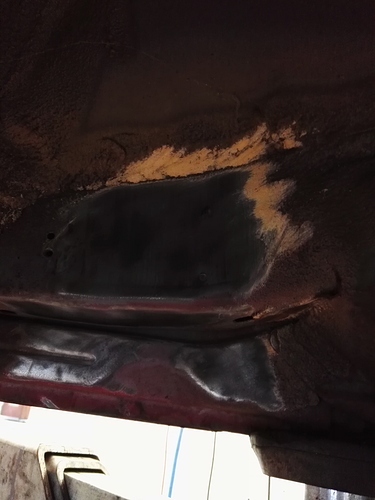
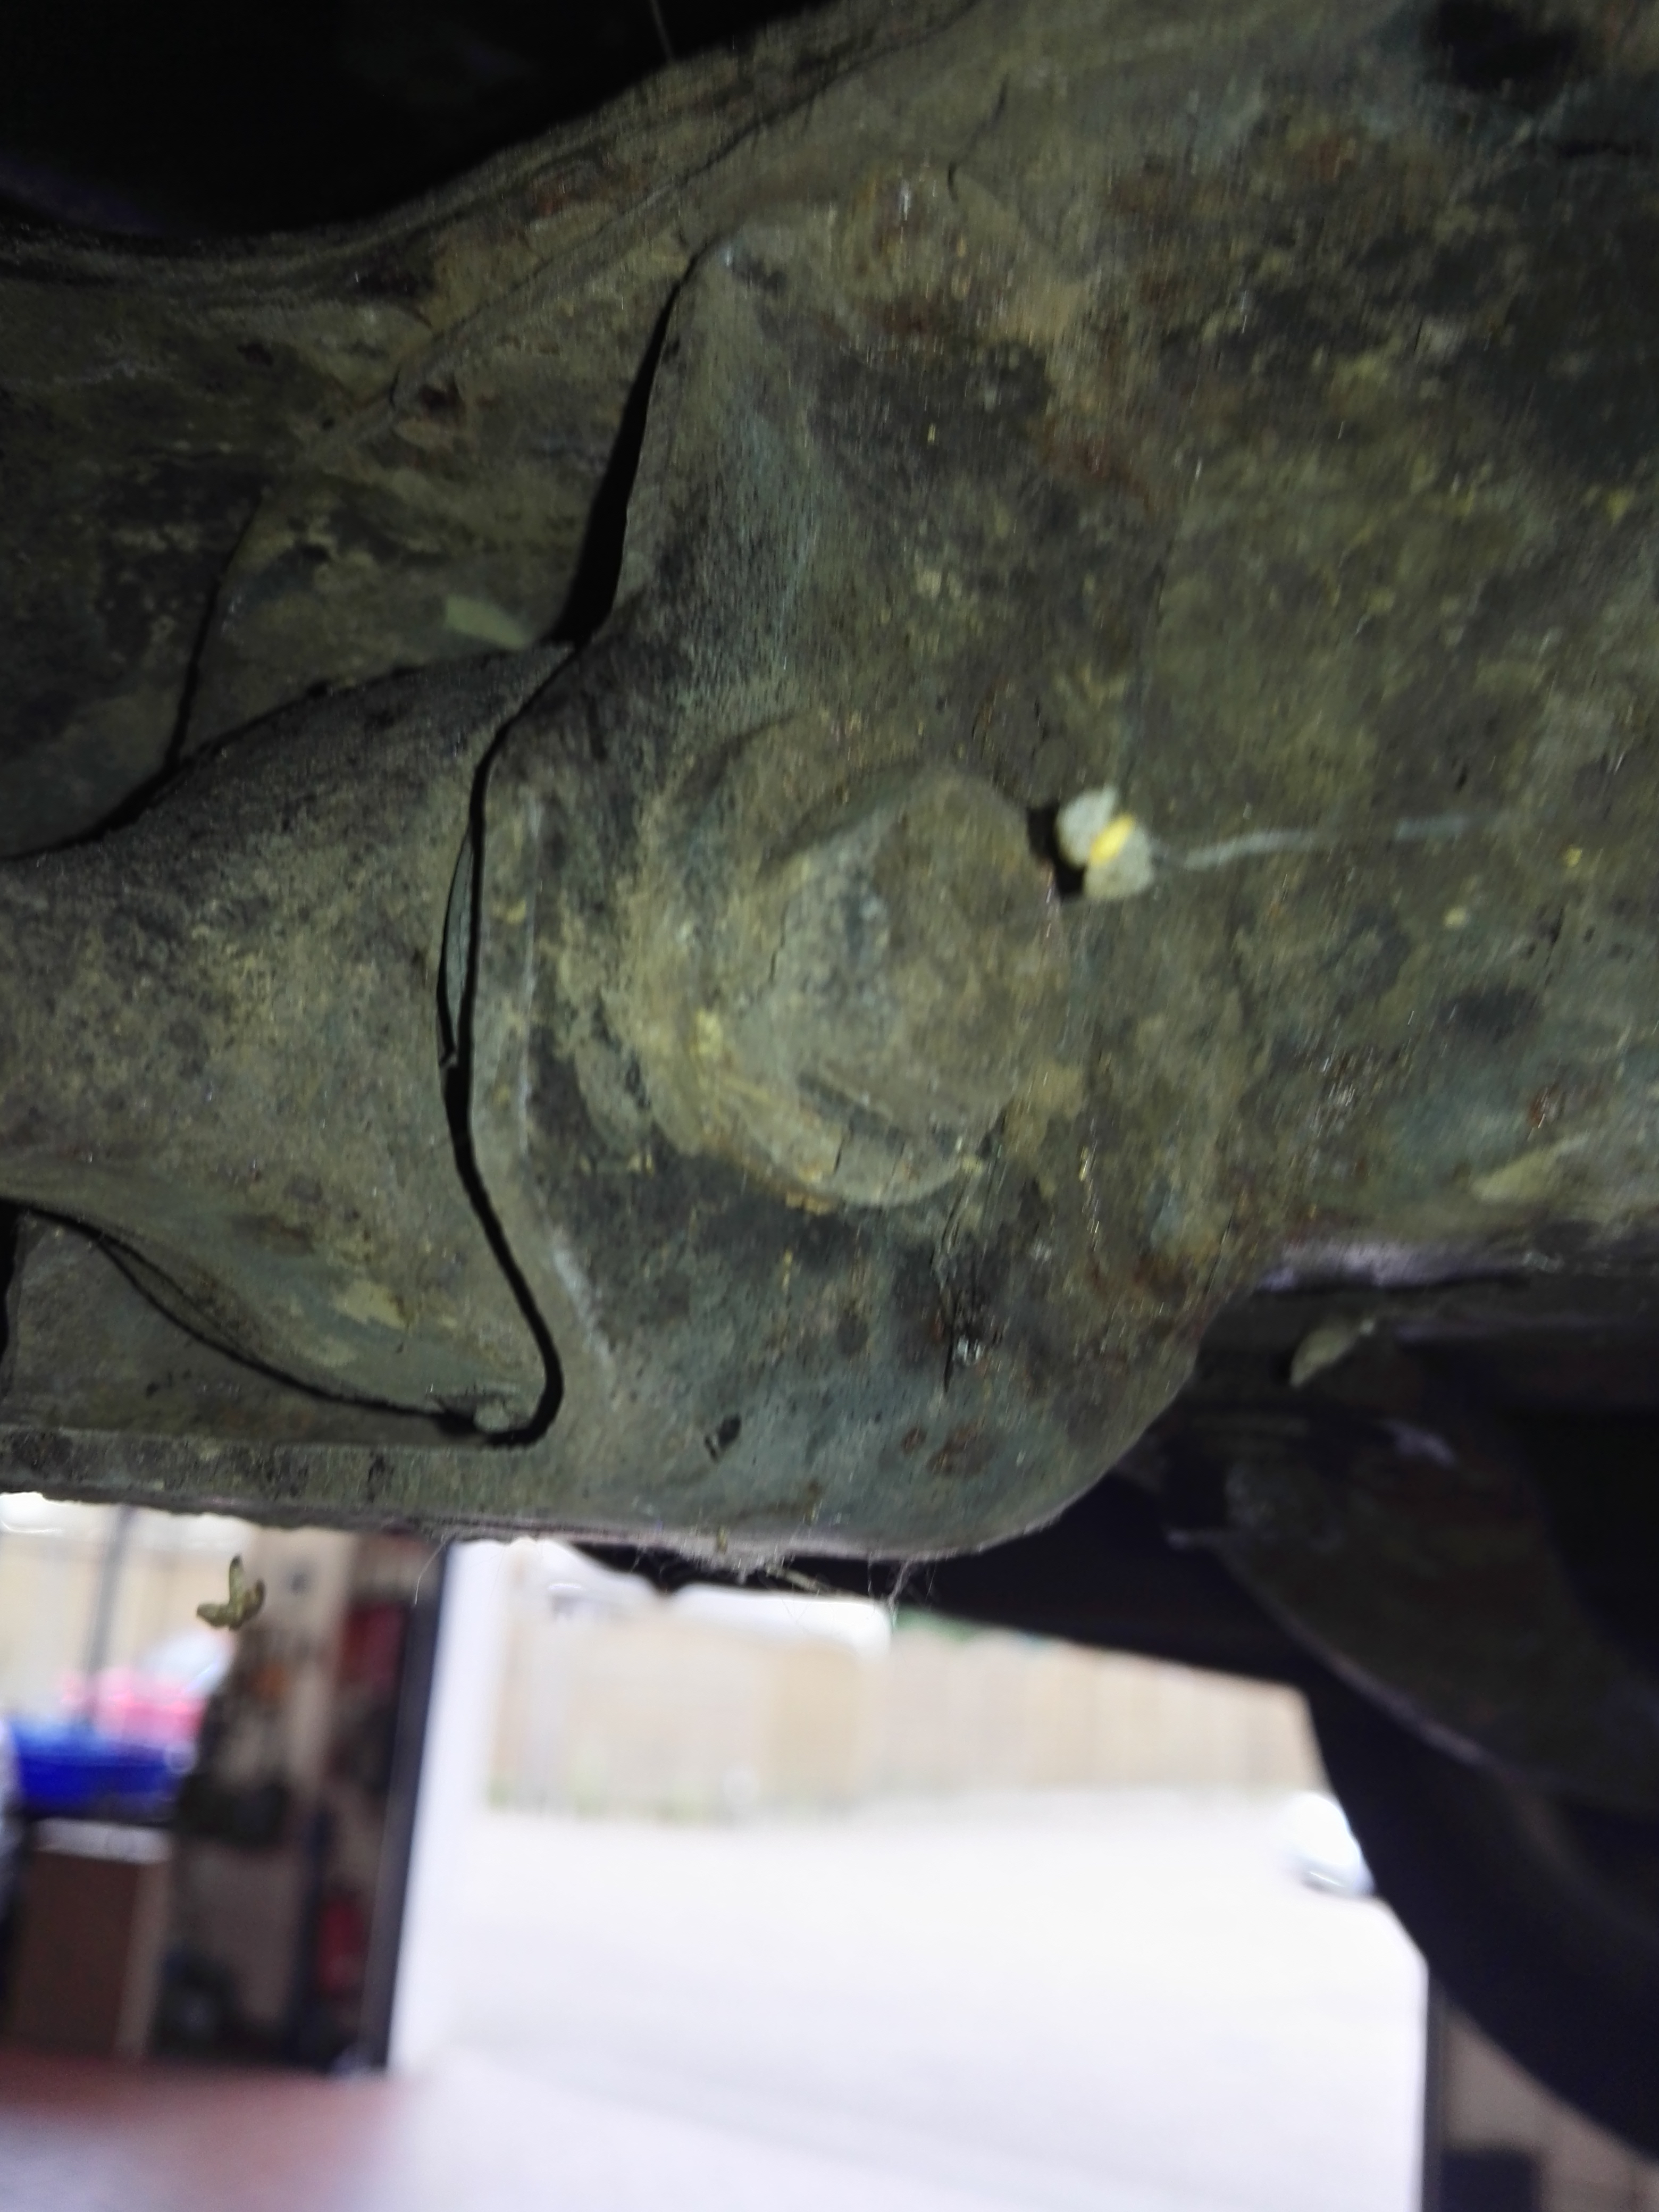
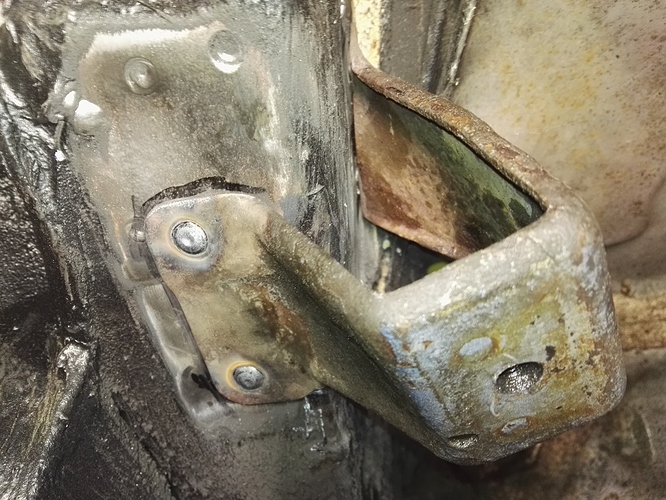
You will need to clean the areas where the trailing arm mounts and panhard mound need to be welded like this.
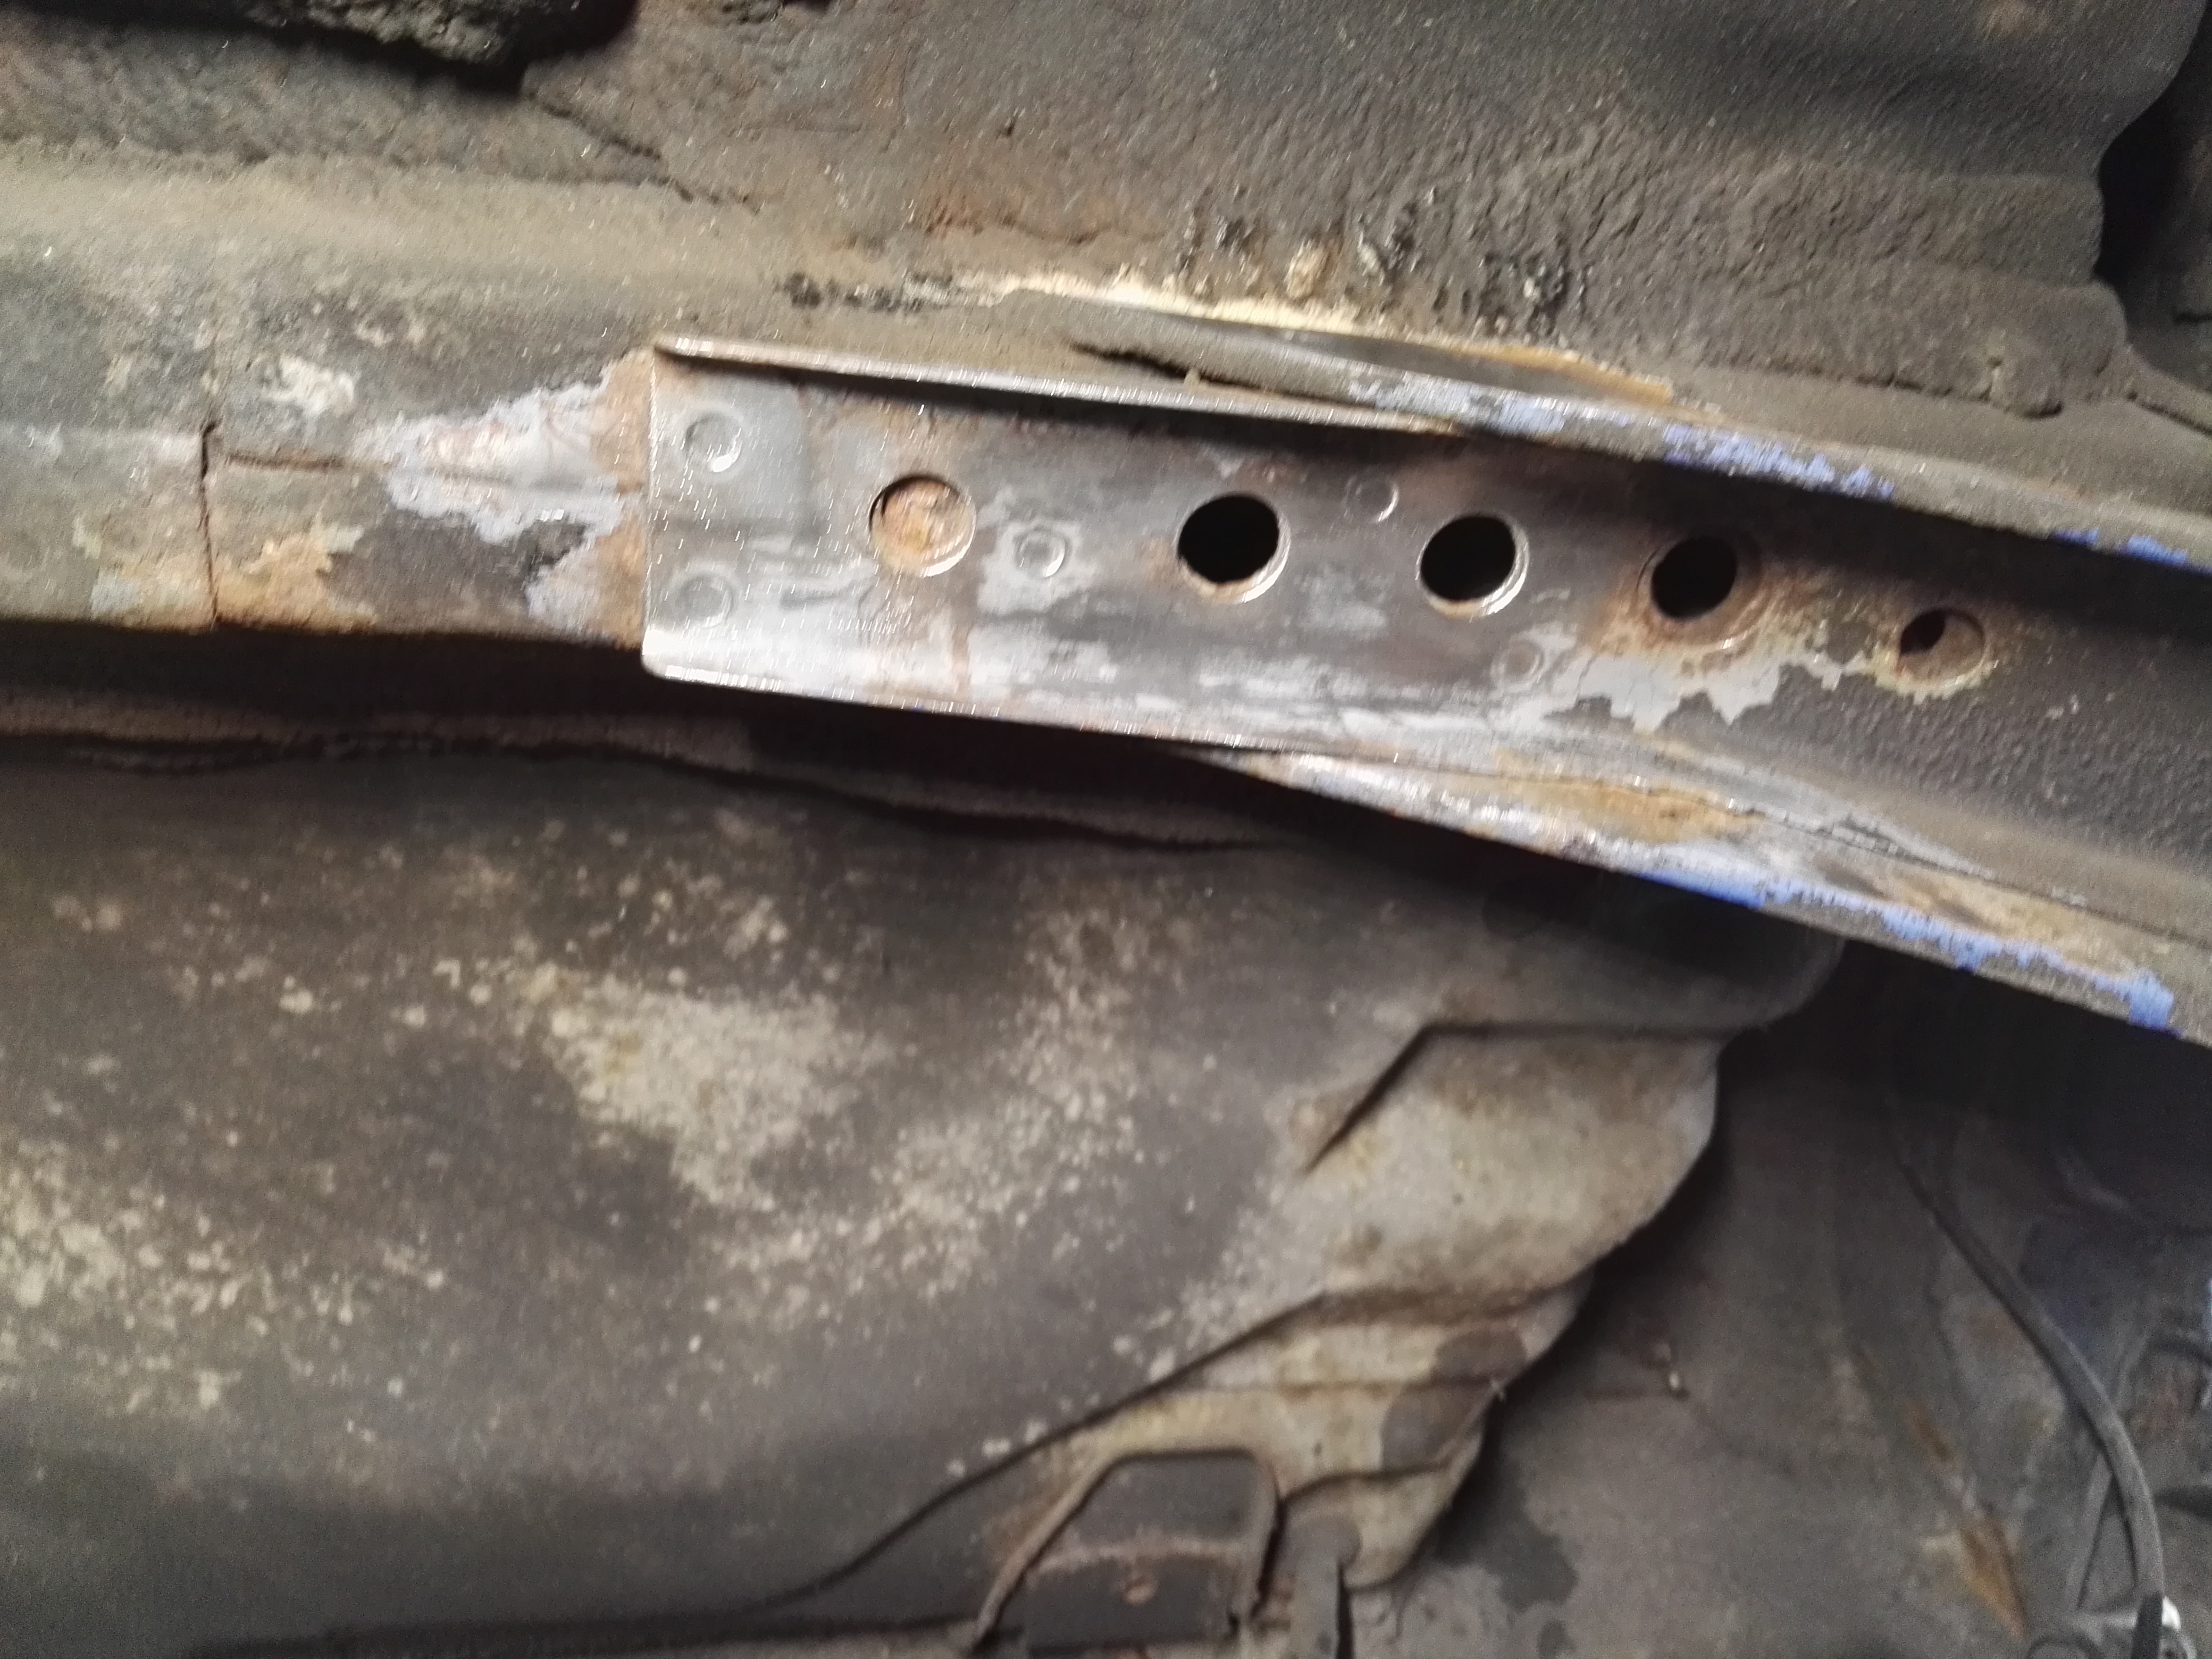
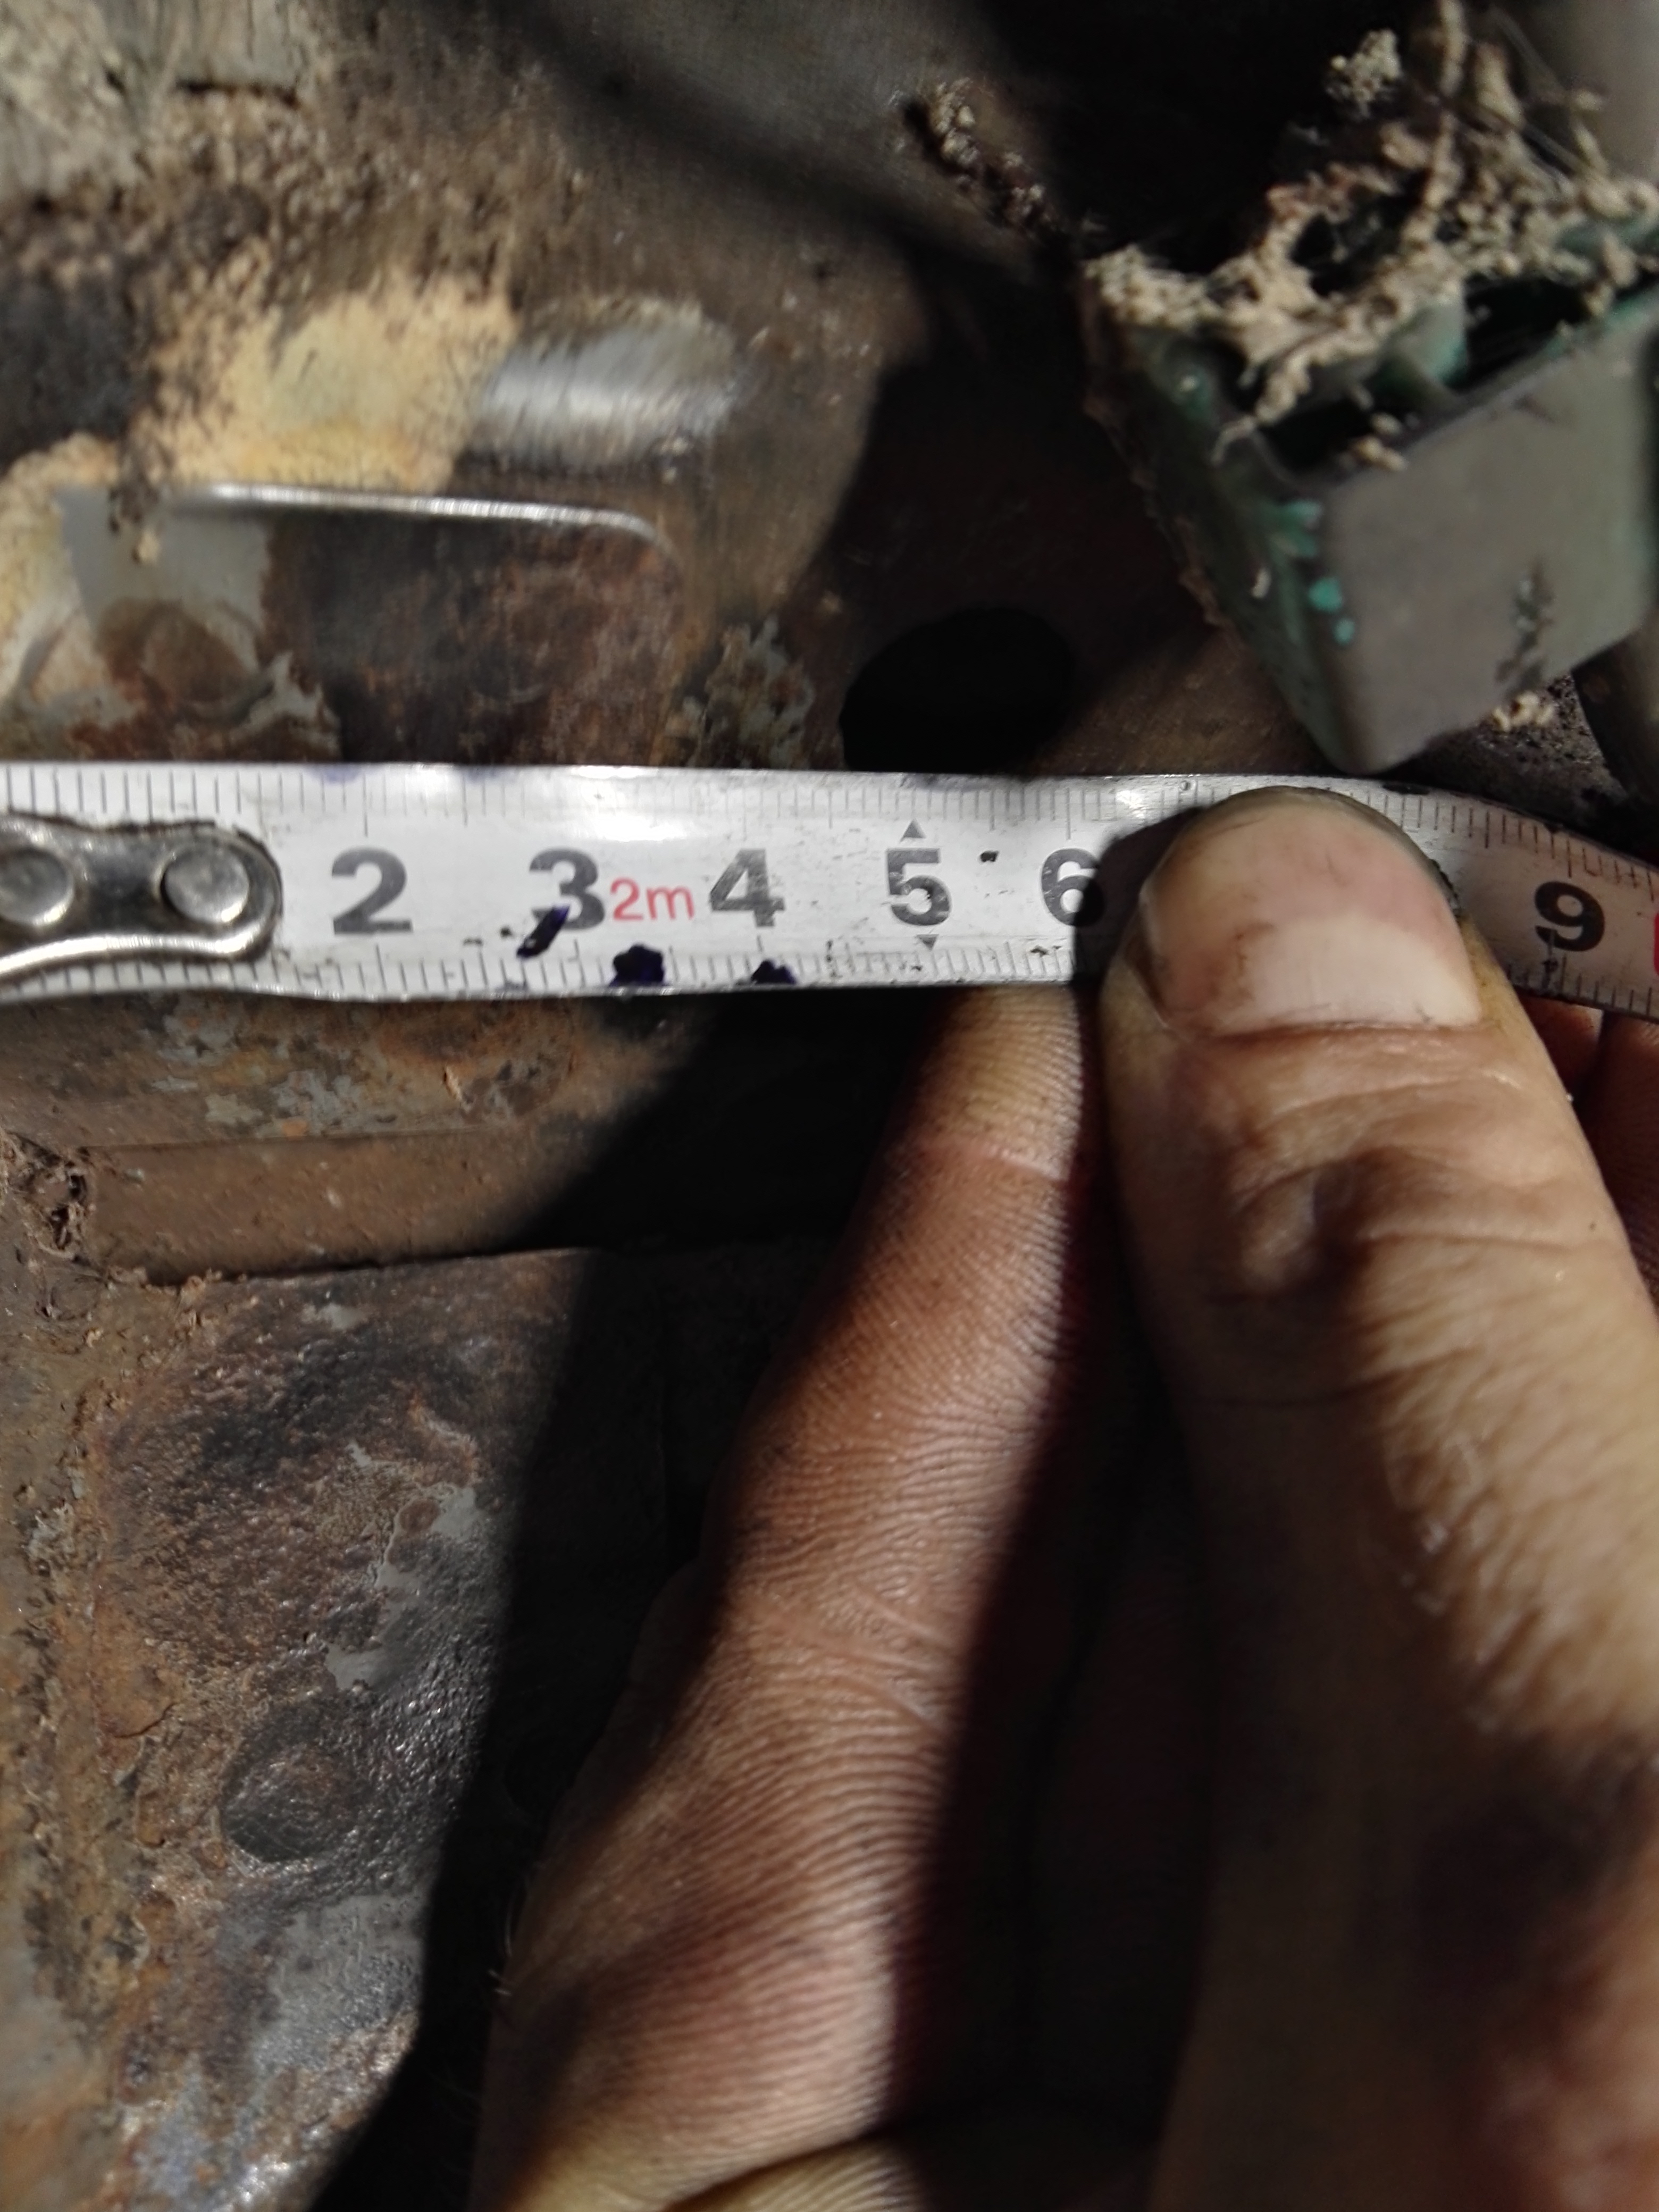
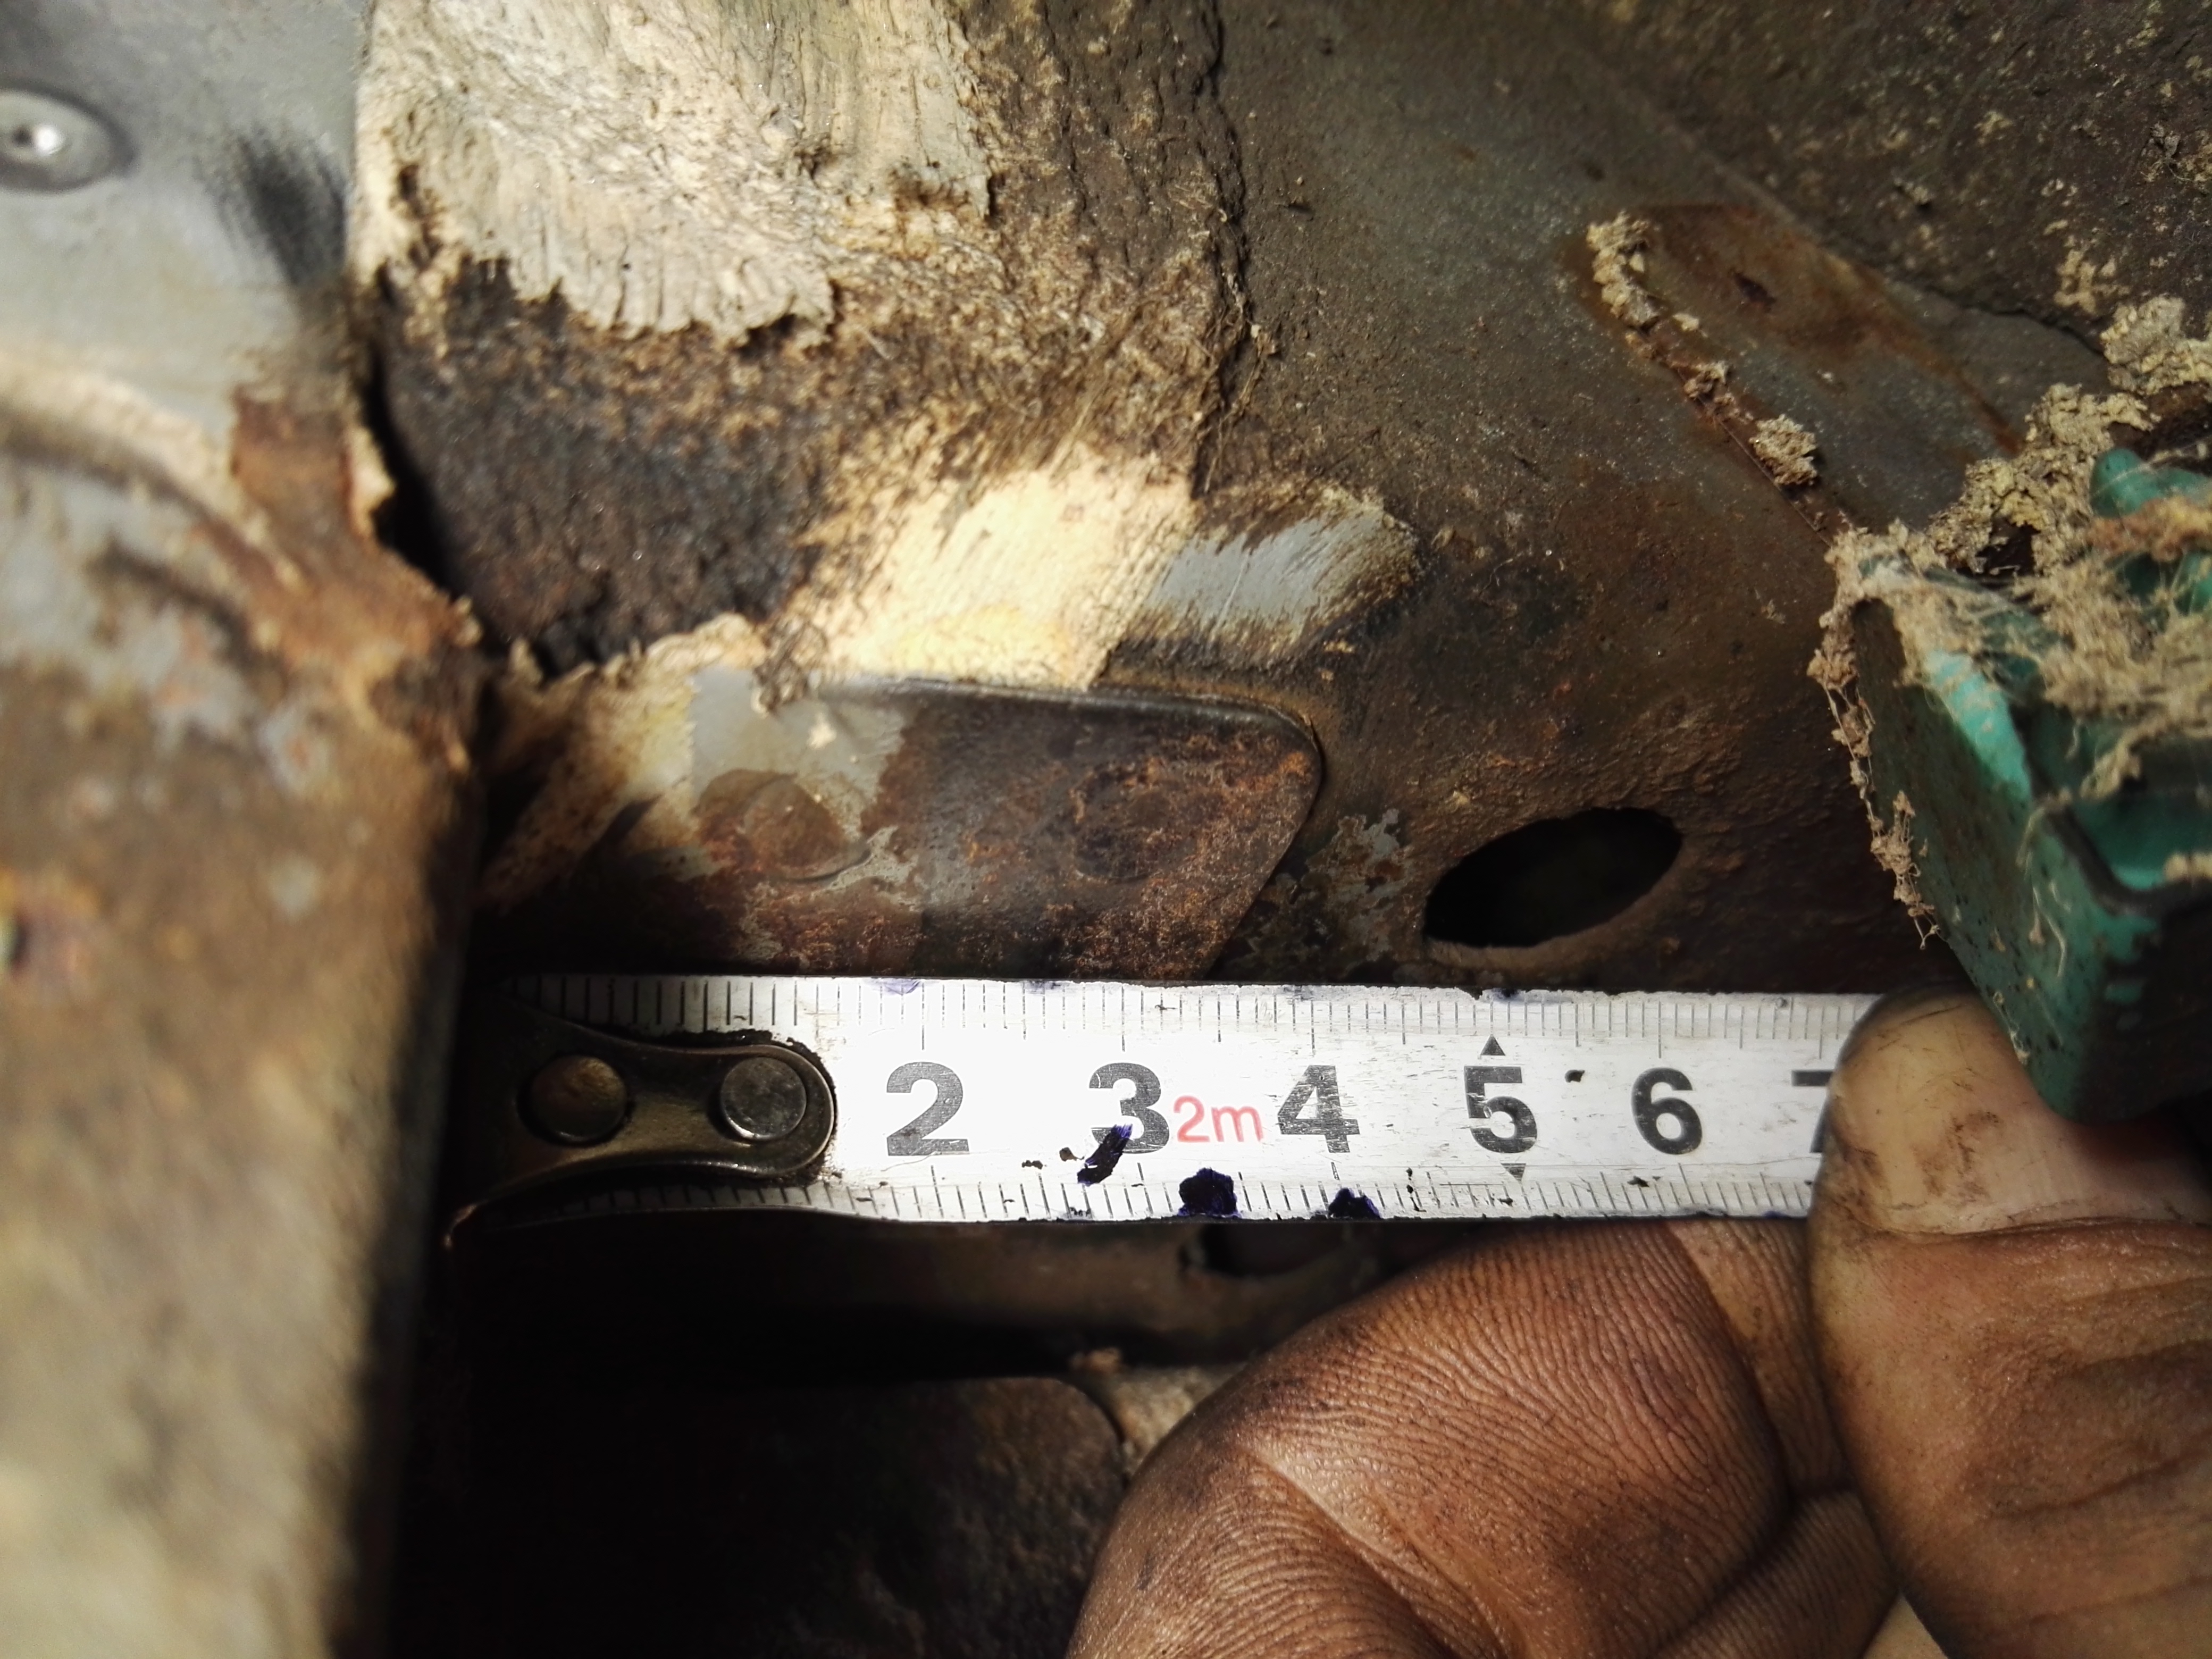
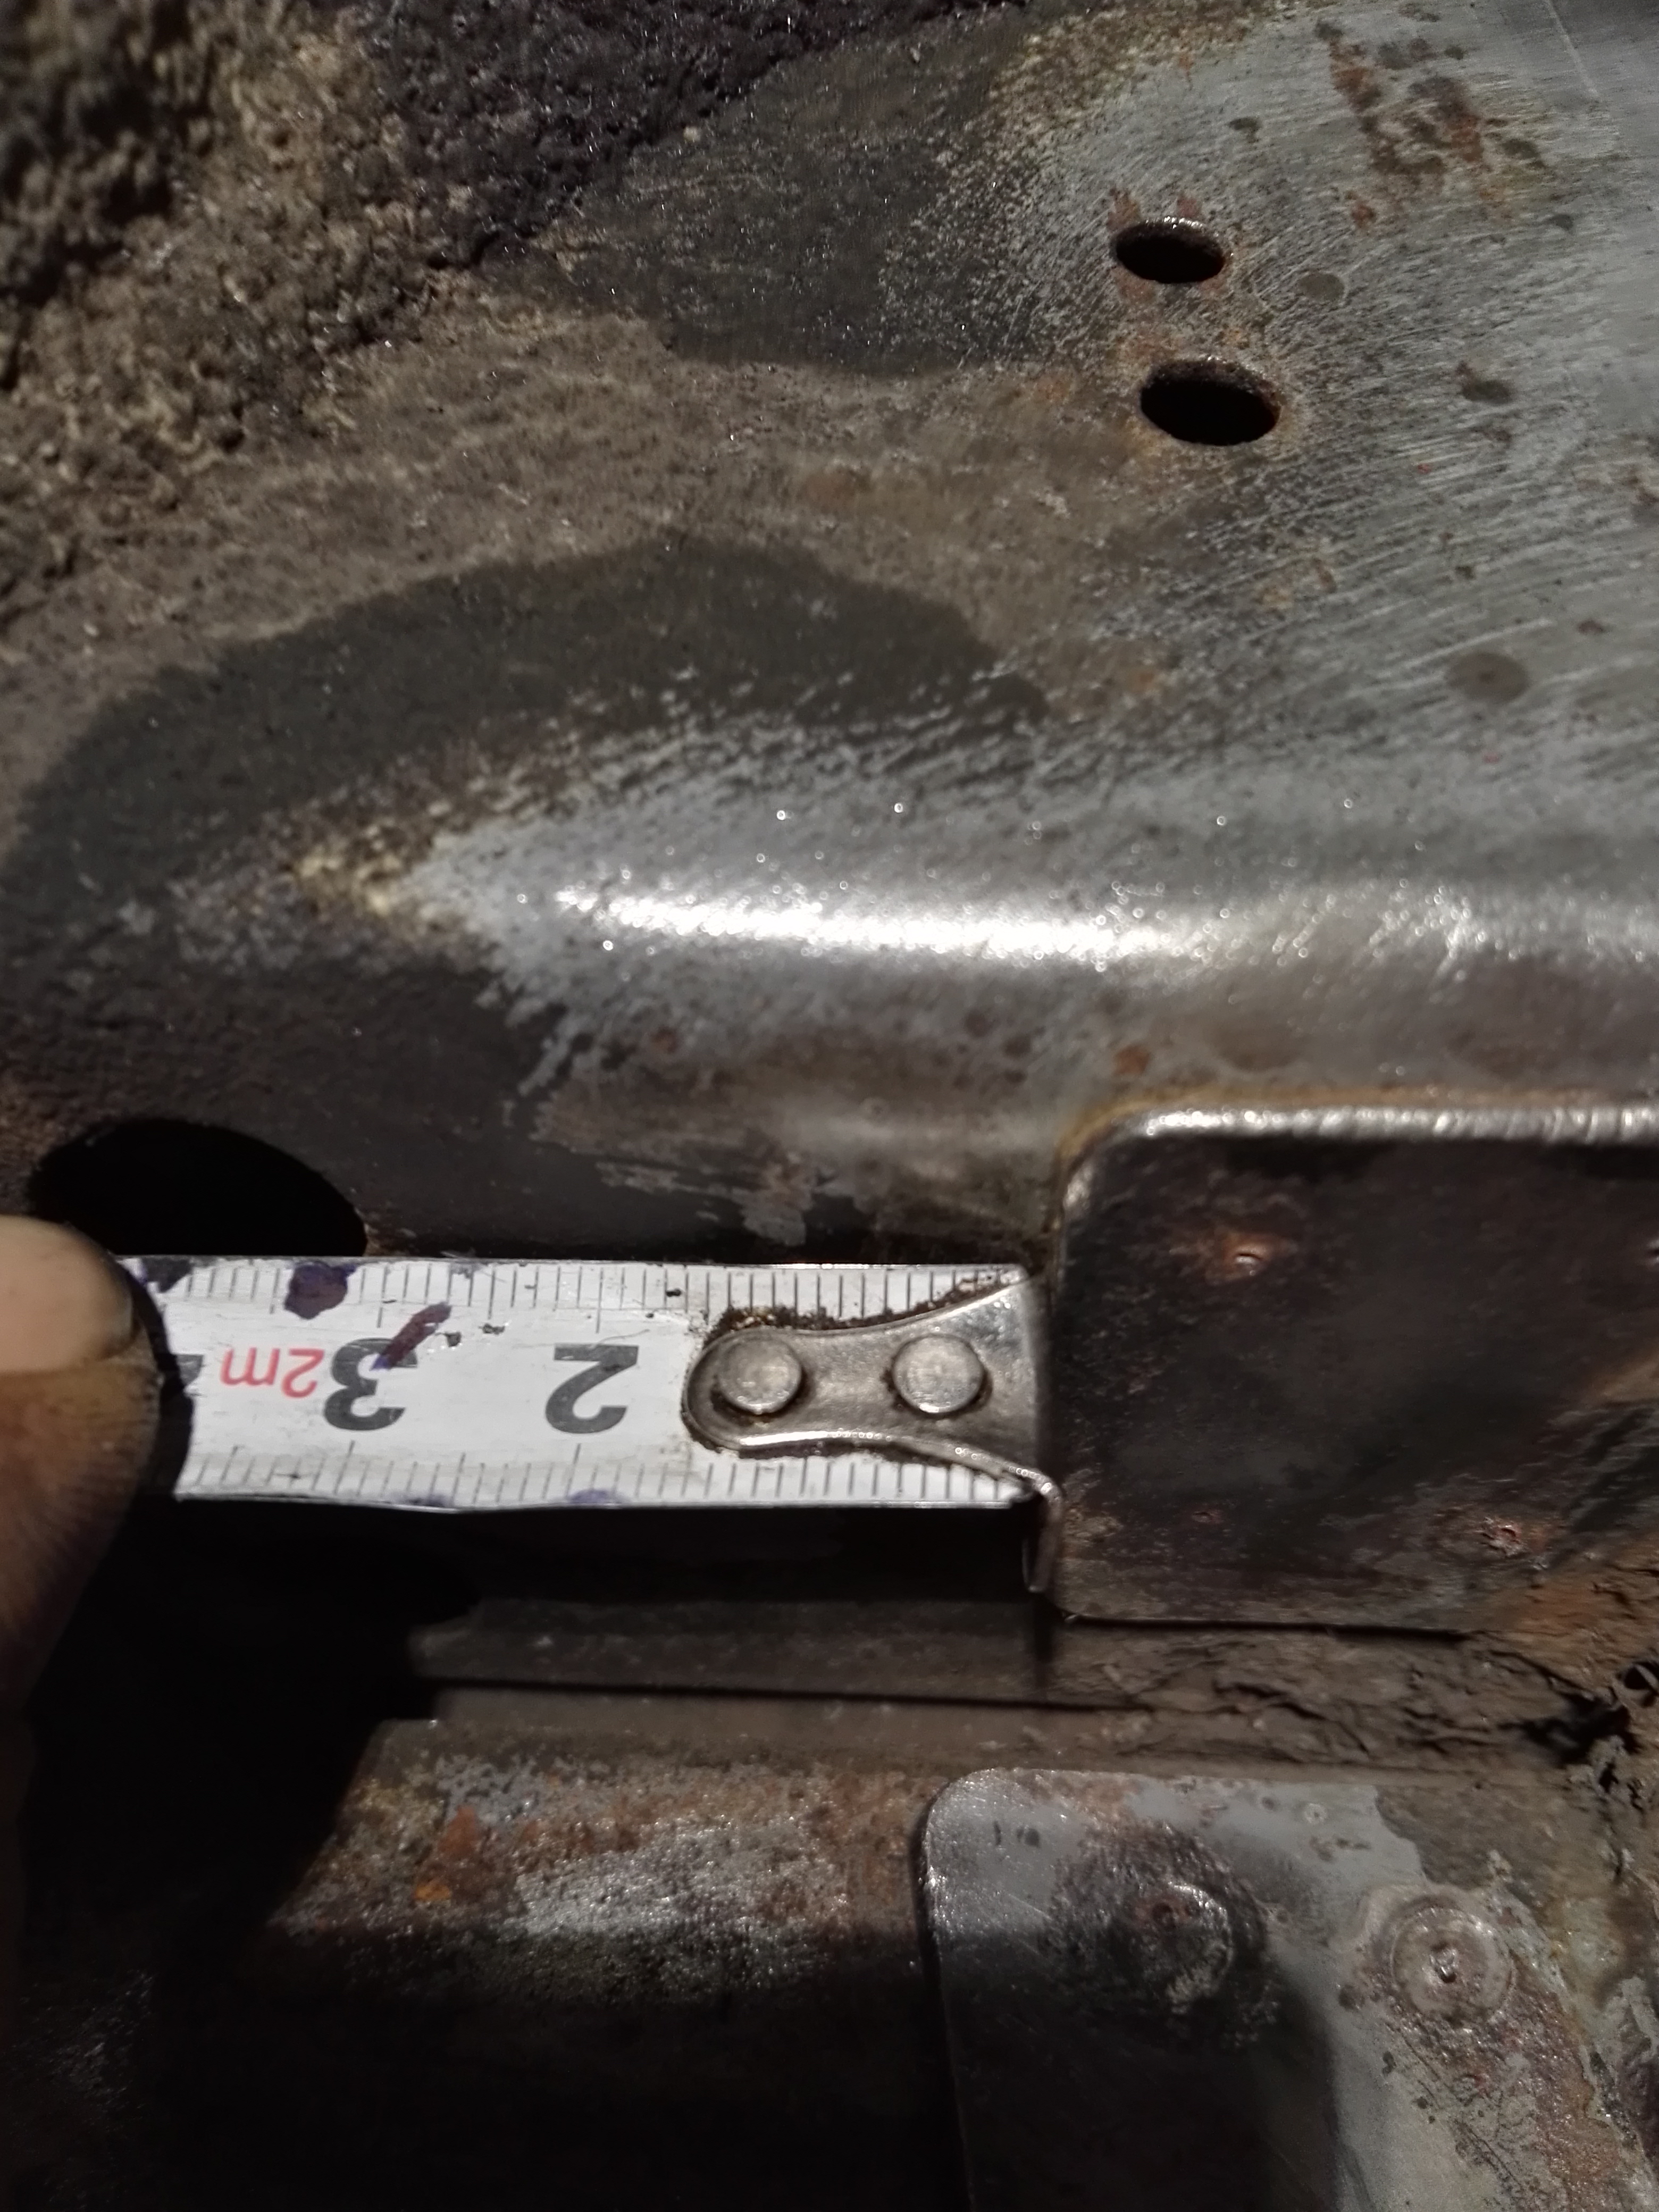
The measurments for placement of the trailing arm mounts are as follows;
From the outside holes in the rear support beam

to the captive nut on the trailing arm mounts is 80cm straight and 103cm diagonal.
From the front control arm mounts on the K-Frame
to the captive nut on the trail arm mounts is 174cm straight and 197cm diagonal.
Please note that these numbers serve as a guide only, there will be minor variations in vehicle construction, body flex from sitting on the hoist or jack stands, and from normal driving. You will need to use your head and work it out. The most important thing is that both sides are the same and square with the front. If you fuck it up you will be driving down the road like a crab, so please double check everything before welding.
Here are some photos with measurements to other points on the body for reference only.

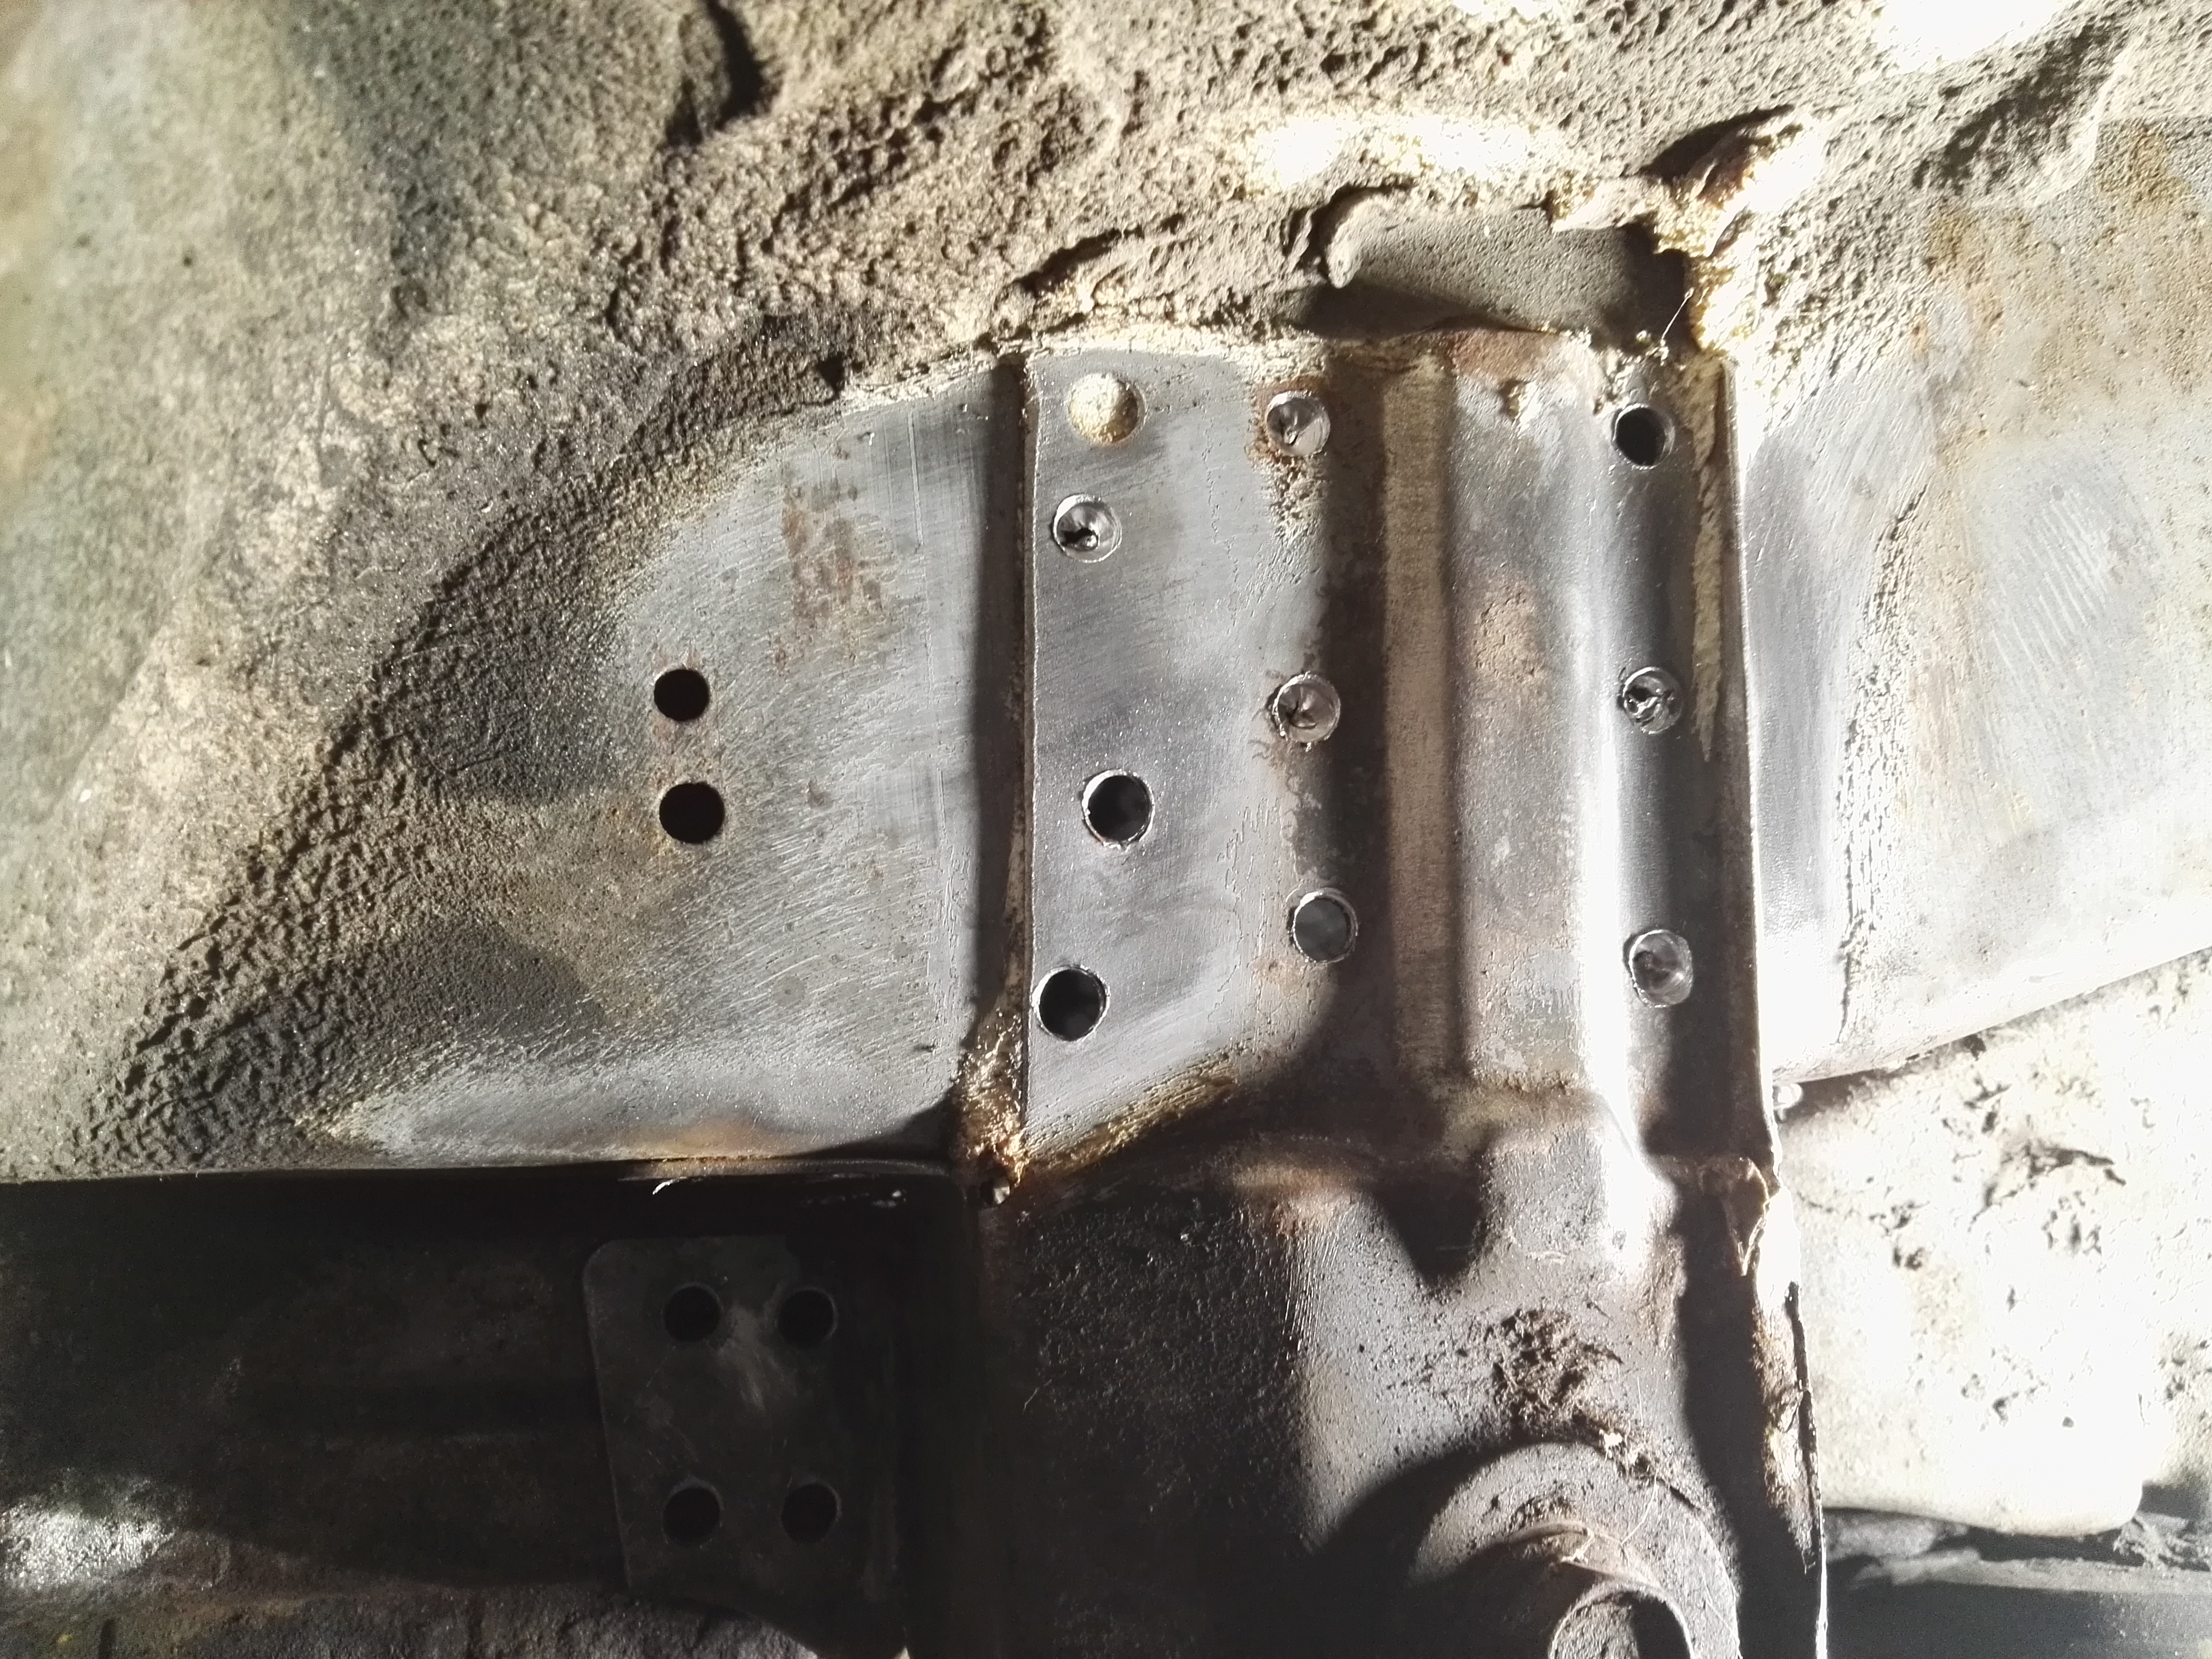
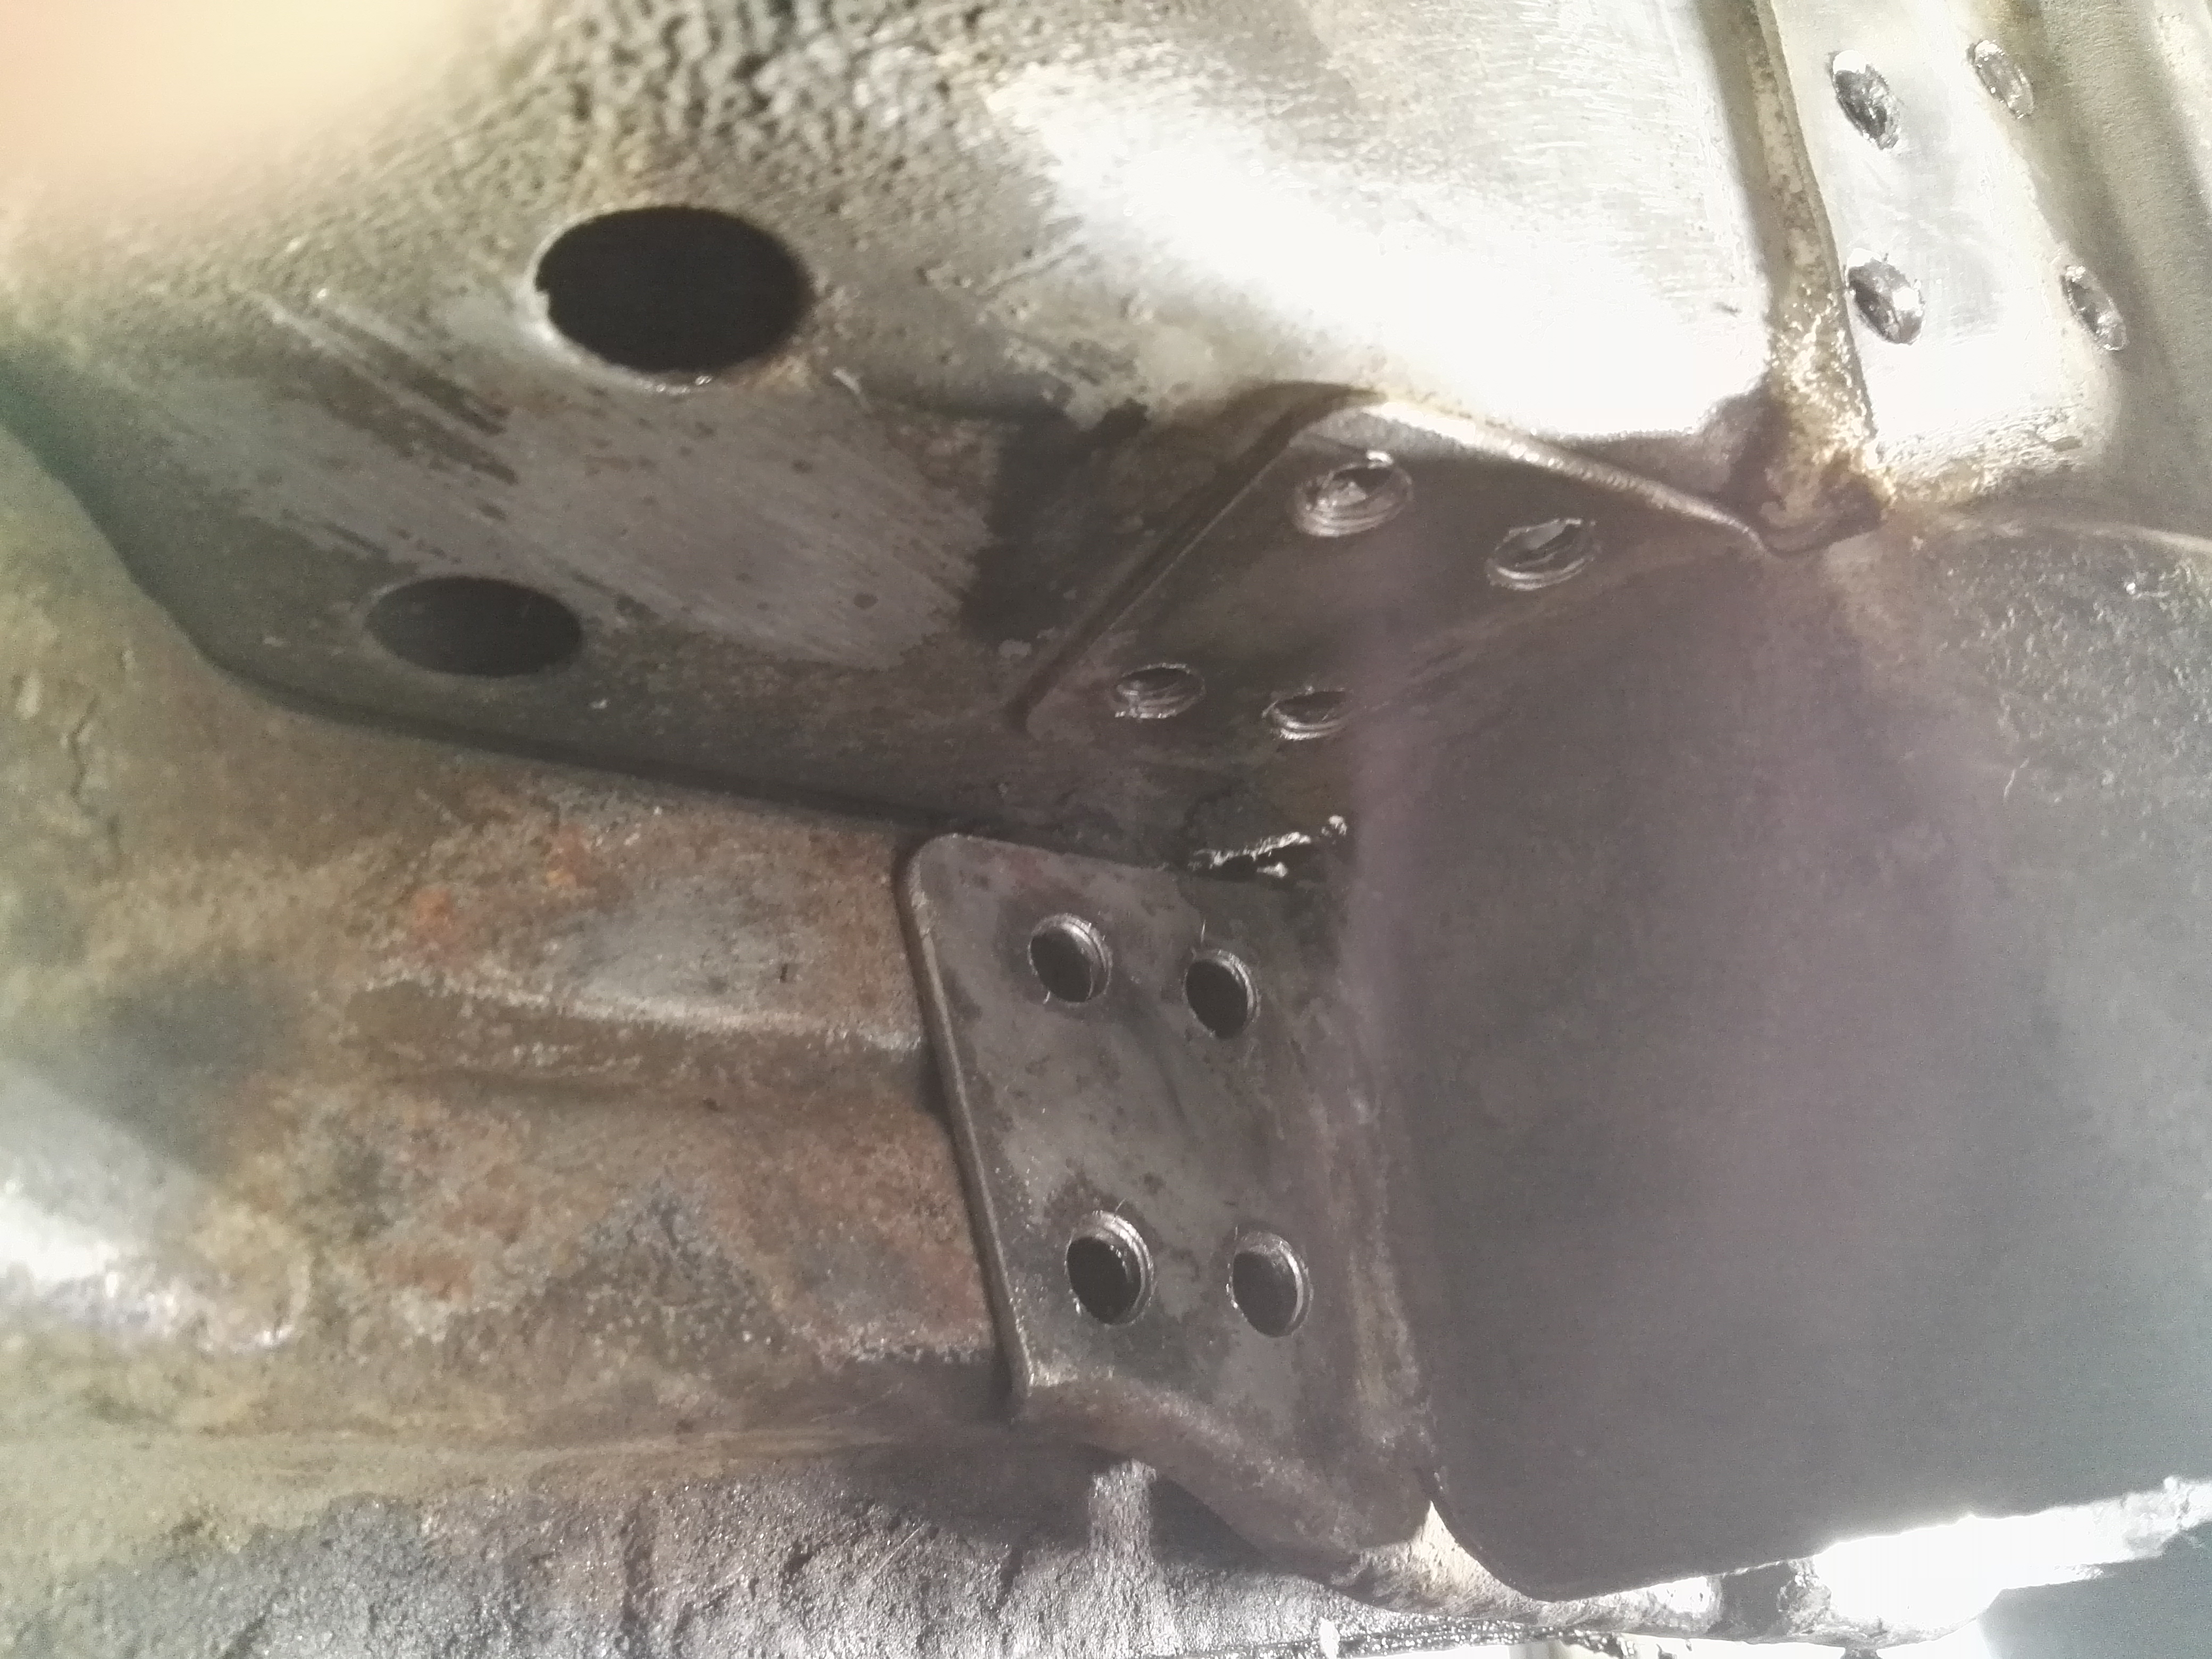
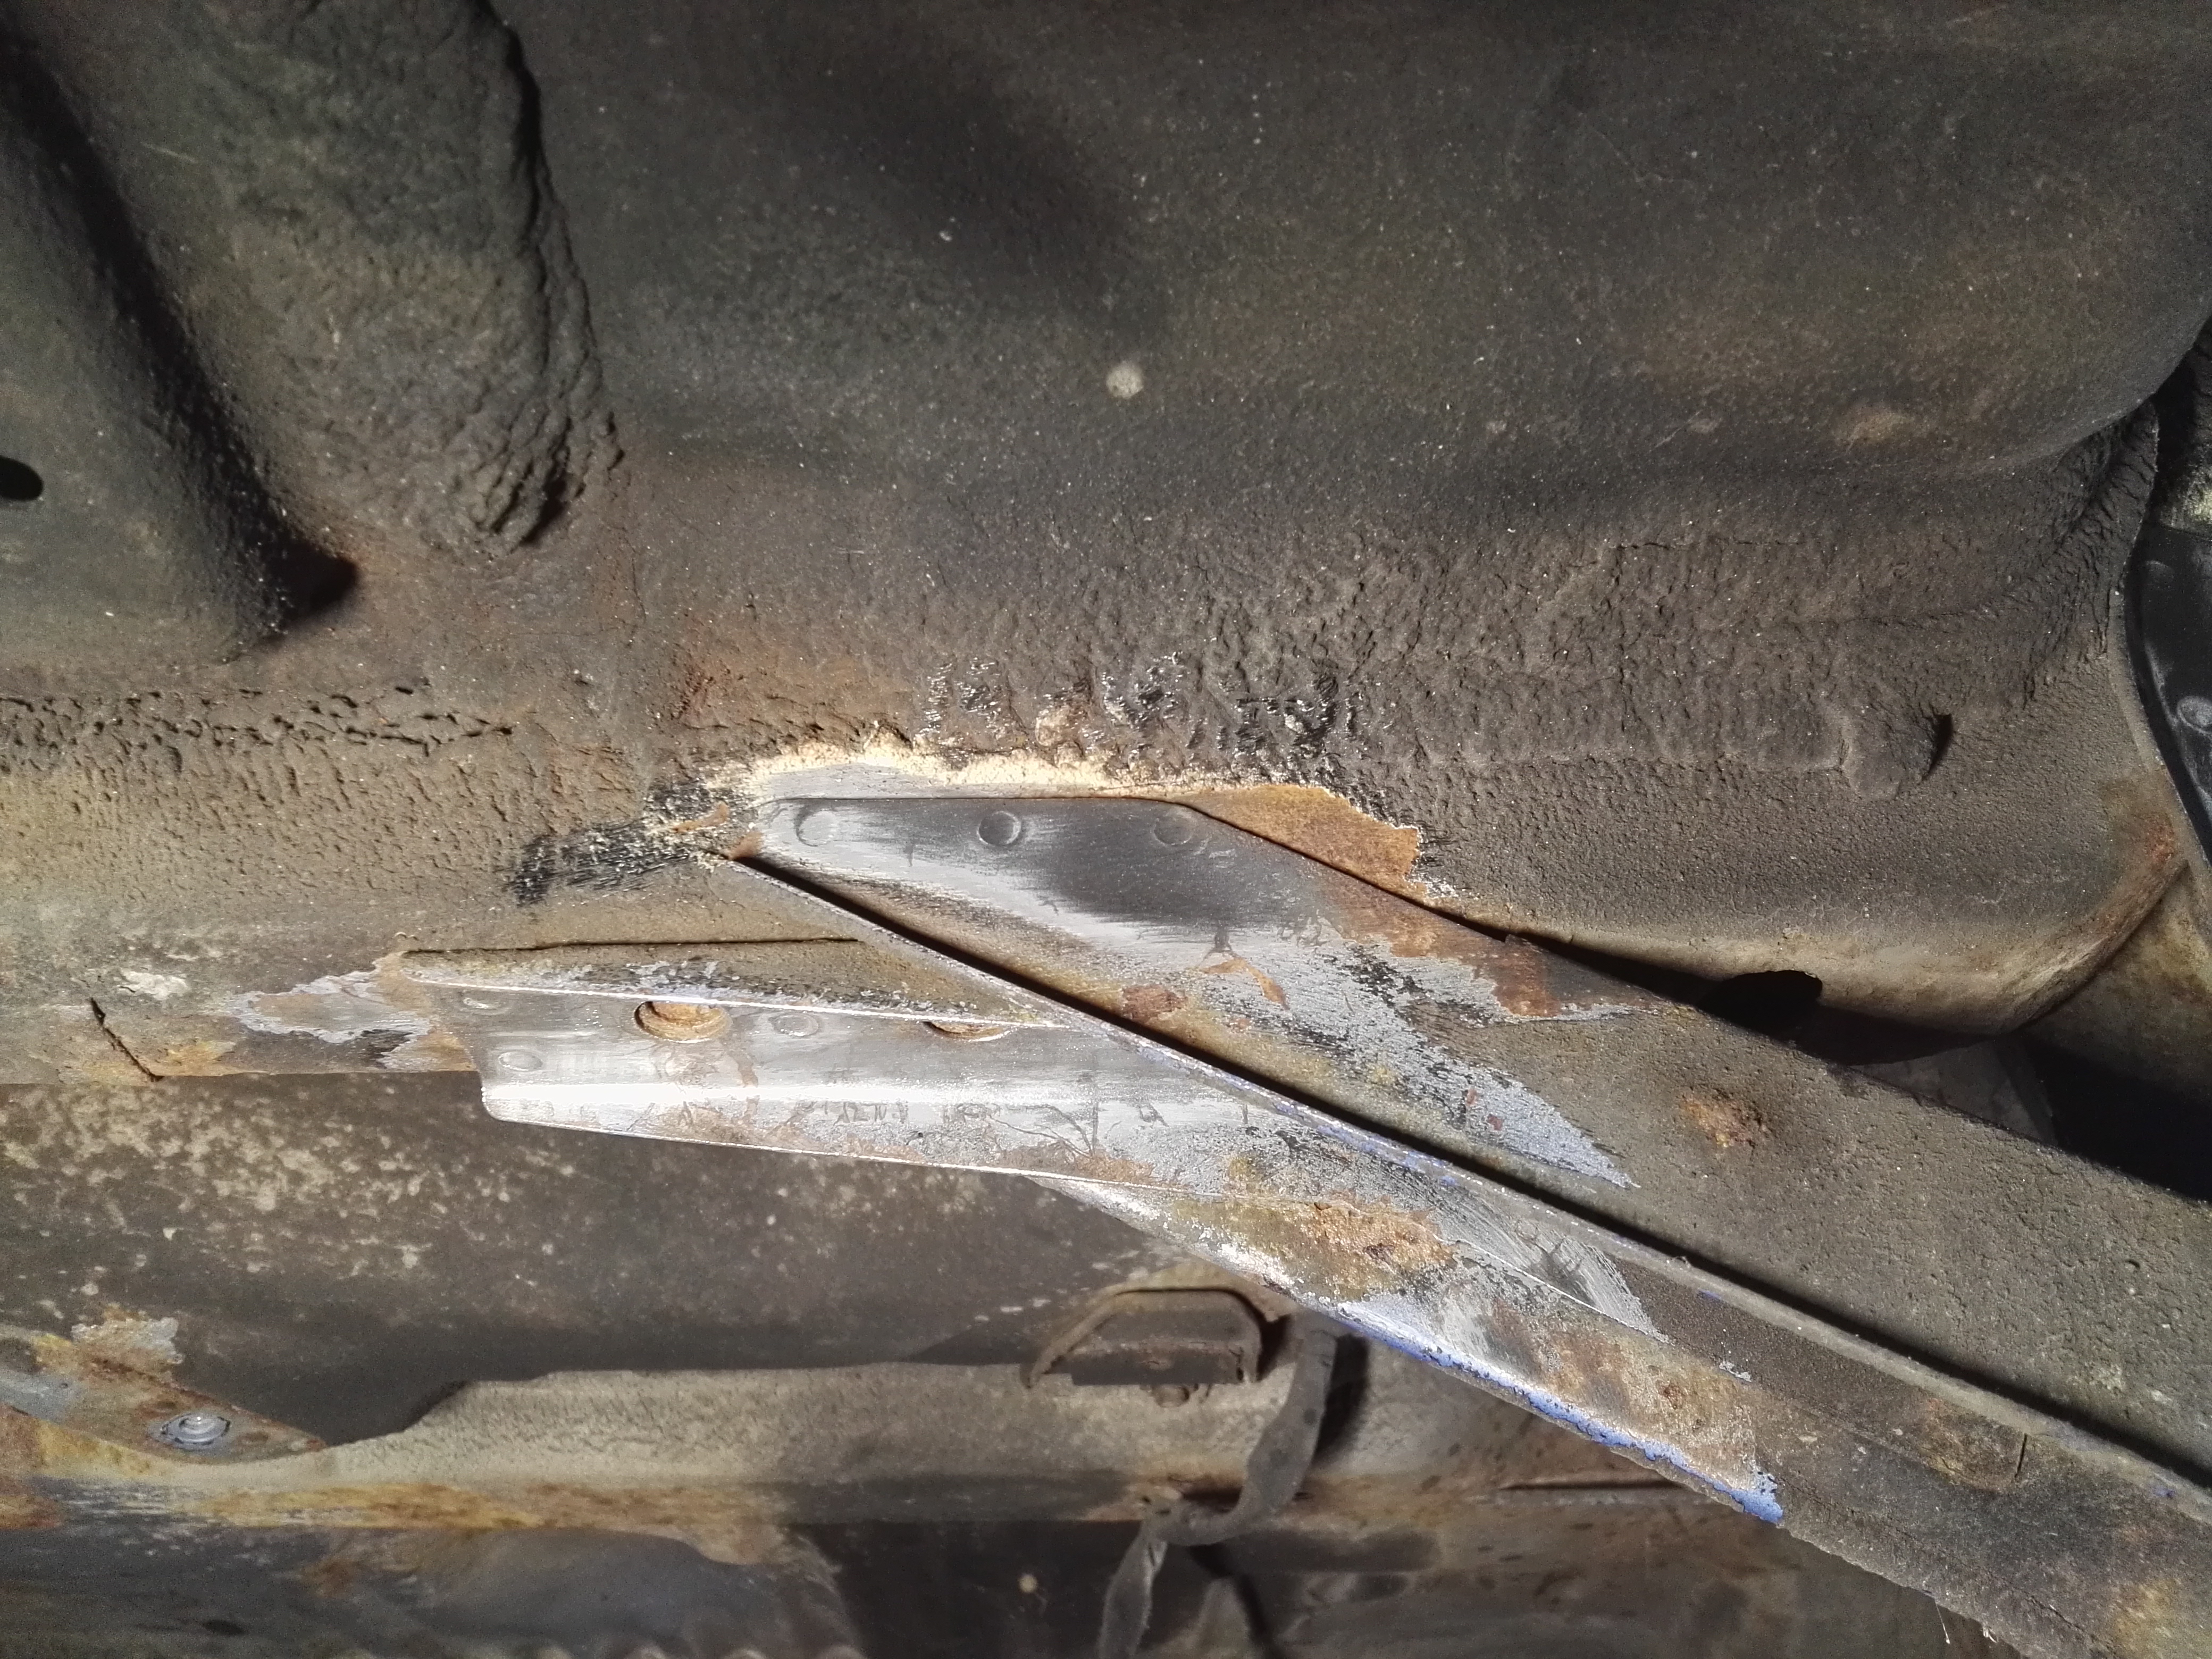
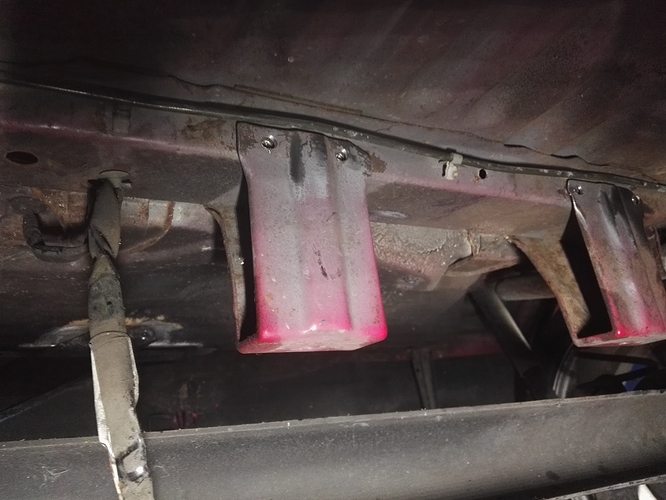
Here are some photos of the trailing arm mounts welded in
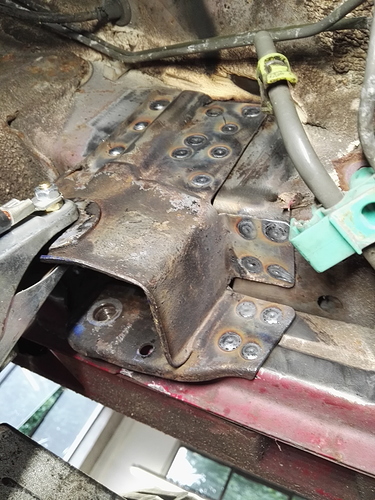

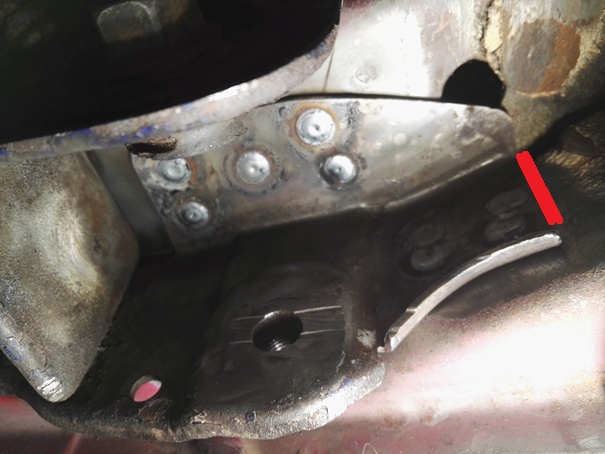
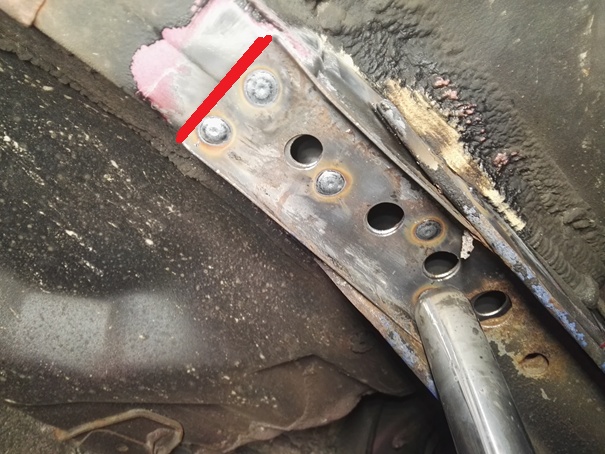
Once they are welded in use some seam sealer around the edges, cover with underbody spray or rubber guard, and use some wax spray with a long nozzle to coat the inside of the chassis where you have been welding to prevent rust. I also chose to run a weld along the red lines so I knew for sure the mounts weren’t going anywhere. This is optional but recommended.
Now you will need to get rid of the old axle mounts. You will need to cut, drill, swear, whatever. I don’t have any photos of this because when I did it, it was a bitch and I wasn’t thinking about photos at the time. Just use your head and you will figure it out. On the left side you will need to more or less remove it completely to make room for the new fuel tank mount.
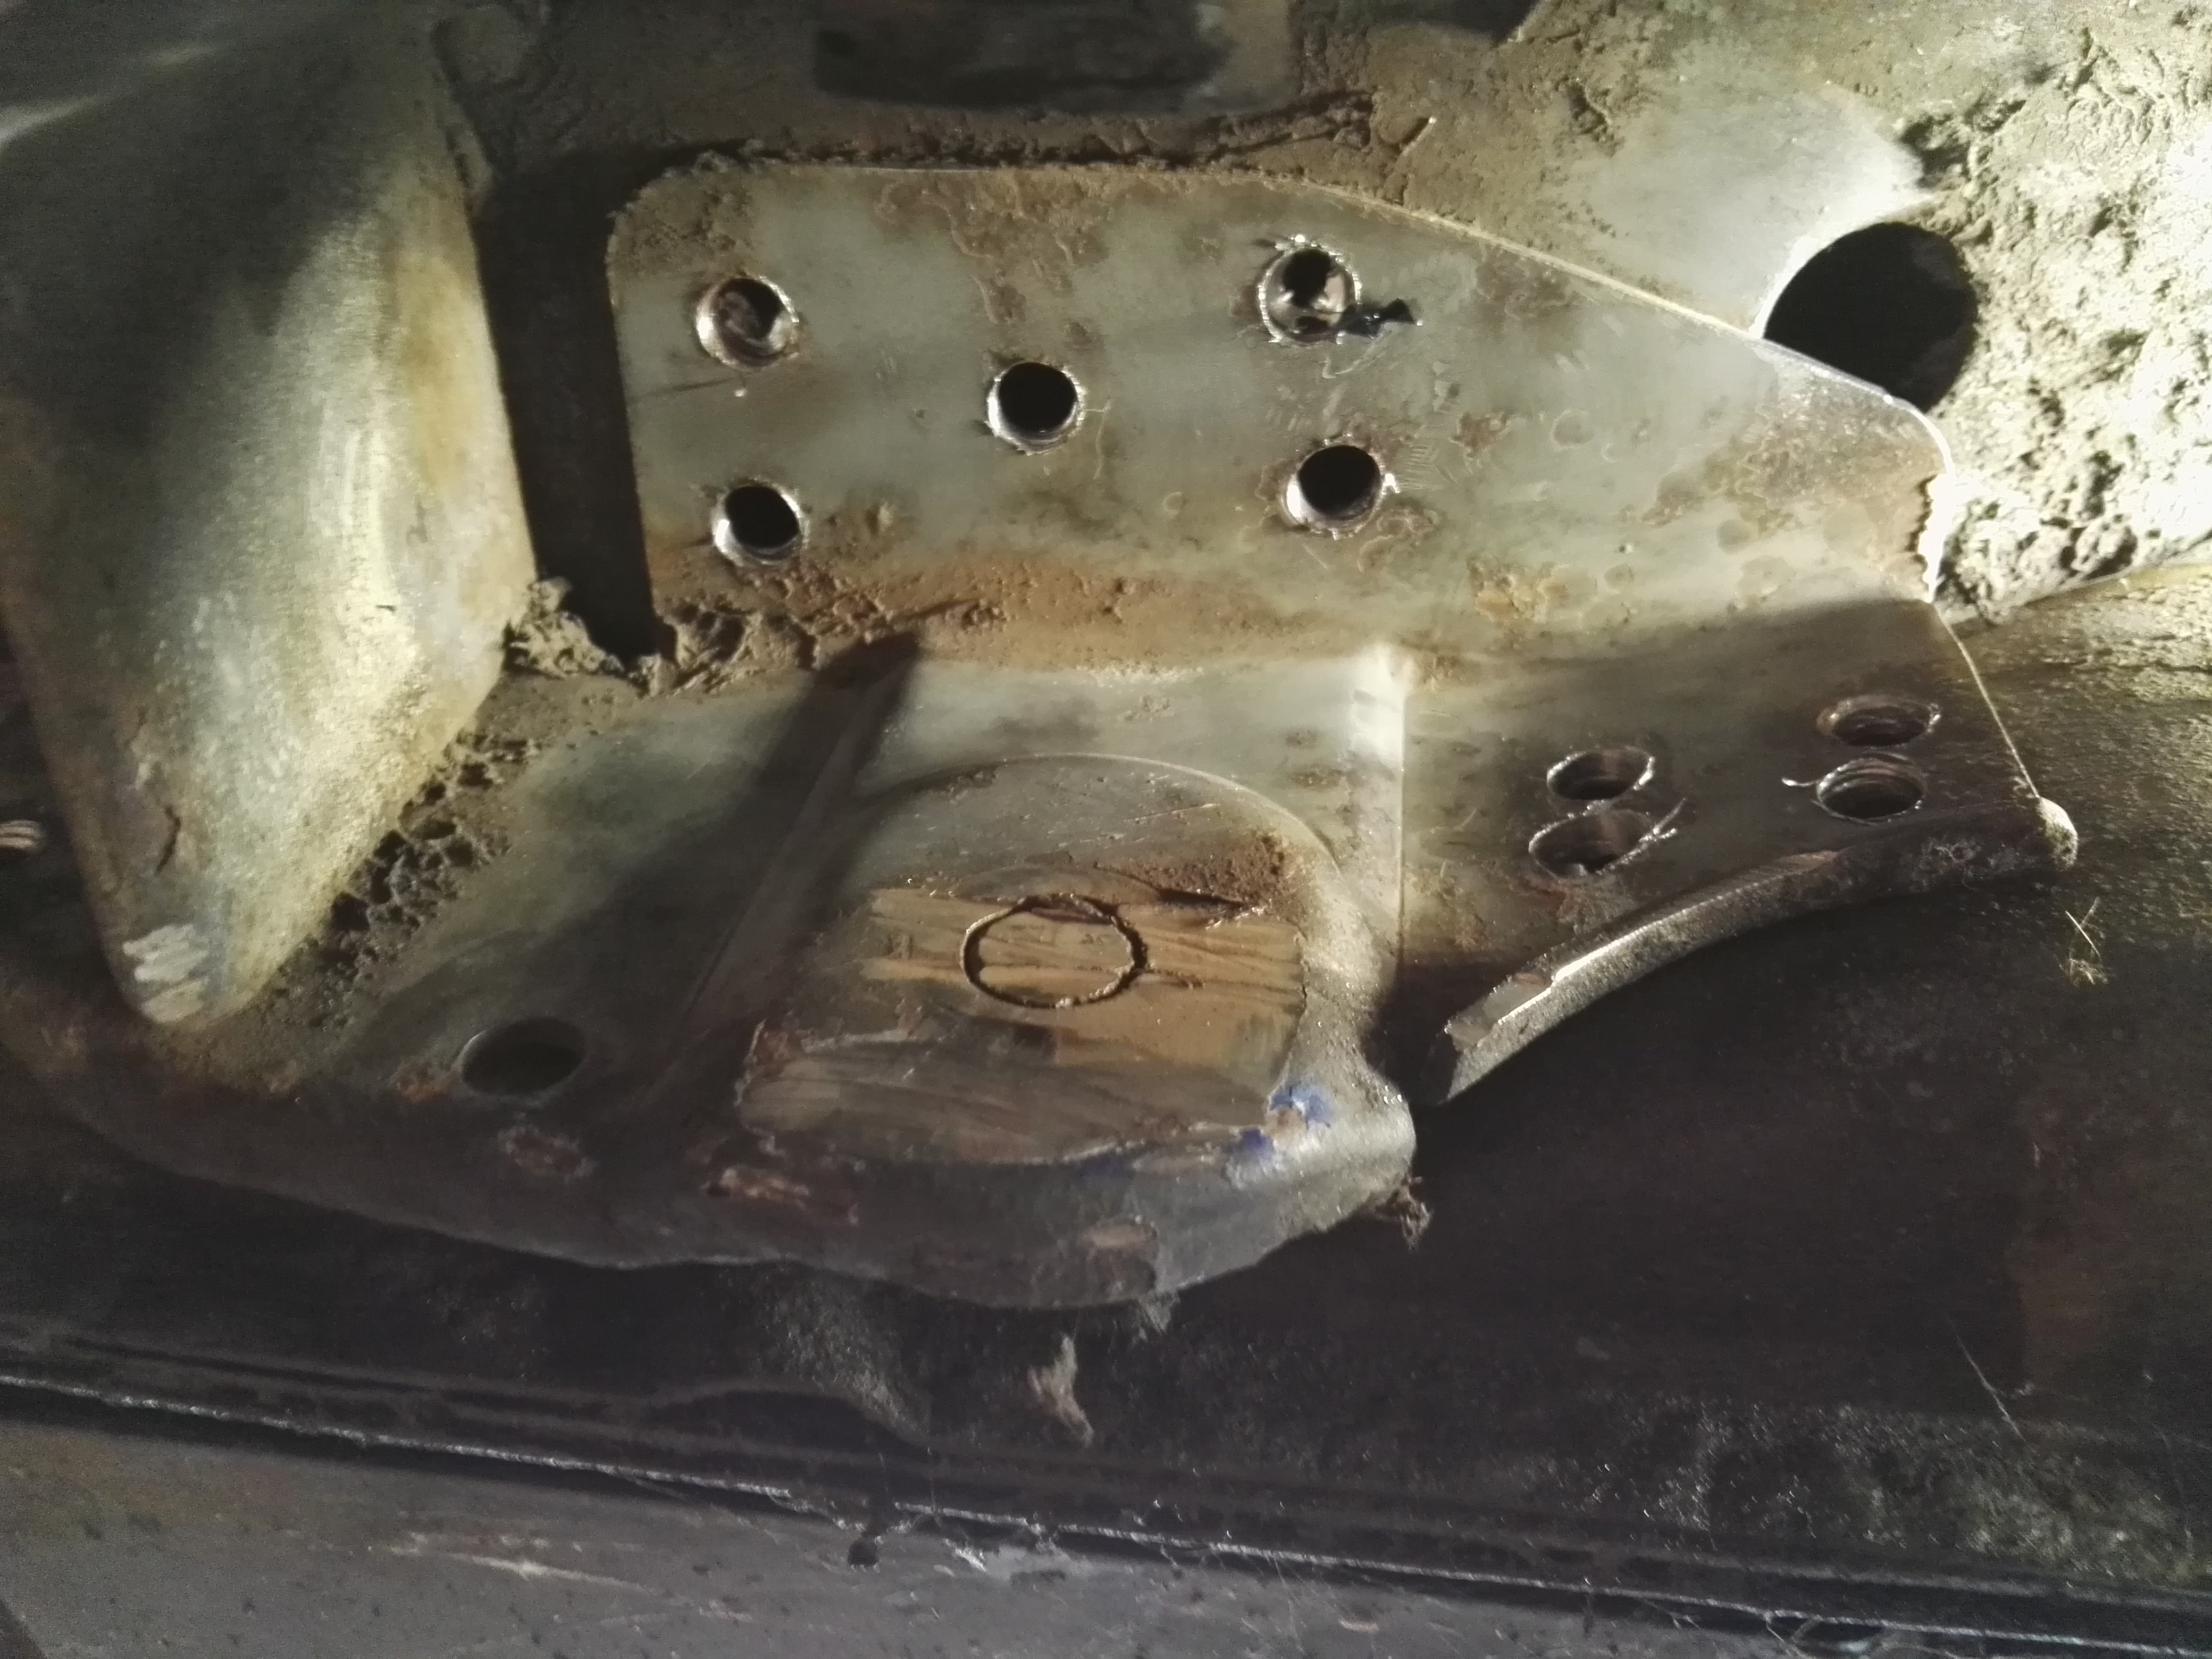
You will also need to get rid of the old fuel tank mounts. You can cut them off or drill out the spot welds. I chose to drill out the spot welds.
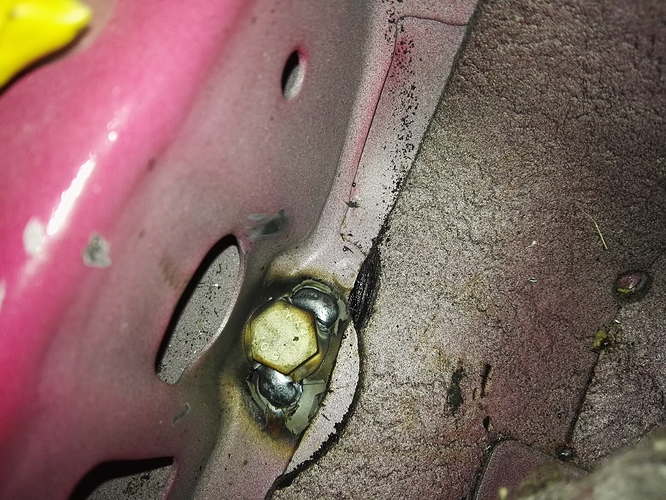
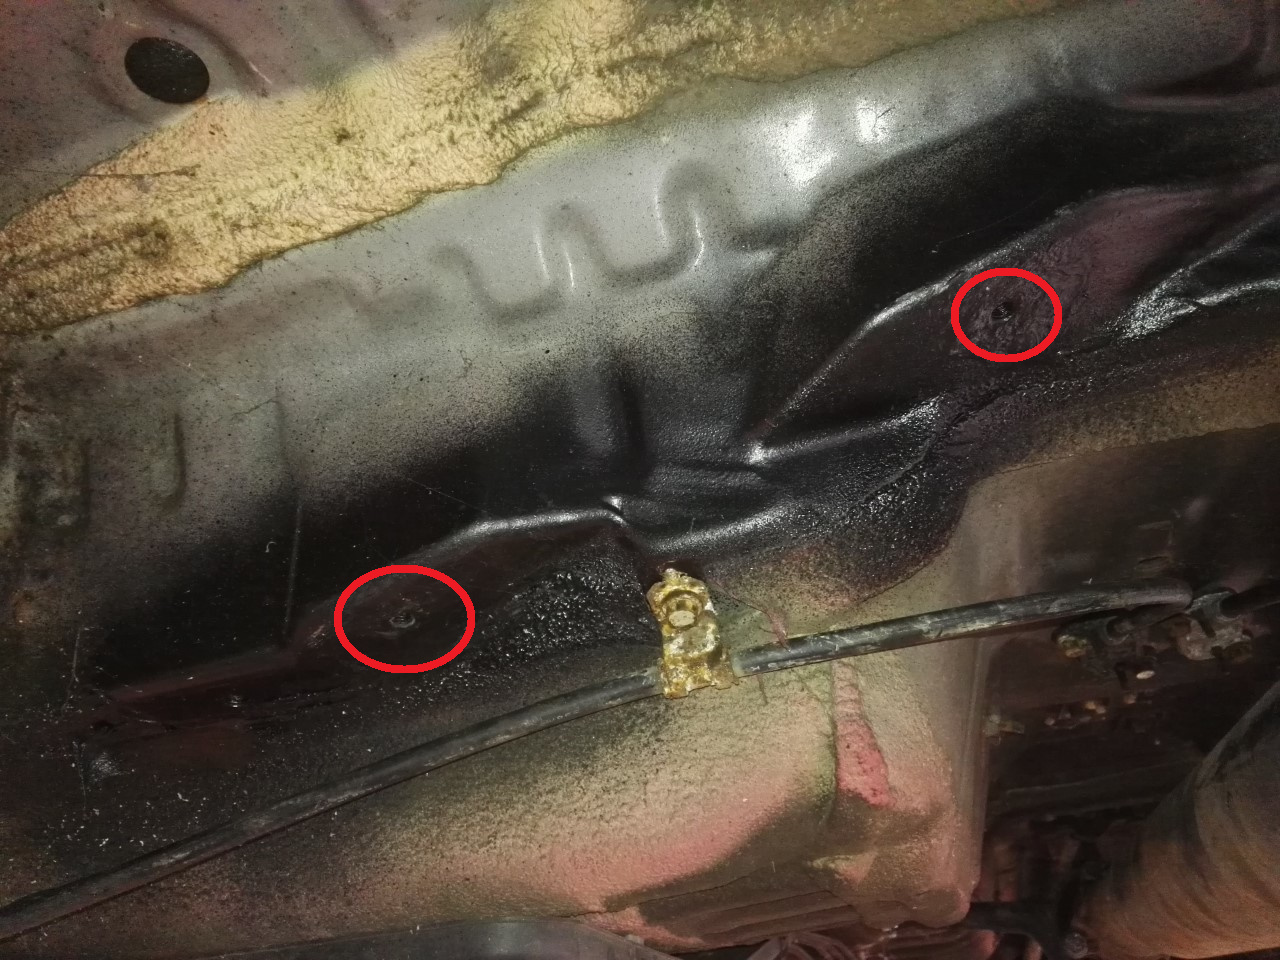
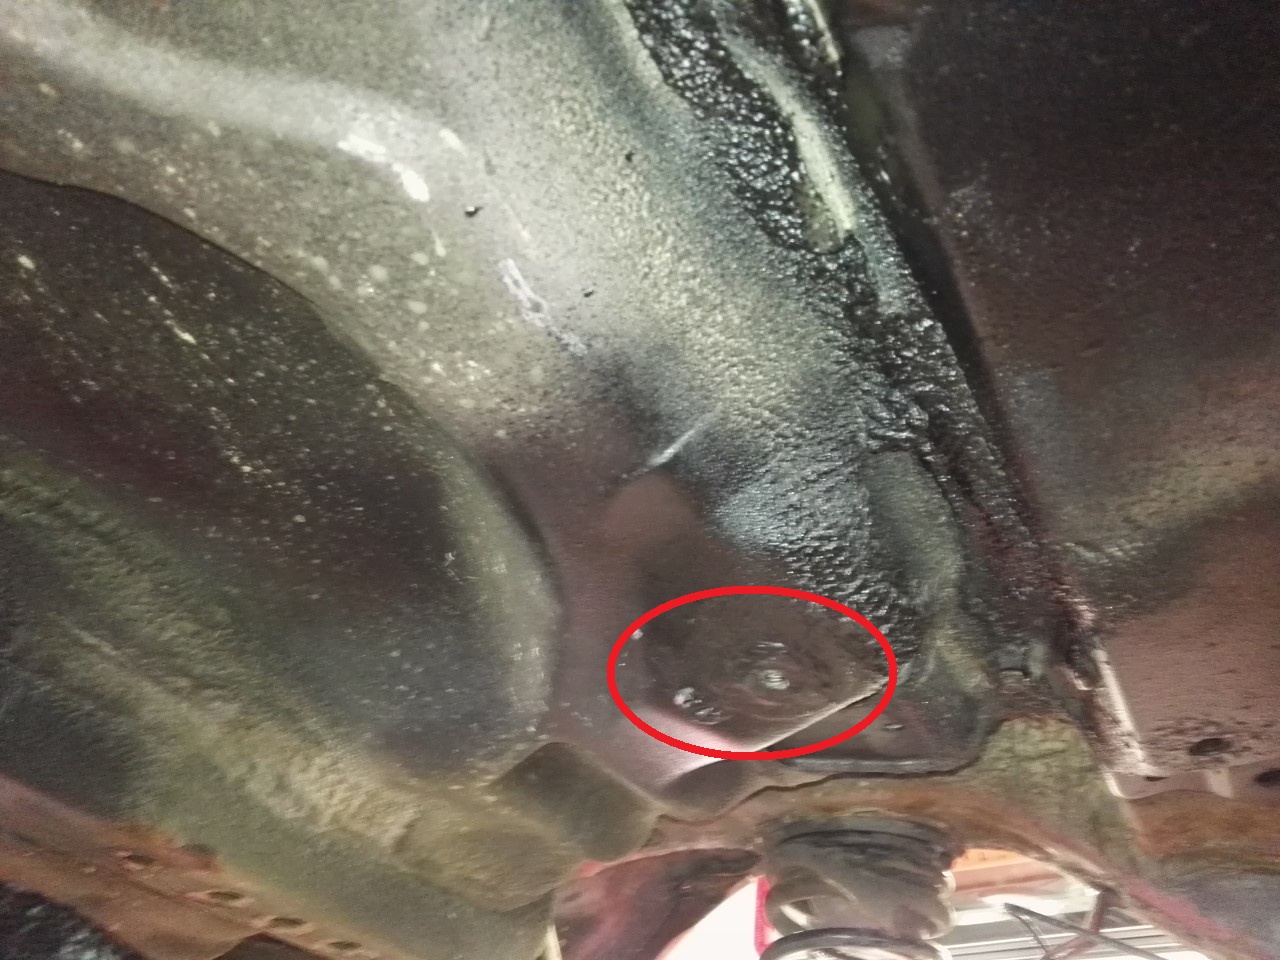
To fit the new tank you will need to weld in some M8 nuts in 3 places (circled in red). The holes are already there from the factory. I used flange nuts with a 13mm head, they fit straight into the holes then I welded around the flange. Then I hit it with some seam sealer and wax on the inside.
Once you have the tank in with 3 bolts you can work out where the rear left tank mount needs to go, clean the area, mark where it needs to be, remove the tank and weld it in. Same deal, seam sealer, wax blah blah blah
Now you can fit the tank and filler neck, fuel lines and electrical connector are the same.
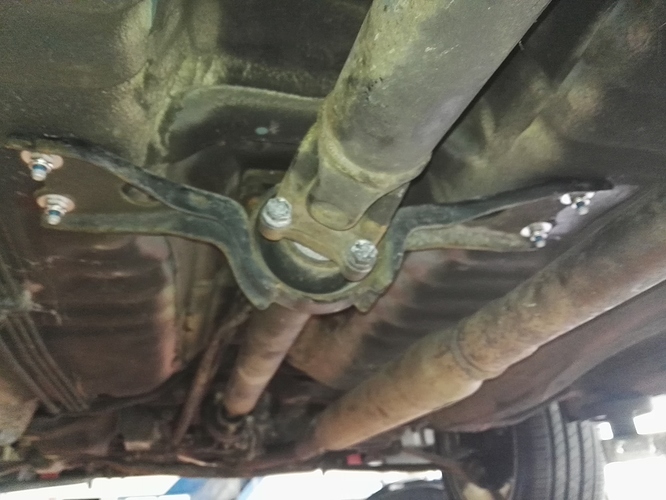
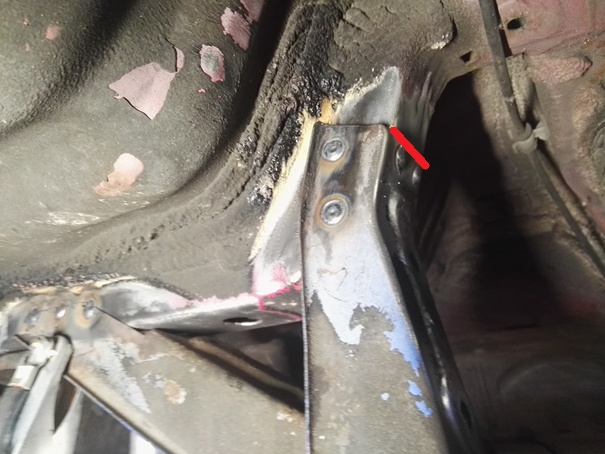
Now you will need to weld in the panhard bar mount. This is super easy because the holes line up. You literally cant fuck it up. I also rand some extra welds here (marked in red) to make sure it was solid.
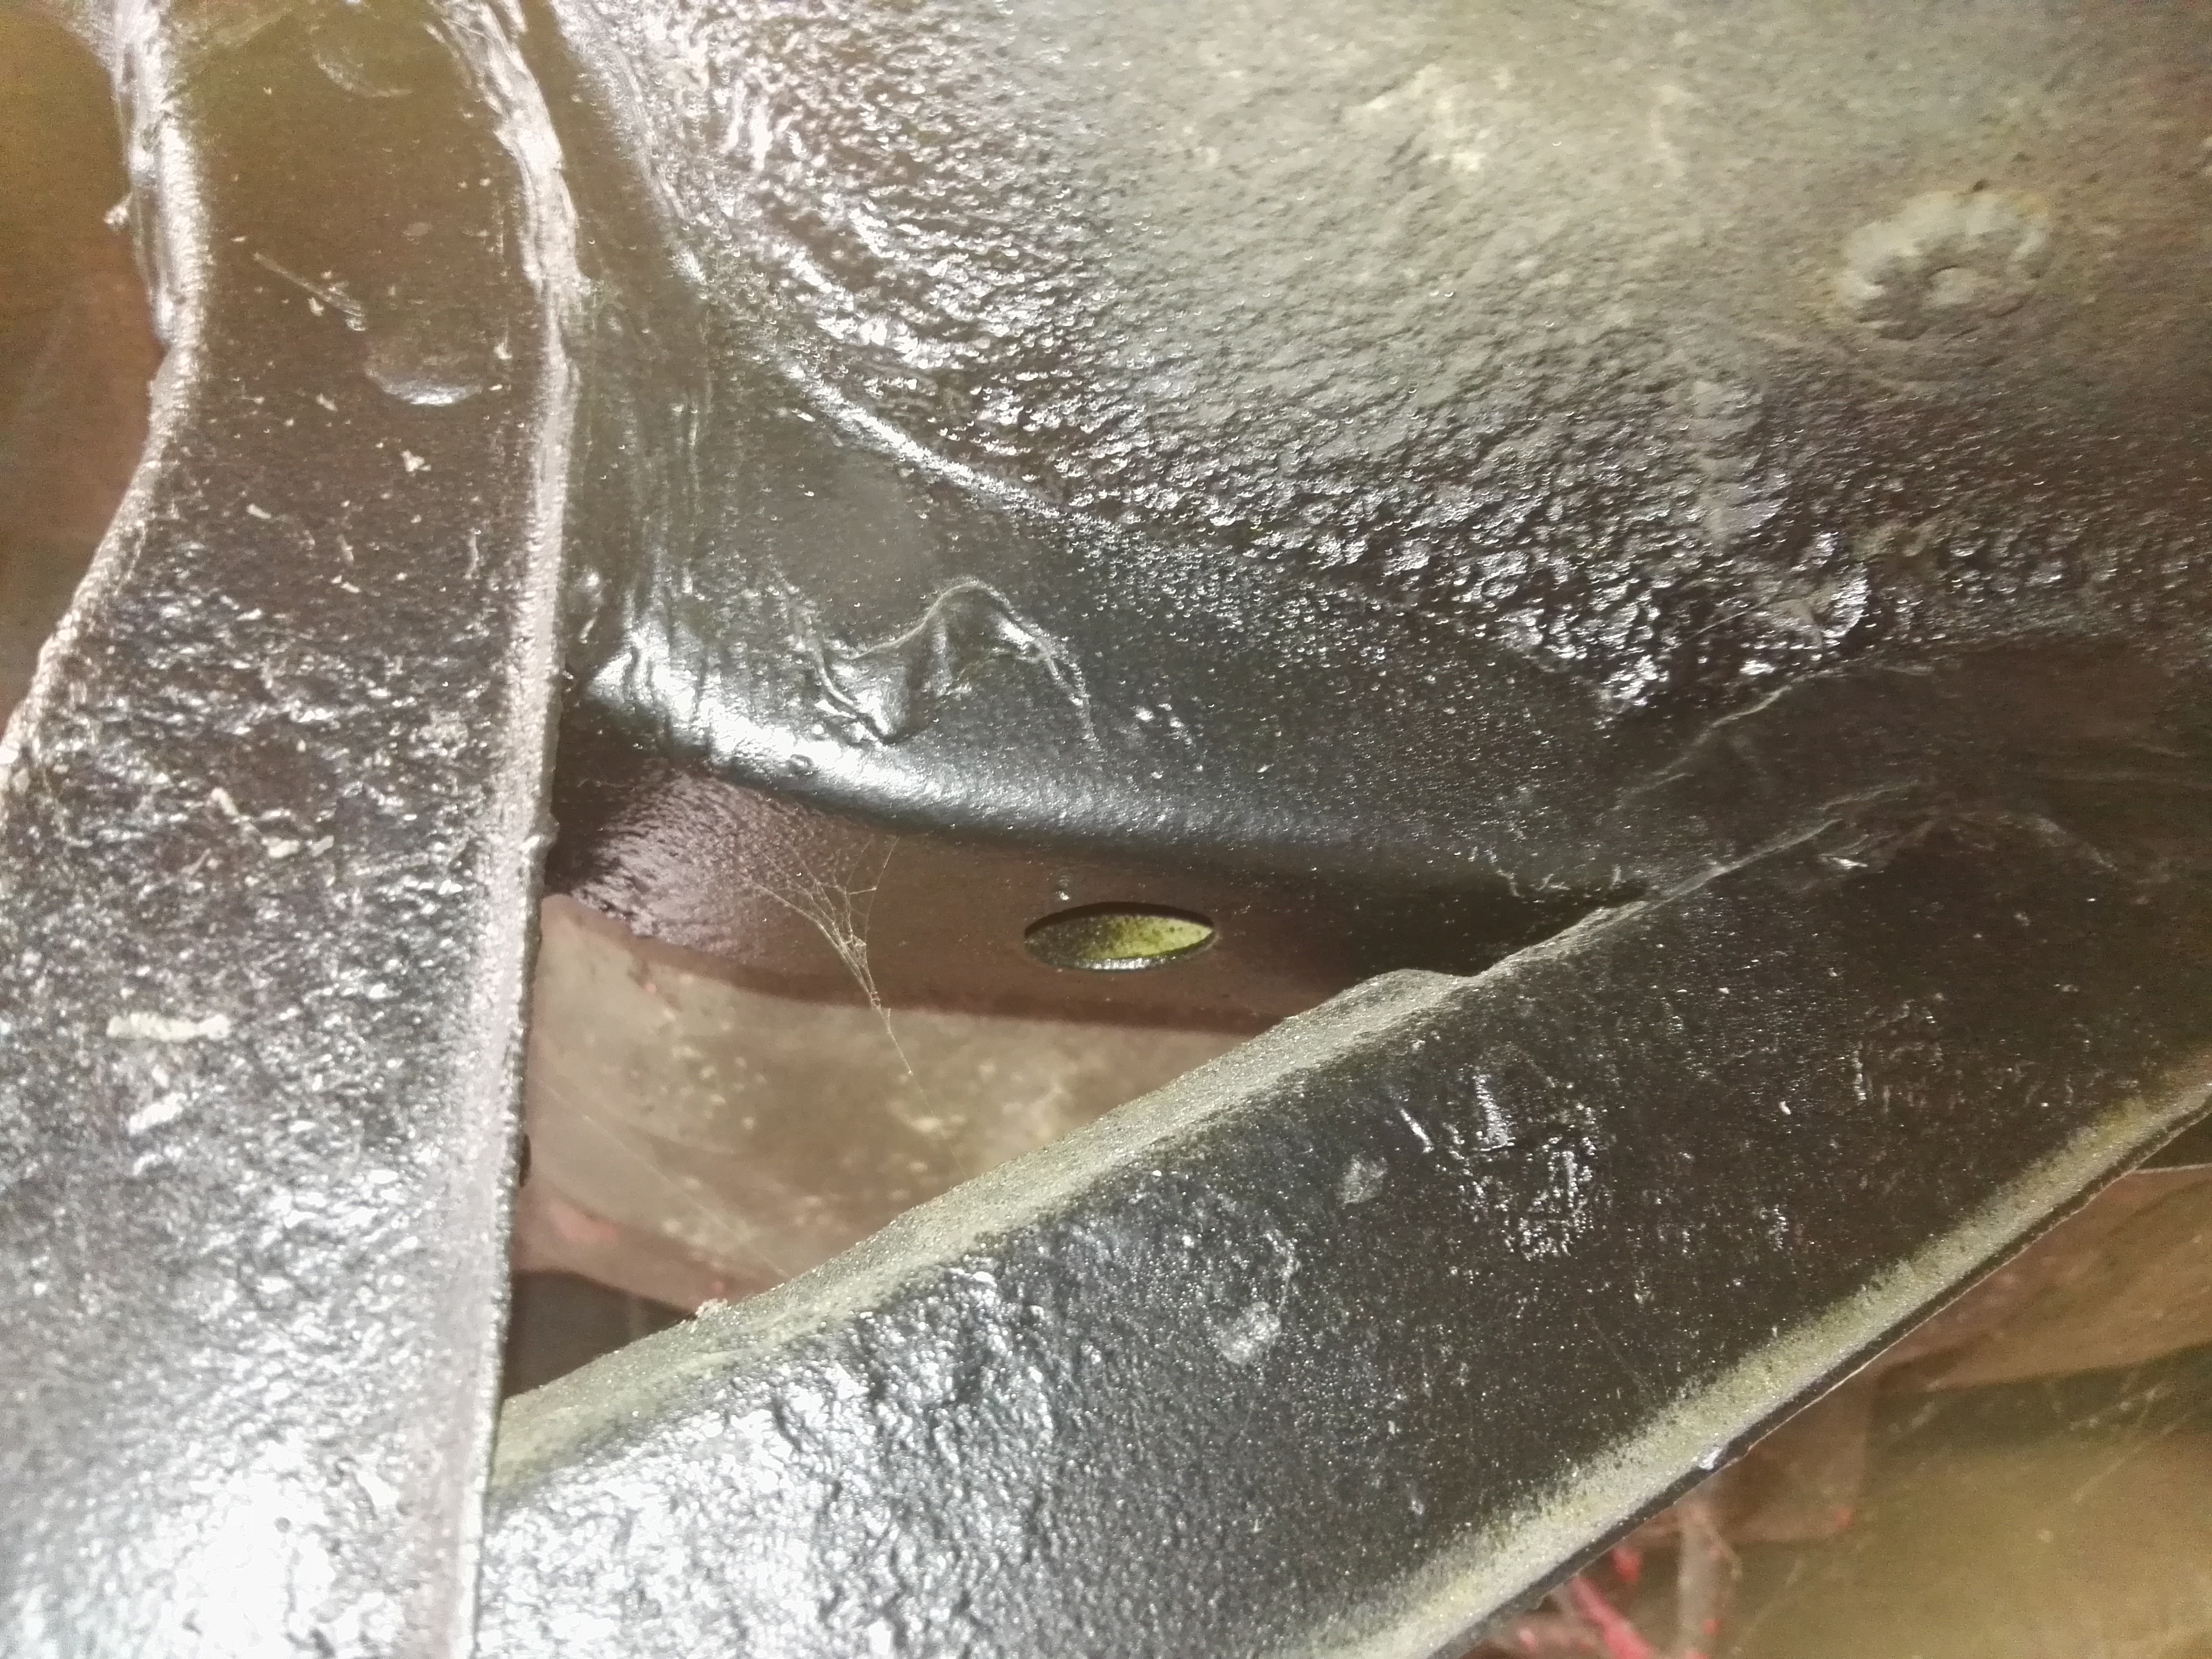
There is an extra support for the panhard mount, there is a hole near the exhaust hanger for this. An M8 rivnut fits in nicely and saves you having to drill out the hole to fit a normal M8 nut and weld it in like we did for the fuel tank.

Now you can fit the rear end, you will need to install an M6 rivnut in this location to bolt up the RH handbrake cable.


Now you’re ready to go and do some hectic habib heli’s!
Some people ask me why I went to all this trouble. Basically I am building a car to race autoslalom. Here in Germany the weather is shit and it rains a lot, so having AWD will give me an advantage in wet conditions. At first I wanted an AWD Sirion but all the ones I found were either too far away or full of rust, so I bought a 2WD with a good body and a blown motor for super cheap. Turns out the second car I bought to pull the motor from was a rusted out AWD, so after sussing everything out and seeing it was possible, and having a lot of discussions with TÜV inspectors to see if it was legal, I decided to do the conversion.
I still have a long way to go with the car to get it ready, but the AWD conversion is finished and I thought I would share how to do it so others have the information available.
