Derku's little red: Supercharged Franken-motor Mira

Hi all,

My first post here to introduce myself and also as a place to store info about my build.

I have an 1990 3dr L200 Daihatsu Mira and its my daily. It originally had an 850cc ED10 carby engine and I have since converted it to EFI using the 660cc EFEL head turning it into the proclaimed ‘franken-motor’ which has been a proven and reliable set up. Further to the engine, I have added an AMR500 supercharger, along with 2 extra injectors to liven it up.

I’ve basically copied pasted two big posts I had originally made on facebook groups here in the following posts about the conversion processes.

I hope to update this with many things to come and I also hope you enjoy reading.
Cheers,
derku

8 Likes

Franken-motor-Mira review: the 12 valve 660cc EFI head from an EFEL on an 847cc carby ED10 in the L200.

Id like to share my experience thus far and hope its helpful to those curious or thinking of doing it. Basically, I started with carby and bought a second Mira in hope to combine parts to make a better more interesting one.

First car
4-speed 847cc carby with 3" intake and K&N pod.
Pros:

  • Super crispy throttle response
  • Relatively torquey down low
  • Fuel efficient (7L/100km mixed driving)
  • Long gears with 4-speed means less frequent shifts
  • Sounds awesome(with the intake I had)
    Cons:
  • Poor cold start; got to pump the throttle
  • Lack of top end power and in general over 70km/hr.
  • Looses speed on some uphills
  • Rough at high RPM

Second car
5-speed 660cc EFI with no panel filter
Pros:

  • Fuel efficient(no numbers sorry)
  • Smooth start up
  • High revving
  • Somewhat fun to downshift being 5-speed
    Cons:
  • Lack of torque all round
  • Relatively complex compared to carbys
  • Sounds like a struggling camry

Franken-motor-Mira
12 valve 660cc EFI head from an EFEL on an 847cc carby ED10 block and I chose to use the 5-speed just to ‘try’ it out.

Pros:

  • Good cold start
  • Runs smoother all the way to redline
  • Acceleration is better(possibly due to 5-speed too)
  • Mid-range torque is greatly increased
  • can accelerate comfortably to 100km/hr no problems
  • does not loose power on the same uphills, can gain.
    Cons:
  • Still sounds a little weak(intake wise)
  • Lost a bit of throttle response
  • Lost a little low end torque
  • Needed an adjustable fuel pressure regulator($)
  • Heats up more but maybe because its enticing me to drive it harder

Set up:

  • Bolt 660cc EFI head directly onto 847cc ED10 block
  • Adjustable fuel pressure regulator needed; I tee’d mine in and set it to 60ish-psi connected to vacuum
  • Had to use 847cc ED10 timing belt as 660cc was too short.
  • Top timing cover of 660 head is shorter, so you need the 847 one if you want the garnish to fully cover belt(not essential)
  • 660cc timing sprocket(optional but wider to match the 660 cam gear in case I get wider belt in future)
  • 660cc crank pulley as its smaller to underdrive accessories(optional).
  • 847cc water pump pulley as its larger, to get more water circulation(plus my system is underdriven)
  • advanced timing belt tooth on cam gear by one notch
  • 4-5mm off from full timing advance on distributor
  • o2 sensor kept plugged in
  • A sensor on back of 660cc EFEL block transferred to the ED10 block.

As mine was originally a ED10 carby, from the 660cc EFEL donor car:

  • throttle cable
  • fuel lines (660cc line are thicker)
  • fuel tank plus cradle and fuel pump inside
  • Entire wiring loom: engine bay and under dash
  • ECU
  • Dash cluster
  • Exhaust ‘cat’

As you can see, it would have been much easier to start off with an EFI 660cc car as a base but only reason is that I prefered my ED10 carby chassis and its colour. New franken-fuel economy is yet to be determined. The 5-speed does require more shifting effort and I would have stuck with the 4-speed had I to do it again. Considering overall power in increased(easily tell by feel), the longer ratio of 4-speed probably would have made more sense in hindsight. Overall I felt a positive increase in performance but it lost a bit of response(acceptable though). Apparently making this combination, being lower compression ratio, makes it suitable for forced induction but I’m content with the immediate gains as it is :slight_smile:

Hope the information is useful to someone in future and thanks for reading.

5 Likes

AMR500 Supercharged Franken-build, derku’s approach.
Max 12psi with 10psi from 1500rpm onwards.

So Ive been meaning to write this up as a guide but no means a recipe to help those considering a supercharger and the reward plus challenges I had along the way. Why supercharger? its responsive and Id never supercharged a car myself, so it was purely a personal ambition to do so.

=== SPECS ========================

  • AMR500 supercharger
  • franken-motor EFEL 660cc EFI head + 850cc ED10 block
  • ebay rising rate fuel pressure regulator
  • Sirion injectors x 4, EFEL stock injector x 1
  • STOCK efel ECU with an Arduino Nano controllng injectors.
  • Aeroflow 400 fuel lines
  • ebay radiator
  • Ford FPV BOV (bosch 25mm)
  • Kei4life Clutch Ahyam racing clutch
  • 2"(51mm) small ATV pod filter

=== SET UP ========================

  • Supercharger to throttle body with BOV in between.
  • AMR500 is driven by crank from the air-con side which is 80mm
  • I converted the AMR500 to V-pulley 40mm making it 1:2 over driven
  • Custom supercharger brackets out of 6mm aluminium plate.
  • Custom 2"(51mm) piping.
  • Full distributor timing advance
  • 1 tooth retarded in timing/cam
  • I have 3 Sirion 1.0L injectors in factory fuel rail location and an extra Sirion Injector plus extra EFEL mira injector in the manifold = 5 total injectors
  • Its set up at 3.5 bar(50psi) base pressure and the injectors are staged to come on at -0.5 bar(-7.5psi) and -0.4 bar(-4.5psi) for the sirion and mira injector respectively. This is controlled by an Arduino nano and two solid state relays(jaycar). Car will run with just the fuel pressure regulator set on 55psi but I set it to 50psi with 2 injectors staged to preserve fuel economy and a leaner idle.

=== RESULTS / FEEDBACK ===========

  • Tremendous increase in torque throughout the rev range.
  • Can accelerate on uphills in 5th gear EASILY even at 100km/hr.
  • 1st and 2nd gear fries tires in dry. 3rd/4th gear in wet.
  • Because it is 1:2 overdriving the supercharger, one must be mindful if limiter bashing at 7000rpm which is makes the AMR500 turn at 14000rpm which is its recommended max limit. I sized it this way to get the most out of the engine/SC rotation.
  • Unlike turbo cars which build boost, you need a better clutch because the AMR500 produces instant power which WILL cause clutch slip on stock clutch a low RPM. You could feed the power in but that defeats the purpose of having SC over turbo.
  • kept it with stock ECU at the time to try get the most out of it before going aftermarket and at the moment, stock ECU is still fit for purpose. FYI stock injectors are on BATCH fire… so there is huge room for improvement in the fueling/tuning.
  • Oh and the supercharger whine is real.

=== FUTURE ========================

    • Currently no intercooler… I am still working out a better route for this to minimise piping and preserve stock look. Im leaning towards FMIC directly in front of the radiator, with the pipe going under passenger head light.
  • May change from 51mm(currently stainless) down to 45mm(aluminium) intercooler piping… probably if and when intercooler goes in.
  • Oil cooler to be put back in with oil relocation mounted somewhere.
  • Exhaust is stock, so again heaps of power improvements to be had here. Just want to help it breath out and dont want anything loud.
  • aftermarket ECU has always been on my mind namely to control fuel… 5 injectors in 3 cylinders sounds tough but its not an efficient way to do it - I would prefer to control 3 larger injectors the conventional way in future. Further, despite the linearity of a supercharger, the timing could be refined. Individual coil packs would also be a possibility along with different maps etc etc… Aftermarket ECU really is the way to go but I just dont need it right in this exact point of the build.

Another video to come soon.

Thank you all for reading and the help from all the members here along the way(you know who you are). I hope this was insightful on what is possible and inspire more projects.


11 Likes

Awesome man, I seen this thing on facebook.
Great to see such a detailed write up!

Is all the bottom end toque why you are looking at going Automatic?

Yeah somewhat but its not the torque(aftermarket clutch hold fine) but rather the traction loss in 1st and 2nd gear which is pretty unpredictable with the open diff. So I’m toying with the idea of an auto and yeah, just doing some research on its capability rather than just bolting it on and trying it.

1 Like

Cool setup mate :wink:

Awesome good to see you here Derku and your build thread :slight_smile:

I just moved it into Dai Street Life as the sub catergory for street cars under builds etc :slight_smile:

1 Like

Put my little red rocket on the dyno at Team Karam Racing dyno day. These guys are well experienced and the dyno operator is a leader in tuning for japanese imports plus more.

It made 48.9kW with a the supercharger, up from 25.2kW with the unmodified ED10 engine which I ran last year. It should be noted that when I had the ED10, it was a 4 speed gear box run in 3rd gear and the supercharged build uses the 5 speed, run in 4th gear.

Anyway, Im on the fence with the results as I was hoping to crack over 50kW. The dyno operator said it was pinging and obviously running very rich. On the road, it drives like a beaut but obviously a lot of improvement to be had - which I will take as a sign of encouragement.

A little more adjustments here and there before I decide on the next path.

Cheers,
derku

Staging for the dyno pulls

My favourite photo so far; car on the rollers with the dyno crew’s composure around the car really sets a nice atmosphere and focus to my build and all the hard effort that has gone into it.

Nice photo when parked just after the dyno pulls

Dyno sheet of the supercharger results

Dyno sheet of the ED10 stock results

4 Likes

very nice comparison mate. still surprised the ed stock isnt 25hp and not 25kw lol

2 Likes

Not really surprised, a standard ED makes between 29 to 32 kw. The average drive train lowers power to the wheels by 10 to 15 %.

2 Likes

Pretty decent result for running a standard ecu with rising fuel regulator and whatnot… I assume the next thing you do is get an ecu and get a proper tune. I guarantee you will get over that magic 50kW number with that…

Where are you located? Do you have access to e85? If you buy an ecu that is applicable to a flex fuel sensor and you run e85 you will be able to run heaps more timing and therefor more power…

I’va always allowed 30 odd percent, seems that with larger motors and autos

This is an awesome build! Love the way it’s going, I’m not too keen on the idea of an auto but that’s me and this is your car, you thought about a long ratio gearbox? That way lower gears would be more useful and obviously an lsd would probably improve your situation massively

9 months since last update! what… really… that is so pathetic…

I hope to catch up to document what has happened in case someone wants to improve on the build. Long story short is that I had since changed the supercharger to a turbo snail… which has recently suffered catastrophic failure due to a tuning run mishap.

A few more snippets of the retrospective progress and essential pieces which led to (prior) glory; my favourite part… the TR-XX tachometer black-faced dash, straight from the land of Japan. Not to sound cocky but owning one of these truly transformed the Mira into an even more unique enjoyable ride and I couldnt imagine one withing this dash anymore.

After the addition of power from the supercharger, I decided it was time to improve the ‘human’ aspect with additions of better speakers. They had to be custom mounted into the door card because the Mira front door speakers wells are quite small. I’d never done audio before so all of this was new to me and the specs and brand of the system was all recommended by more knowledgeable friends whom I trusted for advice.

Sticks out quite a bit…

Subwoofer mounted to the rear tray

This was edited in after but worth showing .

I made these for another red L200 I had. Same idea as the above mdf door cards but wrapped in material. I also installed an ebay power window kit to it as well :stuck_out_tongue: modern goodness :stuck_out_tongue:

5 Likes

Some details of the AMR500 set up:
It was over-driving it at a ratio of 2:1. That is, at 1000 engine RPM, the AMR spun at 2000 RPM. This was deliberately size because the redline of the franken-motor was 7500 RPM but it could be lifted but I chose not to. This would result in the AMR turning at 15000RPM which was its maximum recommended speed. Ultimately it meant that the potential of the AMR500 was fully extracted by the rev range of the franken-motor.

Why I decided to go turbocharger
So while the AMR500 supercharger was a great buzz, it was a constantly driven charger without a clutch-type pulley meaning I couldnt disconnect it. I couldnt see how an SC12 yet alone 14 would fit and my requirement was that ALL components must be within the stock body. Further is the difficulty in controlling boost. As it produced 8psi at 1500rpm with a simple blip of a throttle, it was no easy car to drive; yes it was a blast though! The timing and cam (I have an adjustable cam gear), was set to retard the performance higher up in the RPM range to combat the super-crispy response of this thing.

I’d describe the sound as being chased by a swarm of angry bees that are armed with circular saws! I actually loved it! With the bosche FPV BOV venting to atmosphere and the urgent build up of boost, it was a powerful orchestral symphony with the rhythm of the percussion controlled by the left and right foot alone.

This sounds great, until you cruise at 90km/hr+… the annoying supercharger whine is then realised. Most would live with it but it got the better of me and at the time I had a few commutes and it just wasnt pleasant. Now that circumstances have changed, I’d be happy to whack it all back in.

I guess finally another reason to go turbocharger was purely for the lust of most boost. I had maxed out the AMR500 which could potentially get 12psi peaks but really only 10psi. Note, I have a fairly well flowing exhaust… something ill detail later. A turbocharger was my solution to further the quest for power(boost).

Choosing the turbocharger
I hate lag. So that immediately leads to relatively small turbochargers. I am quite firm on fitting the smallest turbocharger possible because it yields the broadest power band. No point waiting for it to spool and bleeding off boost. Having a smaller turbocharger and running it red makes a car feel so much sharper and responsive.

I chose the TD025, and I am so glad I did.

Cute isnt it! Now, at the time, I didnt have the skills to fabricate a turbo manifold nor did I like any of the Malaysian ones because they would likely result in the turbo hanging out of the front bar… a nono for me. I was led to a place on facebook, keimotorsport… where I met John. This is a talented person who supplied a custom cast log manifold that suited my needs.

23376167_10214828207159684_825076436925815140_n

It came raw from the cast and holes had to be drilled out and tapped where needed

Done. It was also supplied with a flange of the TD025 which was laser cut from a drawing I provided.
23316588_10214828207439691_4227471962082483636_n

Will continue the updates of the turbo charger process soon. Thanks for viewing this far!

3 Likes

Great write up.

The AMR is a roots blower and “psi” for them does not equate to that of a turbo. They move a great deal of air but can’t make pressure without it bleeding back past the rotors, and this makes a lot of heat too. Not sure you’ve seen http://www.autospeed.com/ or know of Julian Edgar. He used to live near me and played a lot with the AMR. At one point he lead wrapped as much of the induction piping as possible to quieten the thing which he had mounted on a Prius as the thing struggled to get up Mt Tamborine. It would be interesting to look at the air temps before and after the blower to gauge air density. The turbo will be a much more efficient thing. All up you’ve done some nice thorough work.

Looking forward to “more” of your pics and story.

Because writing in retrospect… of course it’ll be skipping back and forth with information zig-zagged across time… hope it doesnt become confusing but I rather be comprehensive than skip key milestones.

So i’ll take the time to introduce an aspect which made forced induction possible for me anyway. With boost (basically more air), we needed more fuel. I initially toyed with the idea of both water injection and methanol… and the youthful me thought it would be a brilliant idea. This meant adding injectors in to support the different types of fluids and my solution to this was 2 extra injectors. Yep, 3 cylinder banger with 2 extra injectors making 5 total. While water and methanol were nothing novel, it was purely for academic gain. This young me idea was actually only a year or so ago… the complexity definitely overwhelmed and got the better of my ambitious ‘idea’. It was way over the top and stupid. None the less, I capitalised on the work to include the injectors to instead do staged fuel injection as boost came on.

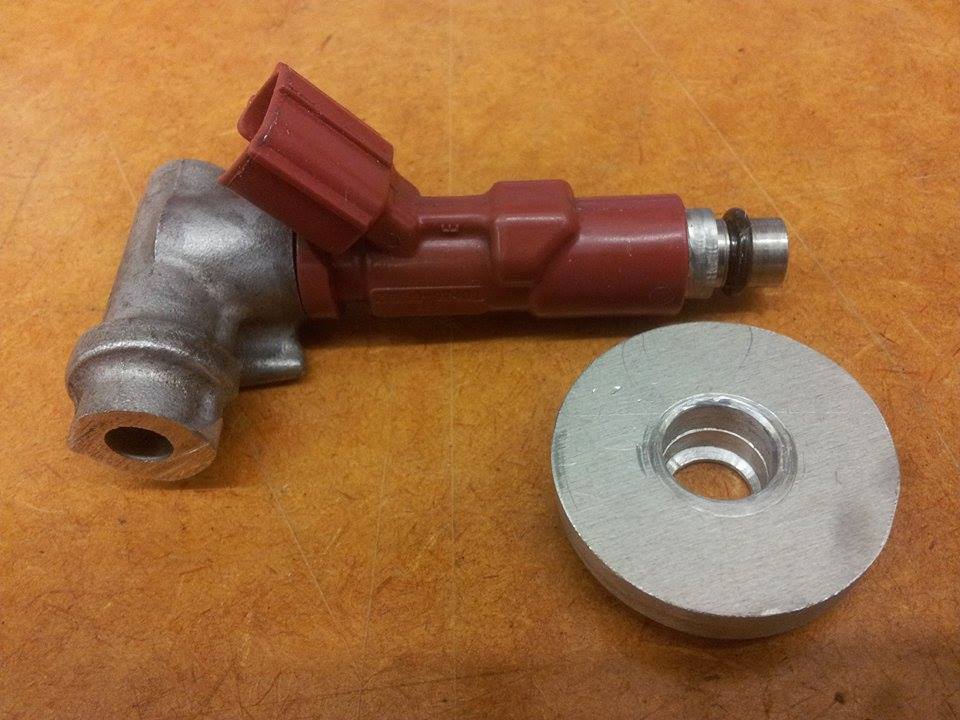
Here is the injector and a boss turned on the lathe. The feed was just an aluminum injector rail cut down.

!

A barb was tapped into the end and a bracket made. The welsch(?) plug was punched out and the injector drilled and tapped in with 3 bolts, sealed with RTV.

!

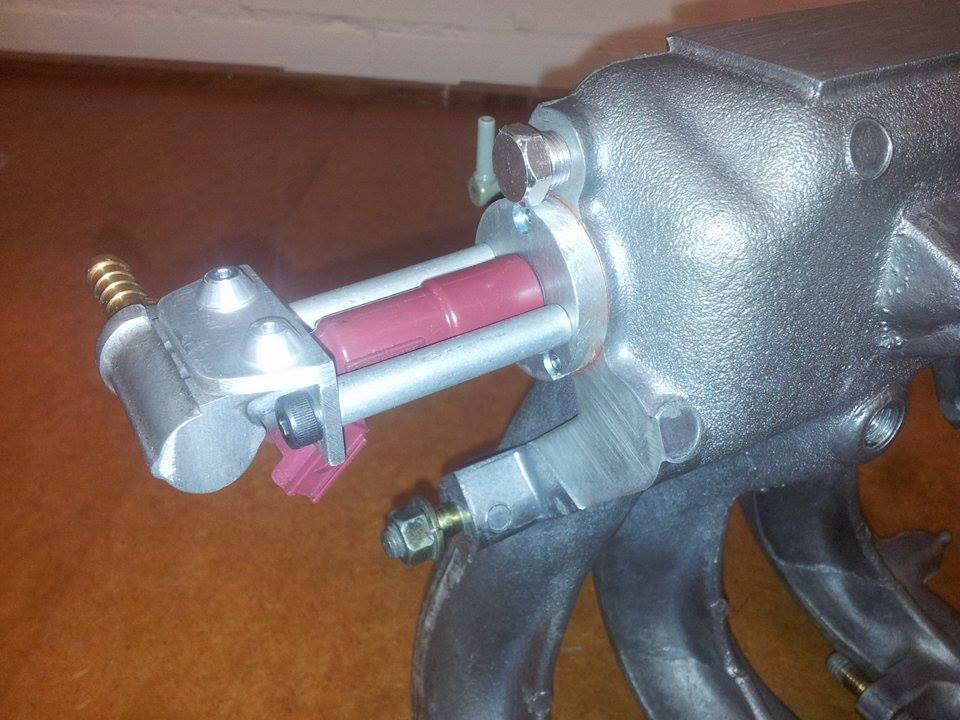
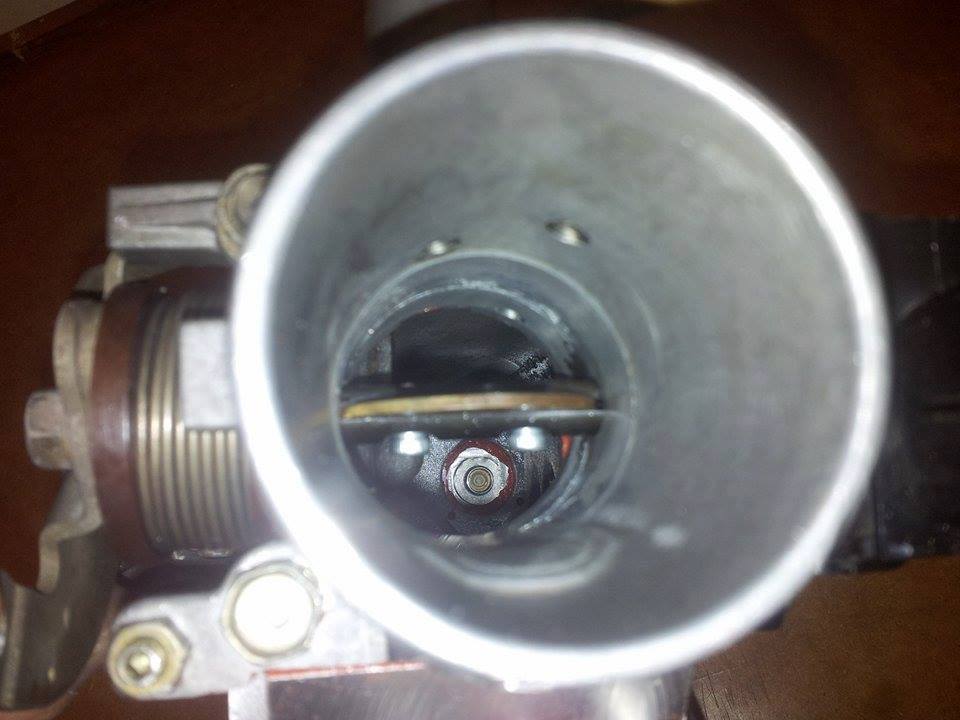
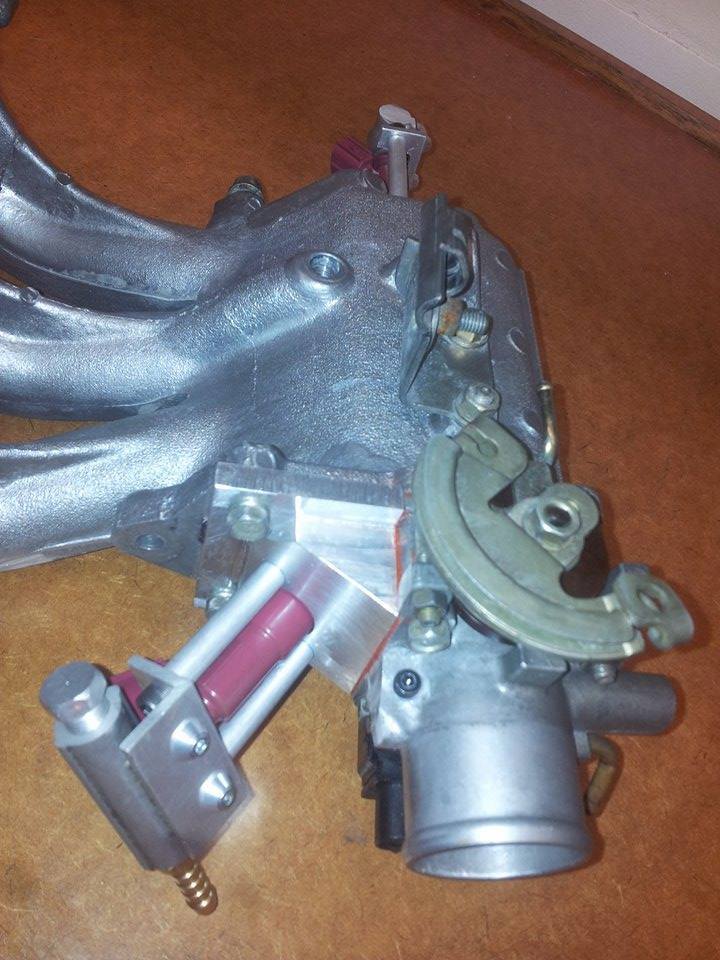
Just look at that beautiful view down the throttle body! So the idea was that this injector sprayed methanol. This would go directly into the intake stream for best atomisation(?)… basically mix well with the inflow.

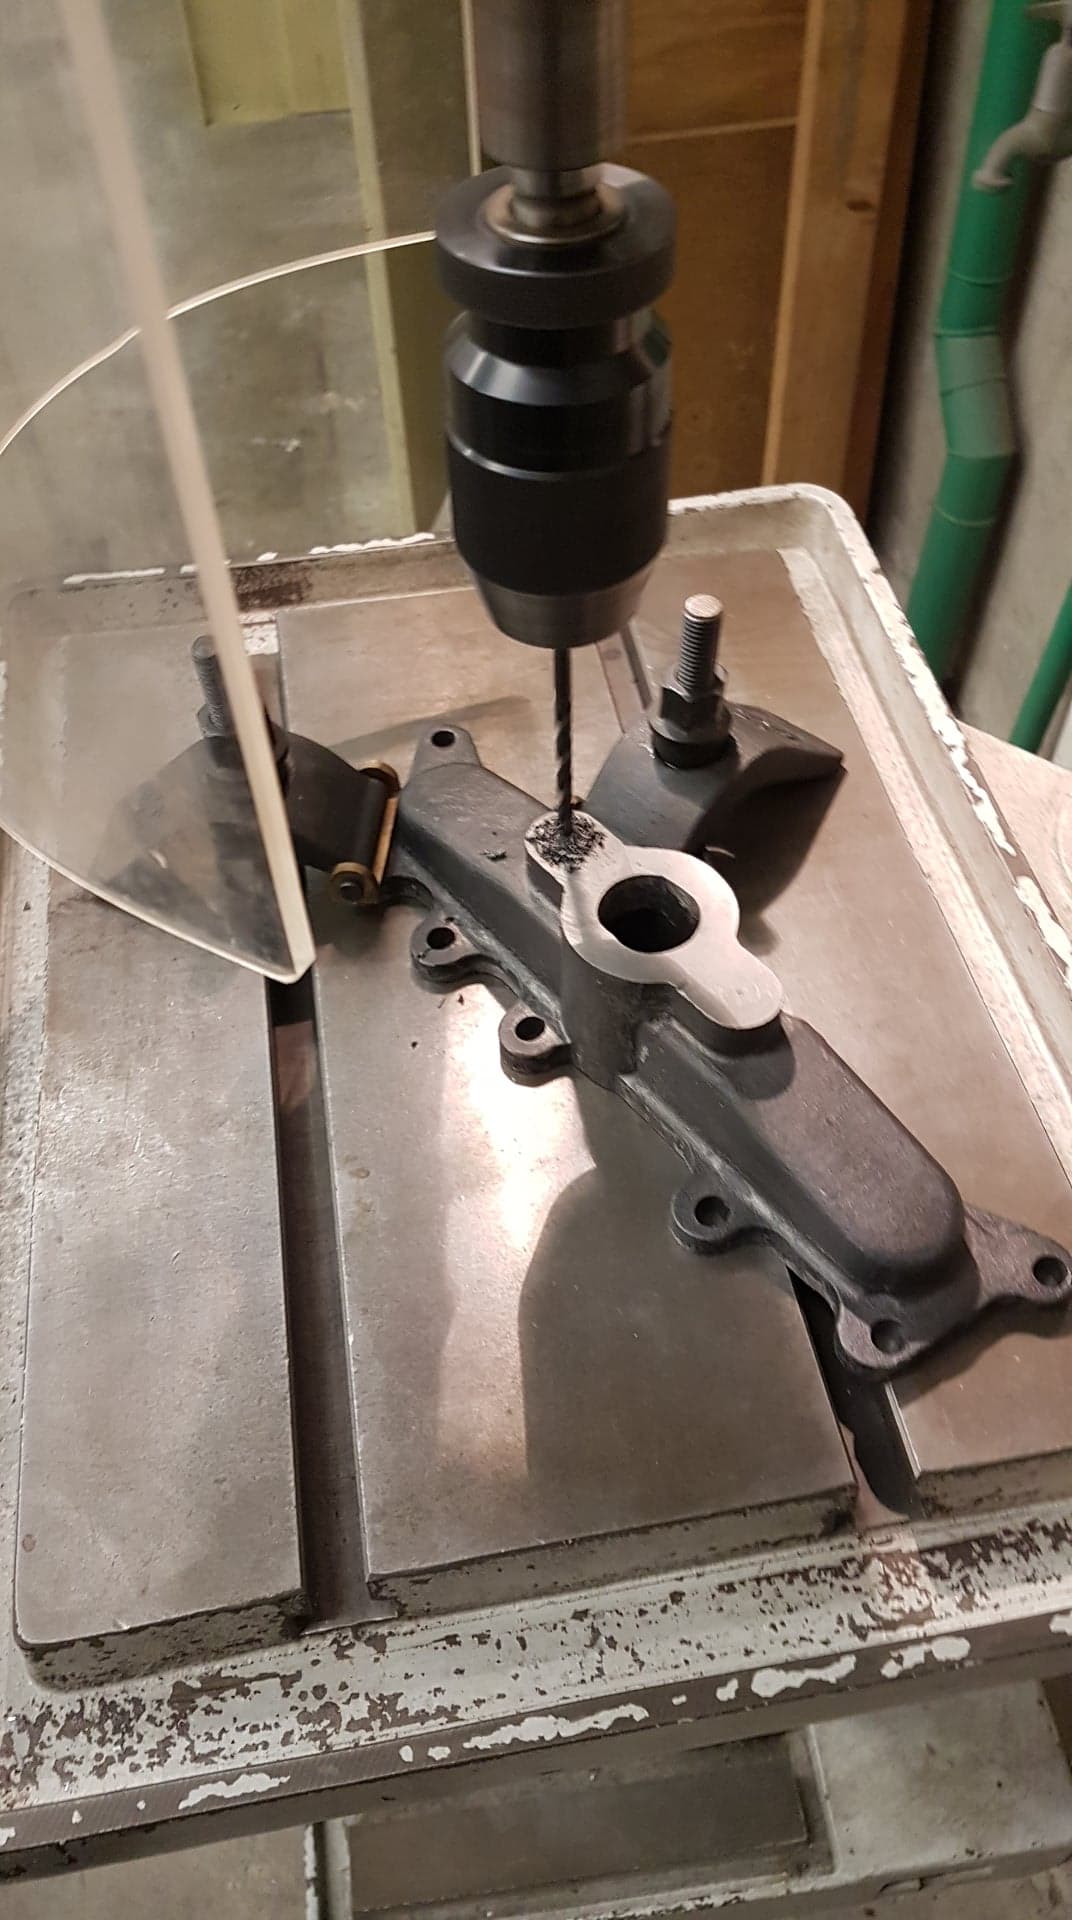
The water injection would have been undertaken by another injector under the throttle body. The original one was cut down, plugged up where the cold idle wax thermostat was with aluminum pressed in, and finally milled square.

!

Another view. Similarly you can see that another aluminium rail cut and tapped with a barb would feed it - in this case it was supposedly water… The more I describe this idea, the stupider it sounds now! haha

!

Another view

!

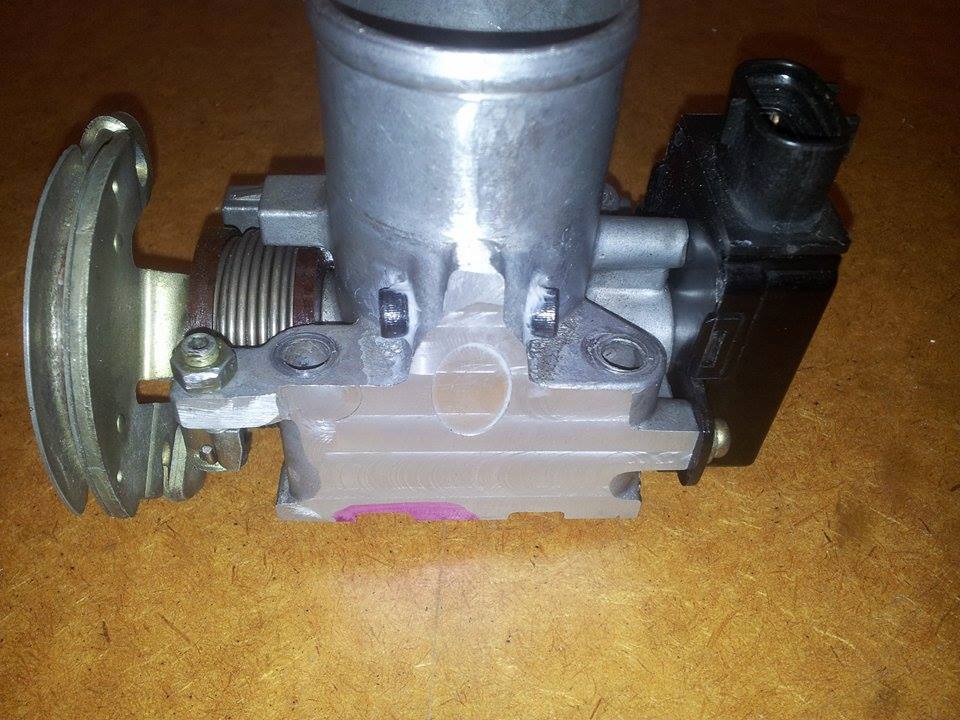
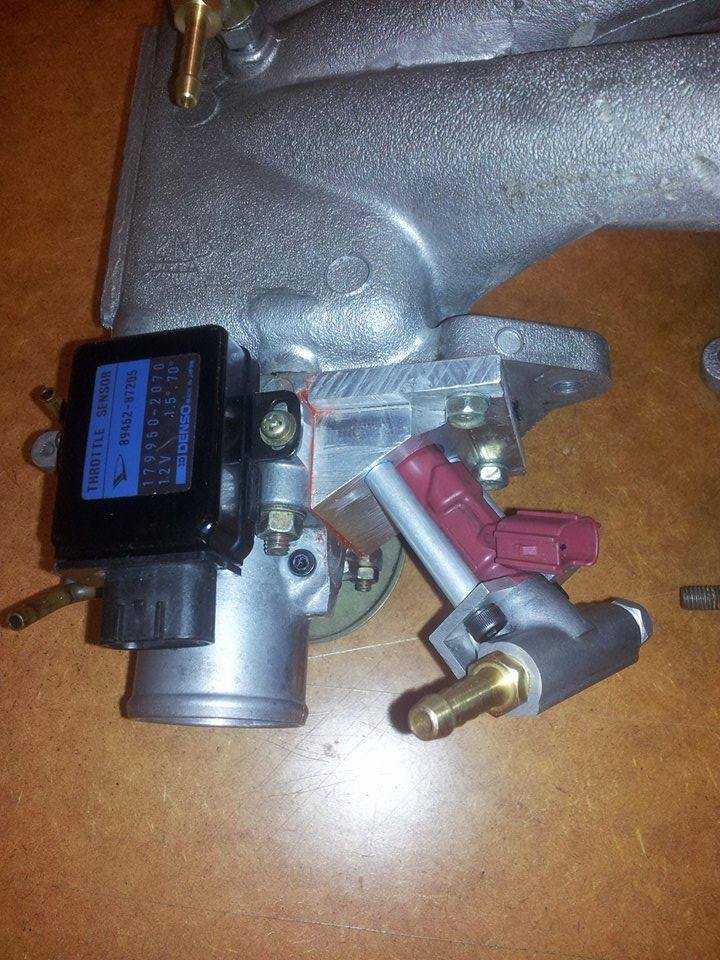
Back side view with throttle body sensor there.

!

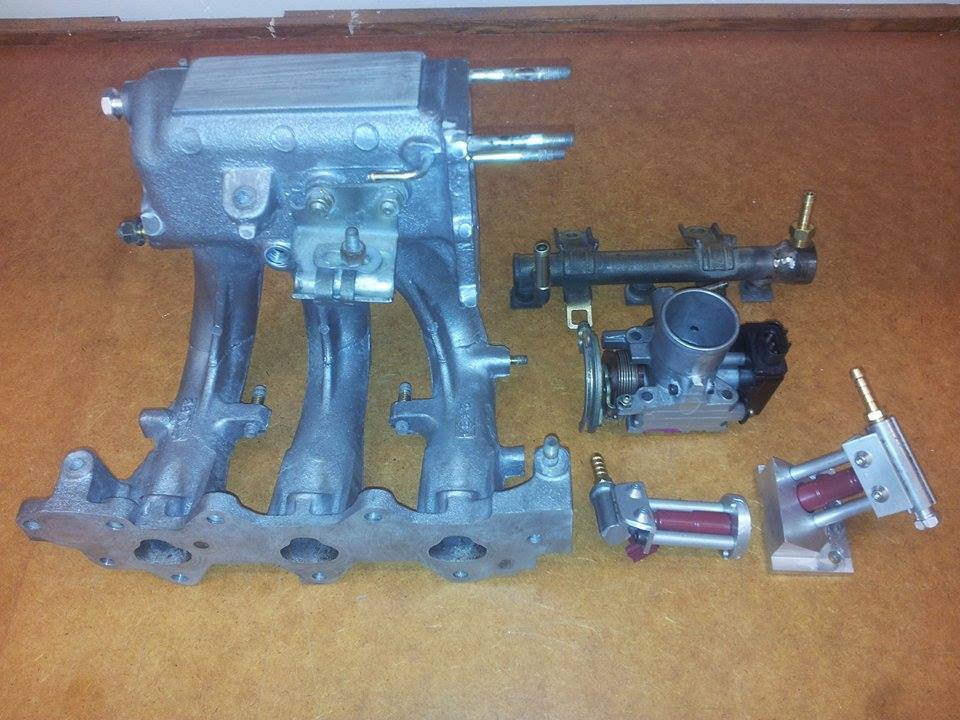
In components laid out. You can see I also modified the factory injector rail which included a welded bung at the end. This deleted the factory fuel pressure regulator and allowed a proper return system (provided we add the adjustable regulator in future).

!

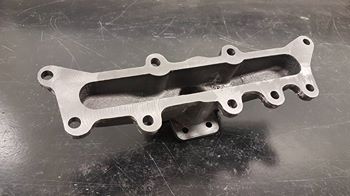
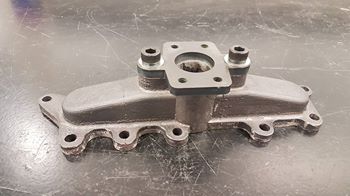
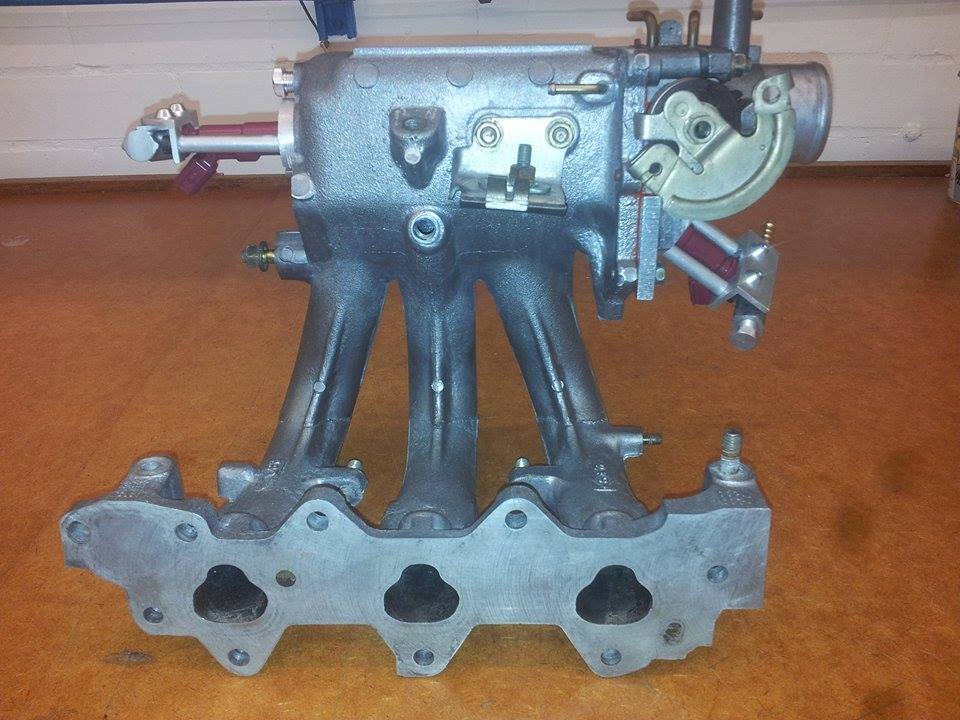
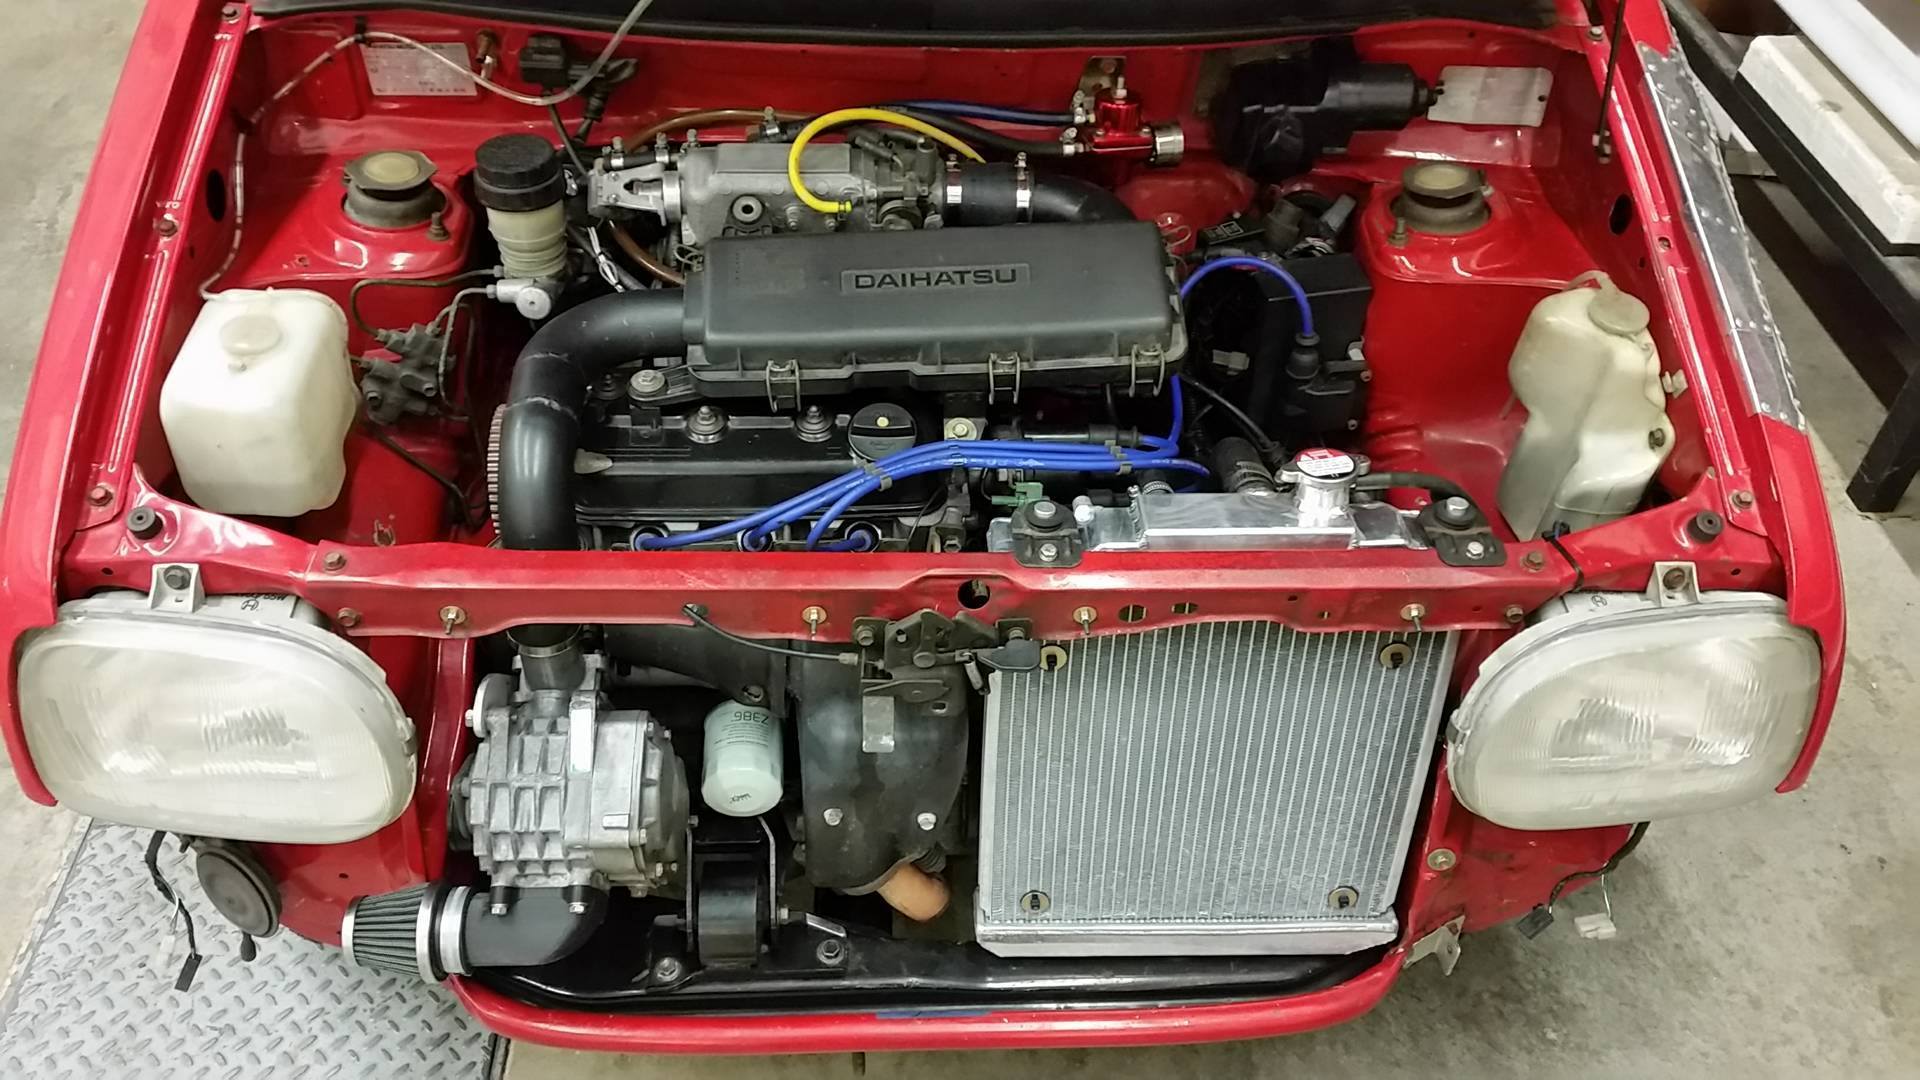
The intake! what a beast!

!

Of course, I hinted that the idea of meth and water was soon abandoned… It did however provide excellent means of staging fuel control. If your injector is too large, it’ll struggle to give a good spray pattern meaning your car(well engine) wont ‘drive’ smooth. An analogy would be like filling a drinking cup with a bucket… its not going to be smooth and very hard to control. Conversely, if you fill a drinking cup with a… say 1.25L bottle, its much easier to control while still having enough overhead to fill it quickly, if need be.

By using factory 660cc injectors on the original injector rail, it meant for a smoother idle and cruise due to their relatively small size. The throttle body injector and side intake manifold injector both used Sirion 1.0L factory injectors. Under normal operation, the 3 primary injectors are actually on batch fire. I simply staged the throttle body and side-intake injectors on sequentially as needed with a custom boost gauge and arduino.

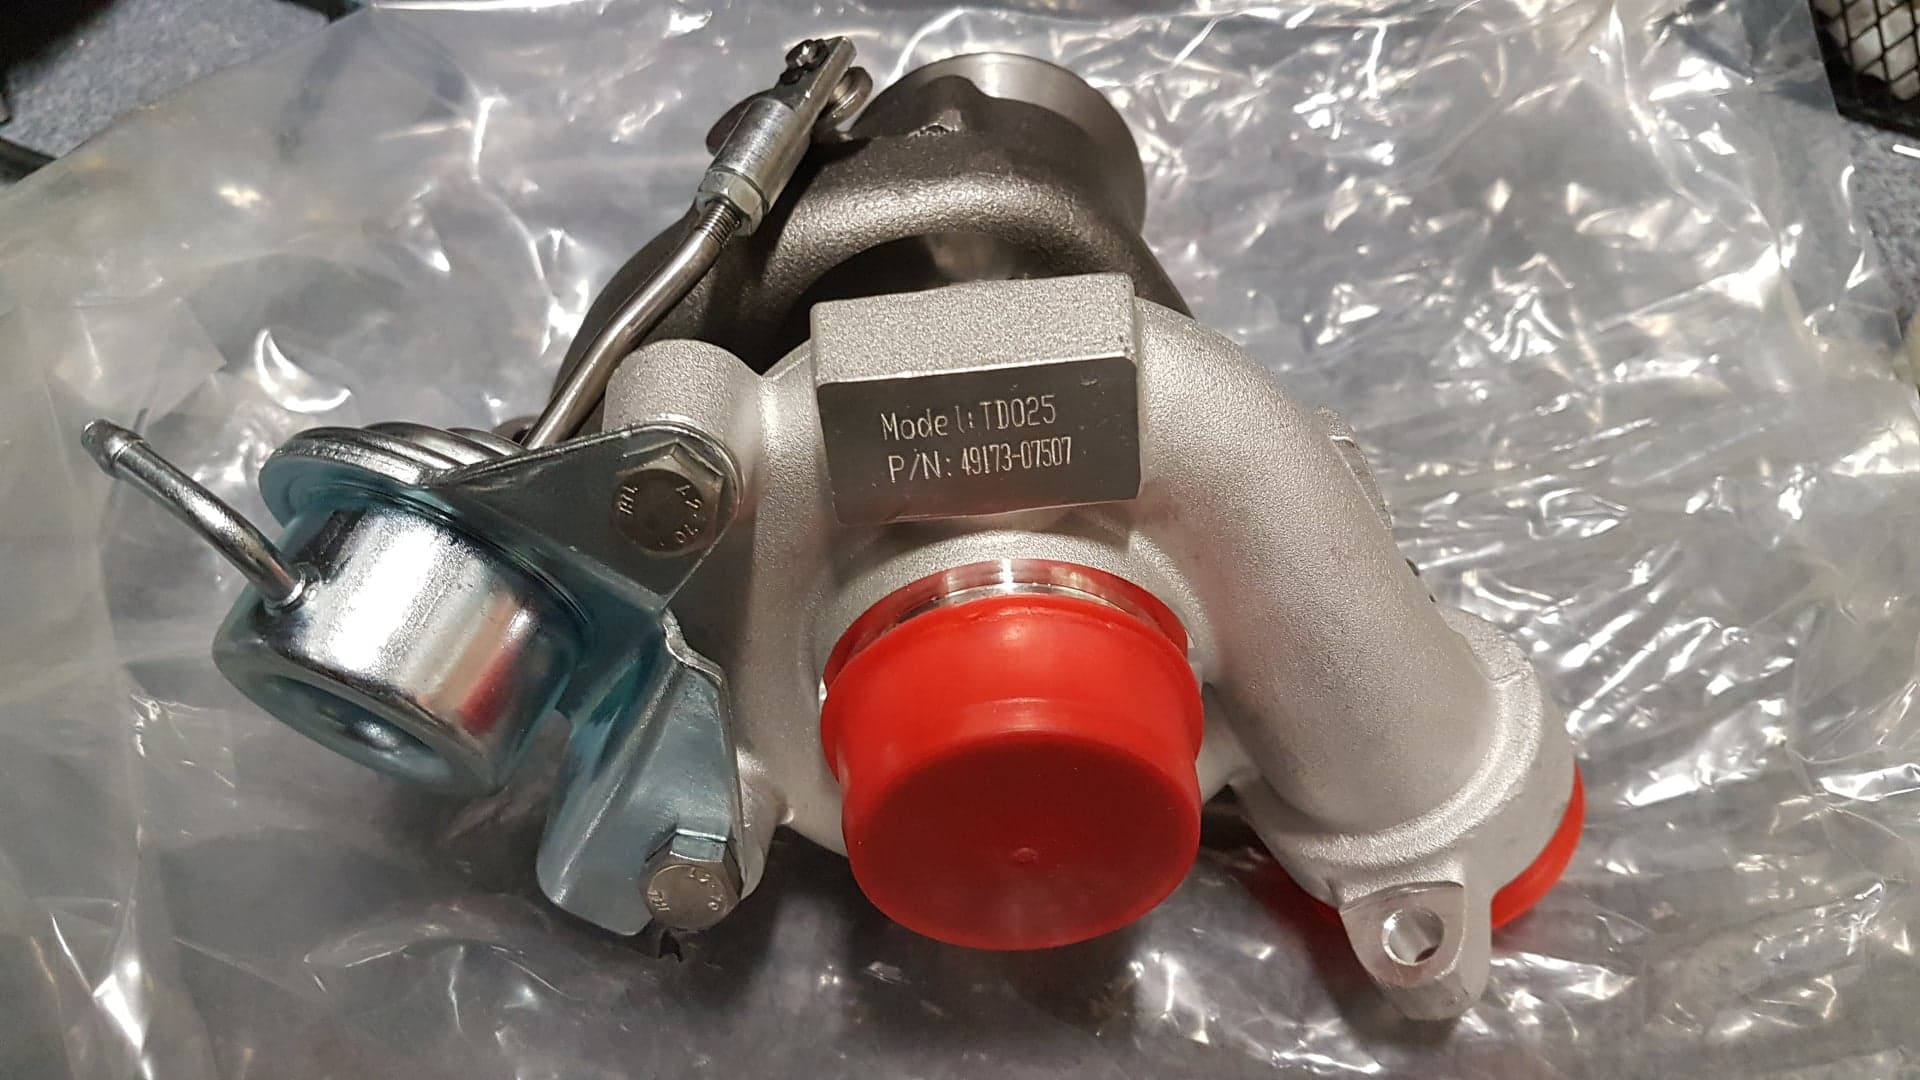
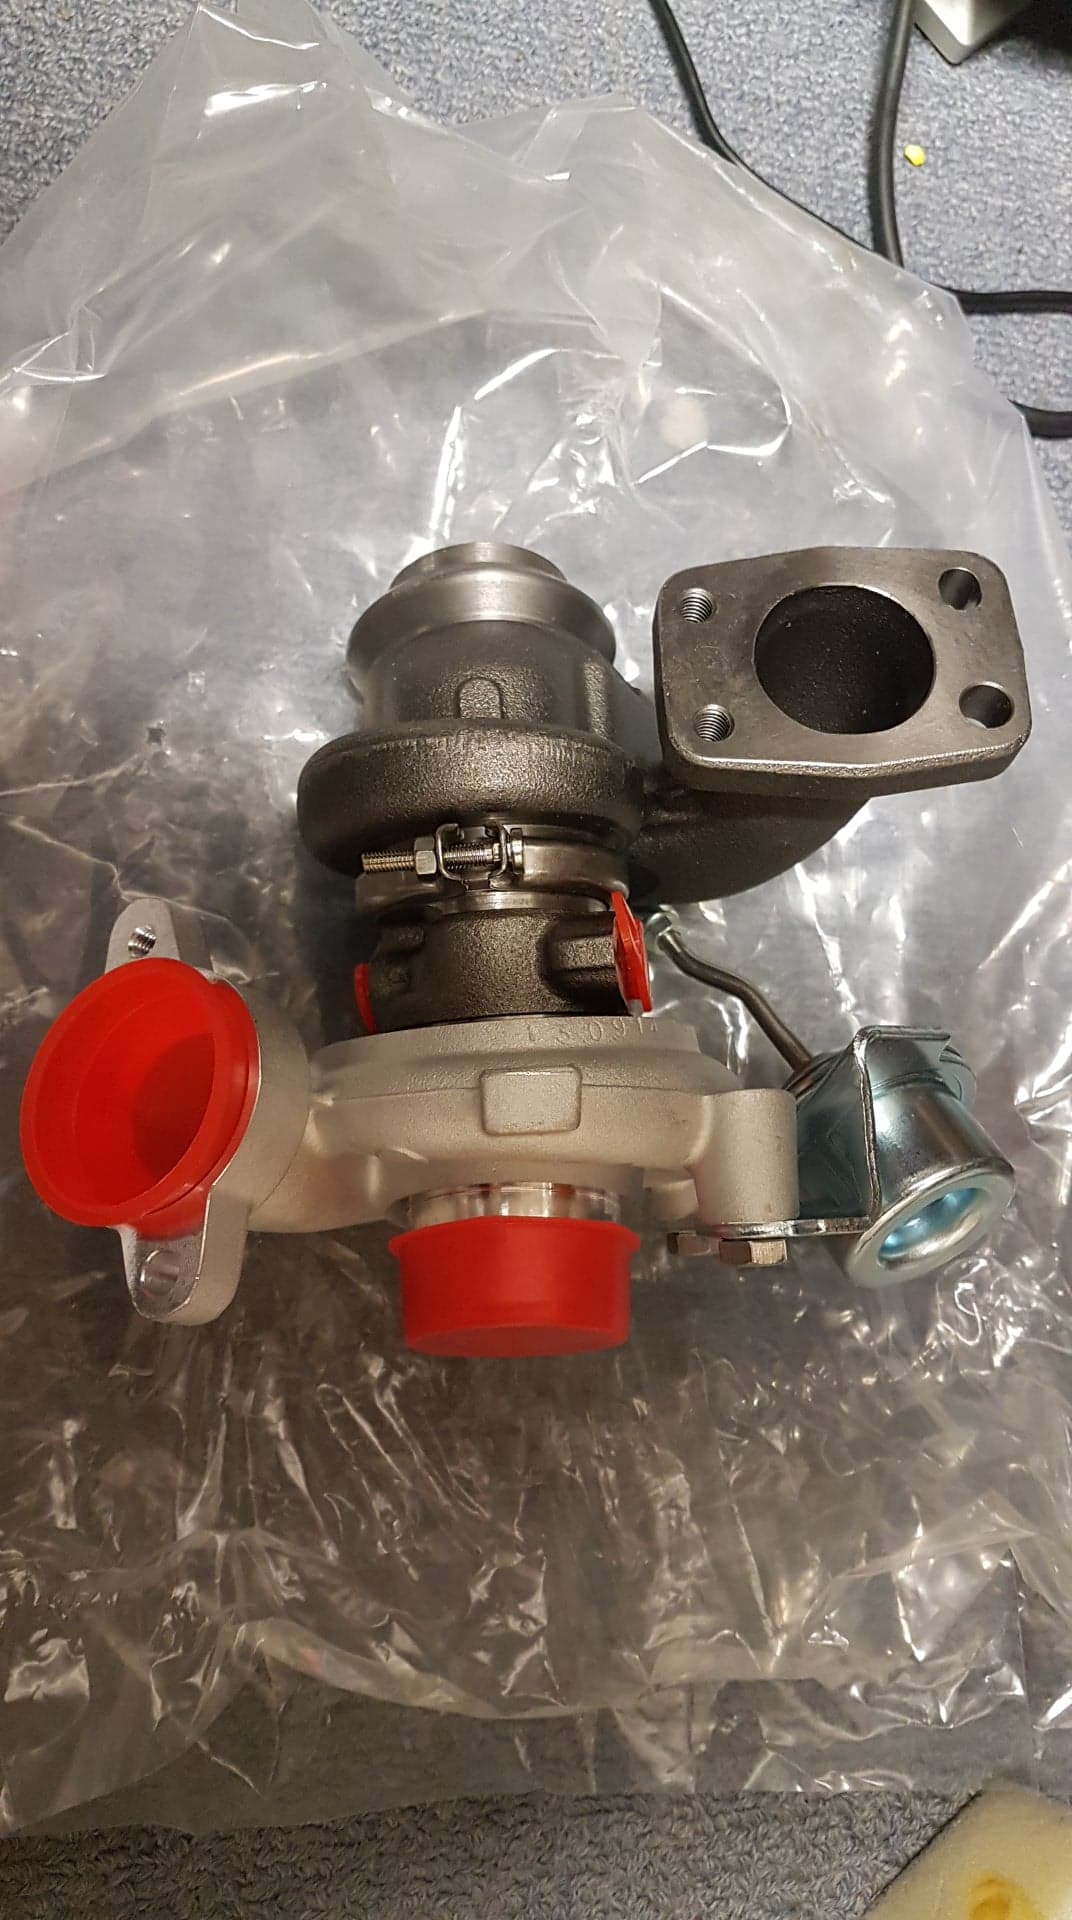
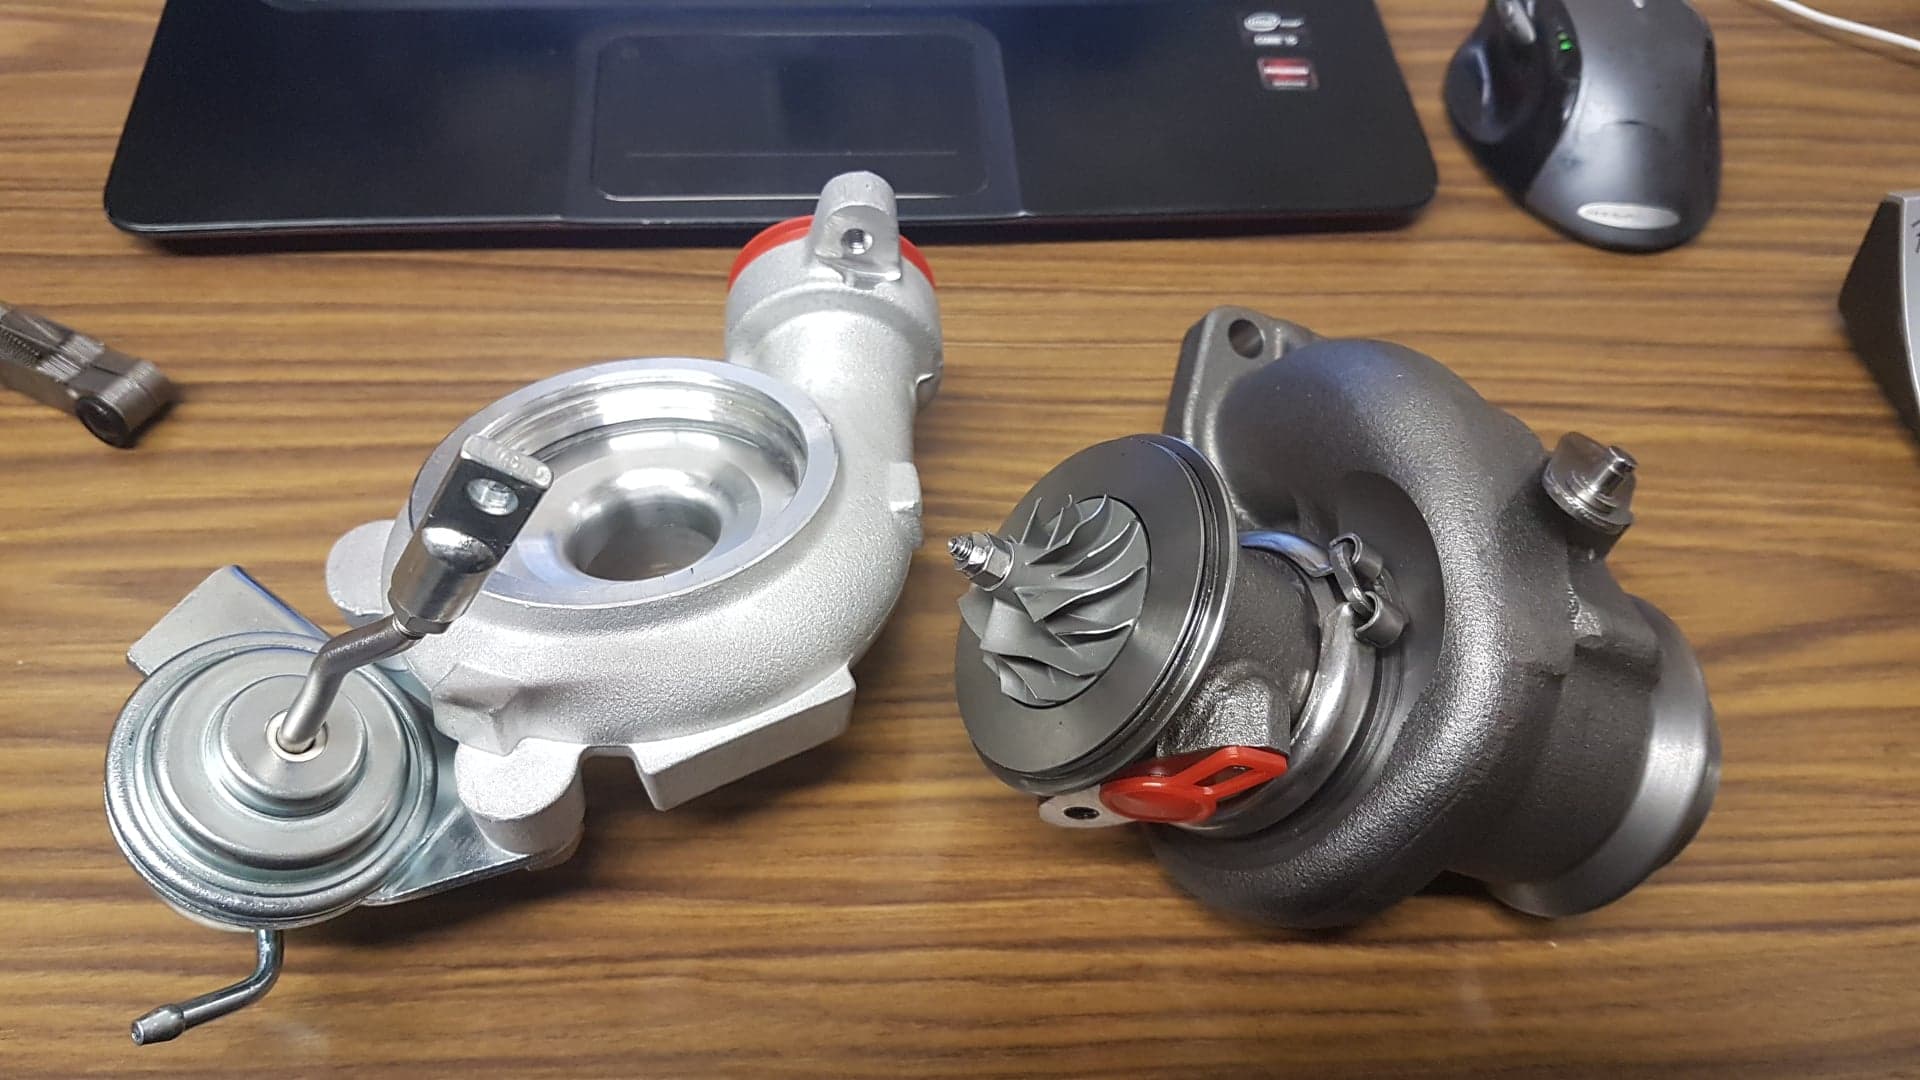
I’ll get back to the turbo first but I’ve now presented the basic fuelling side. Oh it uses factory fuel pump and an ebay adjustable fuel pressure regulator. I’ll add pics of that next time. I got to collate photos exhaust first. The fuel and breathing must be sorted to accommodate performance gains.

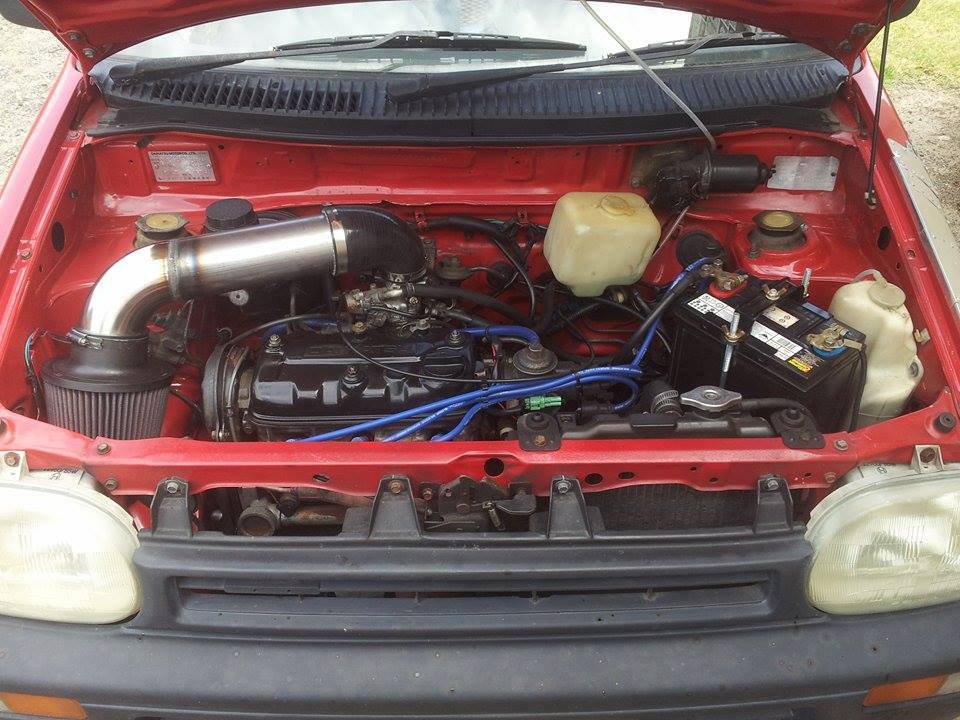
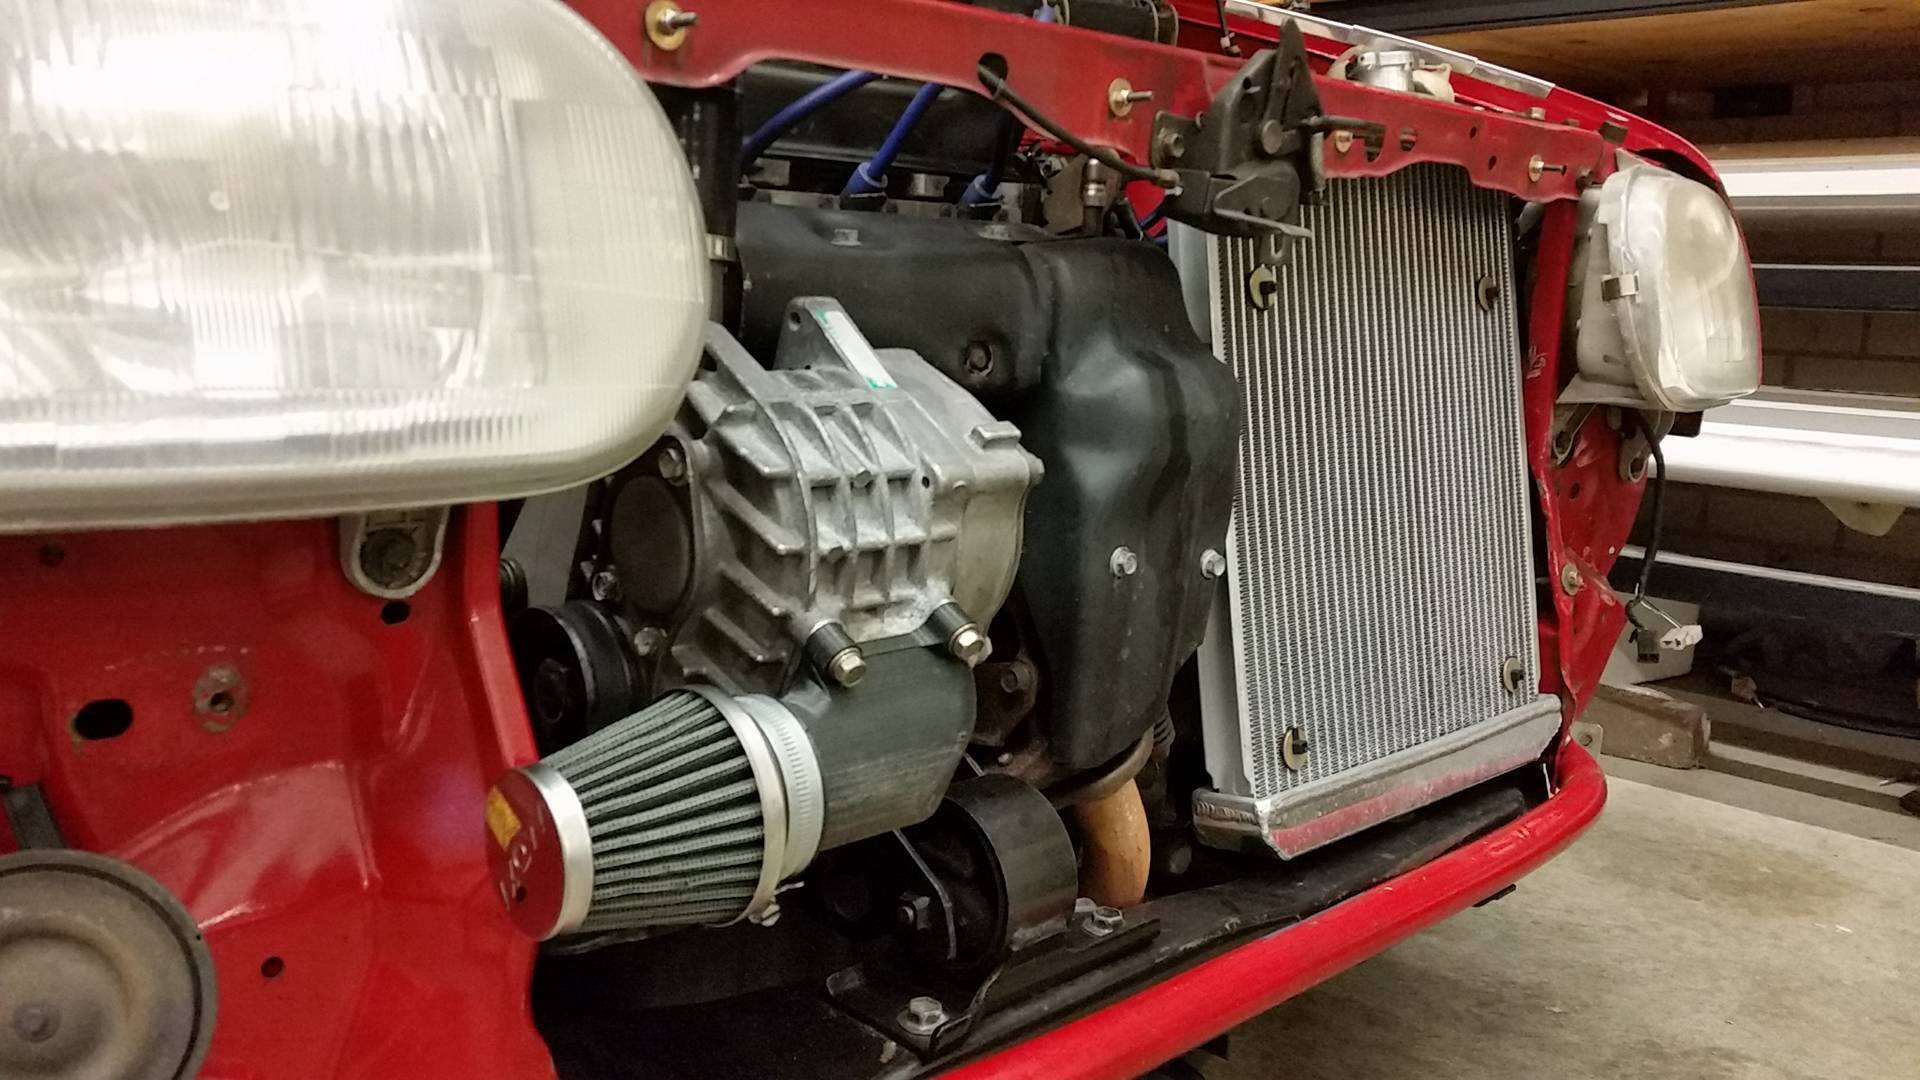
Bonus photo. When the car was originally an ED10 carby. I made a 3" intake and it sounded so good. Carby was so crispy and a pleasure to drive because it was pure mechanical rawness. Its noted that this block was the donor to the franken-mira motor as noted in opening post.

Until next catch up,
derku.

4 Likes

Thanks for the encouragement. Sifting through photos is a timely task… especially when one littered them all over facebook which has no real way to collate everything. Hopefully this will consolidate the info and be of resource… perhaps.

4 Likes

I’m learning a lot by reading it. Keep it up!

Really getting interesting now. Seeing your fabrication and that you are doing your own design and research is fantastic - something that is going to make this thread one of the showcases within the blog. You have us on the edge of our seats.